Check with docker ps if the docker container is successfully up and running. Now just add a new subdomain with ssl in your nginx-proxy-manager. Default login is wallabag:wallabag.
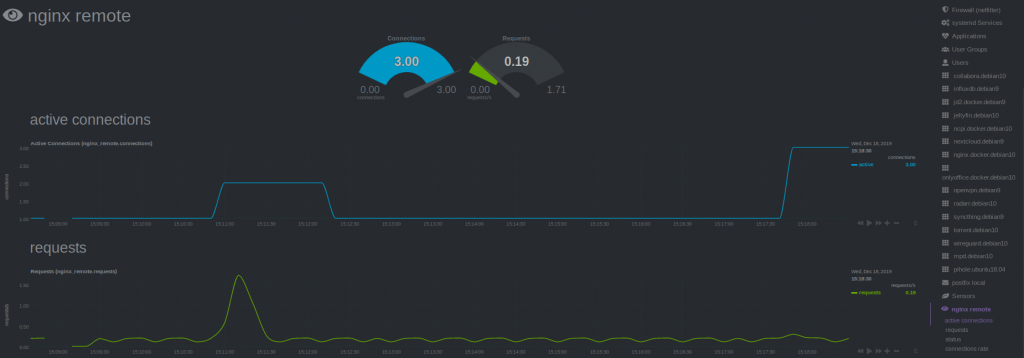
Recently I saw this tutorial about monitoring Nginx with Netdata and tried it by myself. I have running Netdata on my Proxmox Host and Nginx inside LXC. So I could skip step 1 and 2 of the tutorial. Since I’m using the super simple nginx-proxy-manager, which comes as docker deployment, it took me some minutes to figure out, how to enable the Nginx ‘stub_status‘ module (which is step 3 of the tutorial). Here’s what I did.
SSH into the LXC where the Nginx Docker is running. Look up the nginx container name (root_app_1) and open a shell in the running container.
docker ps
docker exec -it root_app_1 /bin/bash
Check if the ‘stub_module‘ is already enabled. The following command should return: with-https_stub_status_module I got it from here.
Next add a location to the nginx ‘server {}‘ block in the default config, to make it reachable via Netdata. The tutorial goes to ‘/etc/nginx/sites-available/default‘, another tutorial is editing ‘/etc/nginx/nginx.conf‘, but I found the default config in ‘/etc/nginx/conf.d/default.conf’.
nano /etc/nginx/conf.d/default.conf
If nano is not installed (bash: nano: command not found), just install it. Get more information here or here.
apt update
apt install nano -y
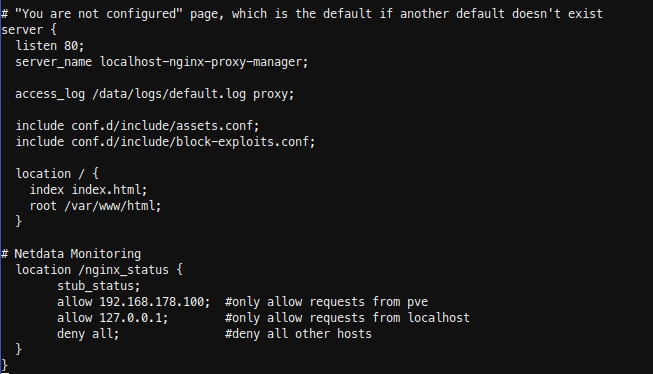
Insert the new location in the server { listen 80; …..} block. In my case I have running Netdata on my Proxmox host, so i added localhost and my Proxmox ip.
  location /nginx_status {
	stub_status;
	allow 192.168.178.100; #only allow requests from pve
	allow 127.0.0.1;	  #only allow requests from localhost
	deny all;		  #deny all other hosts
  }
Save, exit your docker container and restart it.
docker restart root_app_1
SSH into Proxmox and check with curl, if you able to reach the new nginx location.
For the last step Configure Netdata to Monitor Nginx (step 4) , just follow the Netdata Wiki. Place a new file called nginx.conf on your Netdata host.
nano /etc/netdata/python.d/nginx.conf
Because Netdata is not running local, use ‘remote‘ following the url, instead of local and localhost.
Both, Nextcloud and Collabora, are recommending the Docker installation for Collaboraoffice (here and here). But I wasn’t able to get the Collabora Docker Image running succesfully inside an Debian Buster LXC. There were appearing some errors and as far as I understand, it has something to do with running an LXC on ZFS. After spending about 3 hours I gave up and did a manual installation.
Installation
For a current installation guide, have look on their website here. Install https support for apt and add Collabora CODE repository. (CODE = Collabora Online Development Edition)
You have to edit three sections in the config: SSL handling, inserting your Nextcloud domain as WOPI client and add some credentials for webinterface. So open the config with:
nano /etc/loolwsd/loolwsd.xml
If you are using a reverse proxy (I have running a docker with nginx) which is managing all SSL certifactes, you don’t need local certifactes for your Collaboraoffice. So scroll down to the SSL settings, disable SSL and enable SSL termination.
   <ssl desc="SSL settings">
        <enable type="bool" desc="Controls whether SSL encryption is enable (do not disable for production deployment). If default is false, must first be compiled with SSL support to enable." default="true">false</enable>
        <termination desc="Connection via proxy where loolwsd acts as working via https, but actually uses https." type="bool" default="true">true</termination>
2. Next add you Nextcloud domain in the WOPI storage section.
    <storage desc="Backend storage">
        <filesystem allow="false" />
        <wopi desc="Allow/deny wopi storage. Mutually exclusive with webdav." allow="true">
            <host desc="Regex pattern of hostname to allow or deny." allow="true">localhost</host>
            <host desc="Regex pattern of hostname to allow or deny." allow="true">nextcloud\.domain\.org</host>
3. Add your credentials fot the webinterface.
  <admin_console desc="Web admin console settings.">
        <enable desc="Enable the admin console functionality" type="bool" default="true">true</enable>
        <enable_pam desc="Enable admin user authentication with PAM" type="bool" default="false">false</enable_pam>
        <username desc="The username of the admin console. Ignored if PAM is enabled.">user_name</username>
        <password desc="The password of the admin console. Deprecated on most platforms. Instead, use PAM or loolconfig to set up a secure password.">super_secret_password</password>
Now restart loolwsd and check the status.
systemctl restart loolwsd.service
systemctl status loolwsd.service
Check if the https connection is working via browser https://ipaddress:9980 or curl:
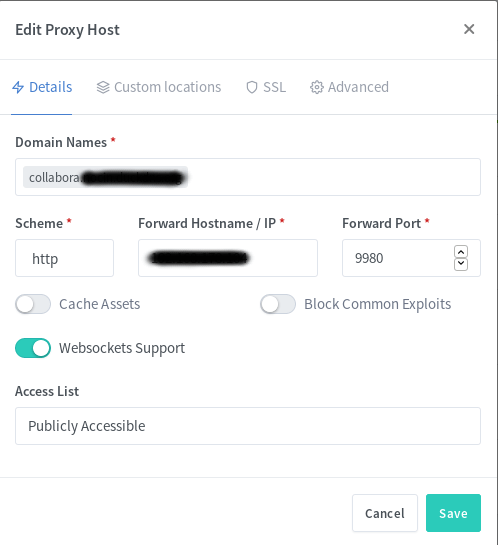
Go to your reverse proxy, in my case it’s nginx proxy manager, and add another subdomain for collabora with an SSL certificate.
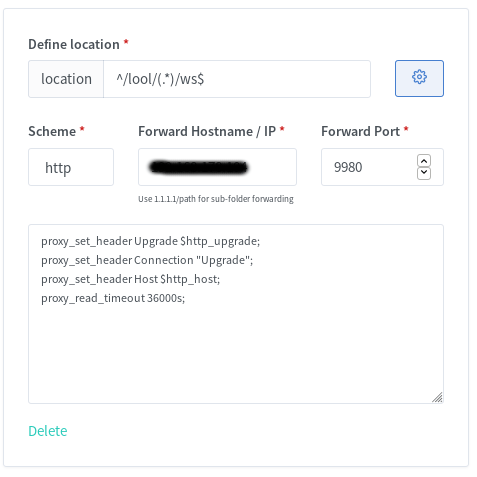
You also have to add a few custom locations. Look at the Collabora website for the some nginx configs. I used the second with “SSL terminates at the proxy”. I also added the given custom locations via the webui, e.g.:
You should now be able to reach Collabora through your new subdomain via https. https://collabora.your.domain.org/ And if you added /lool/adminws in your nginx config, you can also access the webui. https://collabora.your.domain.org/loleaflet/dist/admin/admin.html
Install & configure Collabora Online App in Nextcloud
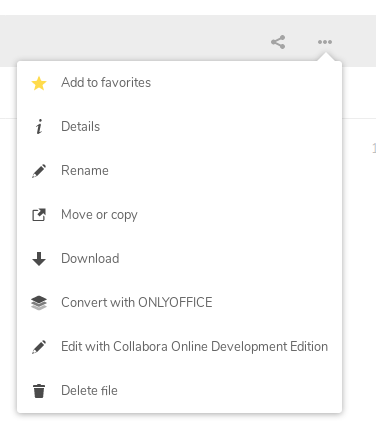
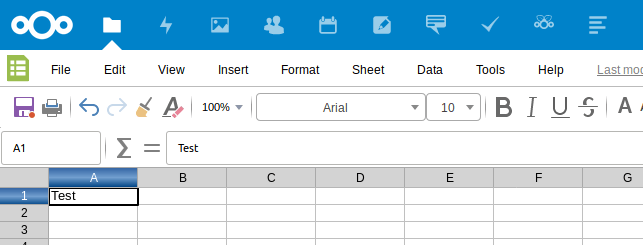
The easiest part is to install the Collabora Online App. If done, go to Settings -> Collabora Online and set your Collabora Domain https://collabora.your.domain.org/ in here. Apply and edit your first excel in Nextcloud.
If there are one or more snapshots between the current state and the snapshot you want to rollback to, you have to add -r (force deletion) to the rollback command.
Running and managing docker containers requires sudo privileges. If you don’t want to type sudo for every commmand, add your current user to the docker group.
sudo usermod -aG docker ${USER}
Docker should now be installed, the daemon started, and the process enabled to start on boot. Check that it’s running.
sudo systemctl status docker
Test if the installtions is working correctly with hello-world.
sudo docker run hello-world
Each container you will create gets a unique ID and name you can look up with “docker ps”. To remove the docker instance just use “docker rm” followed by the ID or the container name.
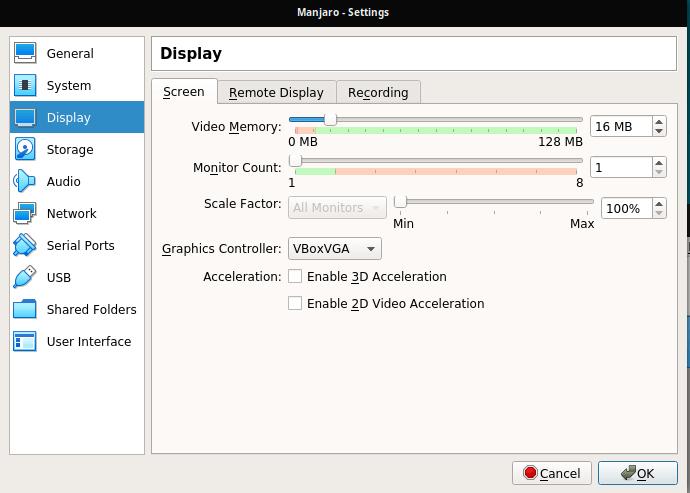
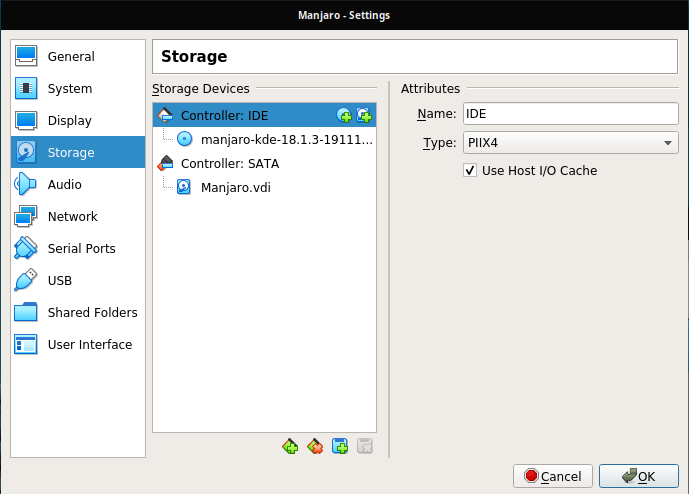
Download the Manjaro ISO here. Run VirtualBox and create a new VM with type “Linux” and version “Arch Linux (64-bit)”. If done, go to Settings -> Display and switch Graphics Controller to “VBoxVGA” to be able to change the screen resolution of your VM. For transparency effects, you can also check “Enable 3D Acceleration”. (Changing this setting didn’t work on my existing VM, only when creating a new VM. So it’s important to do this step before installing the OS.)
Now go to Storage and add your Manjaro ISO as optical drive.
Start the VM and go through the Manjaro installation process. If done, shutdown your VM, go back to settings and remove the Manjaro ISO as optical drive. Else it will boot again into the installer. Now start the VM again.
To run with the VirtualBox Guest Additions, you only have to install virtual-box-utils inside your VM:
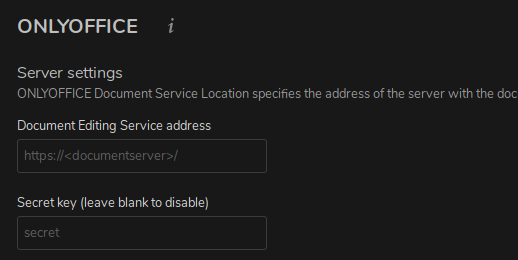
Add a Token in you local.json file. If your running ONLYOFFICE on linux you will find the file here:
/etc/onlyoffice/documentserver/local.json
Set inbox, outbox and browser to true and add you token in the secret part for inbox, outbox and session. I just generated a random string via Bitwarden.