
Tag: LXC
[Proxmox] Upgrade 7.4 to 8.0 – Failed to run lxc.hook.pre-start for container
After updating my Proxmox Server to PVE8.0, suddenly two lxc containers did not start anymore.
root@pve:~# pct start 192
run_buffer: 322 Script exited with status 2
lxc_init: 844 Failed to run lxc.hook.pre-start for container "192"
__lxc_start: 2027 Failed to initialize container "192"
startup for container '192' failed
I tried to view the error.log but couldn’t find any helpful information.
lxc-start -lDEBUG -o error.log -F -n 192
When googling, I stumbled across this reddit post. Although the issue was a bit different, I tried the recommended steps. The first command directly led me to the right direction…
root@pve:~# pct mount 192
mounting container failed
directory '/mnt/nfs/data/folder' does not exist
For whatever reason, after restarting proxmox it did not mount the nfs shares properly on the host. And of course, after this hint, I noticed that both containers were trying to mount some of these folders, which were actually nfs shares from my NAS. A simple mount -a on the host fixed it immediately. Besides of this little problem, everything went well with the proxmox upgrade!
[Proxmox] Installing Home Assistant
You can install Home Assistant (HA) as LXC or VM on Proxmox. Or even put HA as docker container on top of a LXC or VM, but passing through hardware (like ConBee II) will become much more complicated. There a many installation guides i.e.
https://community.home-assistant.io/t/installing-home-assistant-using-proxmox/201835
https://www.x33u.org/docs/server/home-assistant_proxmox-vm/
https://www.juanmtech.com/install-proxmox-and-virtualize-home-assistant/
and there are few scripts which automate the installing process. Unfortunately some of them doesn’t work anymore for PVE 7 i.e.
https://github.com/whiskerz007/proxmox_hassio_lxc
https://github.com/whiskerz007/proxmox_hassos_install/
The only script that is working (while writing this) is this one https://github.com/tteck/proxmox_haos_vm which may be is a fork of whiskerz007’s previous script.
[Proxmox] Unprivileged Container: Using local directory bind mount points
https://pve.proxmox.com/wiki/Unprivileged_LXC_containers
https://www.reddit.com/r/Proxmox/comments/jz5ugx/lxc_user_mapping_help/
I had to map my lxc user nocin (uid=1000(nocin) gid=1000(nocin)) to user nocin (uid=1000(nocin) gid=1000(nocin)) on the host. So they have the same uid and gid on the host and inside the container and I had to map 1000 to 1000.
$ nano /etc/pve/lxc/114.conf

# had to append these lines
lxc.idmap: u 0 100000 1000
lxc.idmap: g 0 100000 1000
lxc.idmap: u 1000 1000 1
lxc.idmap: g 1000 1000 1
lxc.idmap: u 1001 101001 64535
lxc.idmap: g 1001 101001 64535
Also append the following line to /etc/subuid and /etc/subgid.
root:1000:1
Now all mount points are fully accessible and not owned by “Nobody/NoGroup” anymore.
If you are not able to access your home directory inside your container after the user mapping, you can change the permissions for it directly from the host. Find your lxc directory on your host and update the permissions to your current uid and gid.
$ cd /rpool/data/subvol-114-disk-0/home/
$ chown 1000:1000 -R nocin/
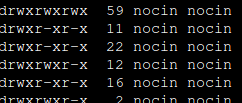
$ ls -l
drwxr-x---+ 5 nocin nocin 9 Mai 16 11:22 nocin
[Wireguard] Set up Wireguard using PiVPN inside LXC
Recently I had to setup a new Proxmox host and also had to setup a VPN to access the network of the host. This time I gave PiVPN a try, since it recently added support for Wireguard.
So first I installed Wireguard on the host like here (without adding the TUN device to the containers config), set up a new unprivileged container running debian buster, set up port forwarding in the router, installed curl followed by the one liner for PiVPN.
apt install curl
curl -L https://install.pivpn.io | bash
And that was almost it. Now just add a device and use the QR-Code the use it on Android.
pivpn -a
pivpn -qr
PiVPN delivers what it promises! That was super easy to setup.
[Docker] Wallabag installation
https://www.wallabag.org
https://github.com/wallabag/docker
Just replace https://your_domain with your domain.
docker run -d --name wallabag --restart=always -v /opt/wallabag/data:/var/www/wallabag/data -v /opt/wallabag/images:/var/www/wallabag/web/assets/images -p 80:80 -e SYMFONY__ENV__DOMAIN_NAME=https://your_domain -e SYMFONY__ENV__FOSUSER_REGISTRATION=false wallabag/wallabag
Check with docker ps if the docker container is successfully up and running. Now just add a new subdomain with ssl in your nginx-proxy-manager.
Default login is wallabag:wallabag.
Their corresponding android app is also available on F-droid: https://f-droid.org/en/packages/fr.gaulupeau.apps.InThePoche/
[NGINX] Monitoring Nginx using Netdata
Recently I saw this tutorial about monitoring Nginx with Netdata and tried it by myself. I have running Netdata on my Proxmox Host and Nginx inside LXC. So I could skip step 1 and 2 of the tutorial. Since I’m using the super simple nginx-proxy-manager, which comes as docker deployment, it took me some minutes to figure out, how to enable the Nginx ‘stub_status‘ module (which is step 3 of the tutorial). Here’s what I did.
SSH into the LXC where the Nginx Docker is running. Look up the nginx container name (root_app_1) and open a shell in the running container.
docker ps
docker exec -it root_app_1 /bin/bash
Check if the ‘stub_module‘ is already enabled. The following command should return: with-https_stub_status_module
I got it from here.
nginx -V 2>&1 | grep -o with-https_stub_status_module
Next add a location to the nginx ‘server {}‘ block in the default config, to make it reachable via Netdata. The tutorial goes to ‘/etc/nginx/sites-available/default‘, another tutorial is editing ‘/etc/nginx/nginx.conf‘, but I found the default config in ‘/etc/nginx/conf.d/default.conf’.
nano /etc/nginx/conf.d/default.conf
If nano is not installed (bash: nano: command not found), just install it. Get more information here or here.
apt update
apt install nano -y
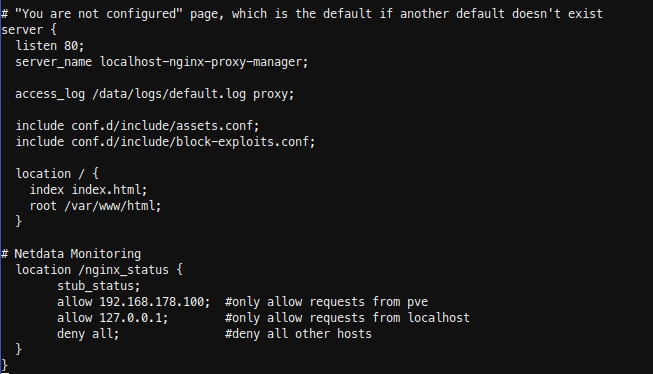
Insert the new location in the server { listen 80; …..} block. In my case I have running Netdata on my Proxmox host, so i added localhost and my Proxmox ip.
  location /nginx_status {
	stub_status;
	allow 192.168.178.100; #only allow requests from pve
	allow 127.0.0.1;	  #only allow requests from localhost
	deny all;		  #deny all other hosts
  }
Save, exit your docker container and restart it.
docker restart root_app_1
SSH into Proxmox and check with curl, if you able to reach the new nginx location.

For the last step Configure Netdata to Monitor Nginx (step 4) , just follow the Netdata Wiki. Place a new file called nginx.conf on your Netdata host.
nano /etc/netdata/python.d/nginx.conf
Because Netdata is not running local, use ‘remote‘ following the url, instead of local and localhost.
update_every : 10
priority     : 90100

remote:
  url     : 'https://192.168.178.197/nginx_status'
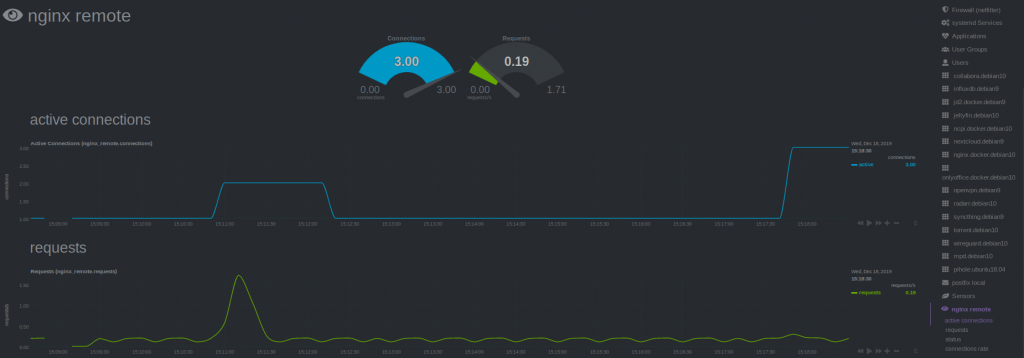
Restart Netdata and your are done.
sudo systemctl restart netdata
[Nextcloud] Installing Collaboraoffice in LXC
Both, Nextcloud and Collabora, are recommending the Docker installation for Collaboraoffice (here and here). But I wasn’t able to get the Collabora Docker Image running succesfully inside an Debian Buster LXC. There were appearing some errors and as far as I understand, it has something to do with running an LXC on ZFS. After spending about 3 hours I gave up and did a manual installation.
Installation
For a current installation guide, have look on their website here.
Install https support for apt and add Collabora CODE repository. (CODE = Collabora Online Development Edition)
sudo apt install apt-transport-https ca-certificates
sudo apt-key adv --keyserver keyserver.ubuntu.com --recv-keys 0C54D189F4BA284D
Add the Collabora CODE repository to the apt sources list.
nano /etc/apt/sources.list.d/collabora.list
Add the following line for Debian Buster:
deb https://www.collaboraoffice.com/repos/CollaboraOnline/CODE-debian10 ./
Now update the repository and install Collabora. (lool = LibreOffice OnLine)
sudo apt update
sudo apt install loolwsd code-brand
Configuration
You have to edit three sections in the config: SSL handling, inserting your Nextcloud domain as WOPI client and add some credentials for webinterface. So open the config with:
nano /etc/loolwsd/loolwsd.xml
- If you are using a reverse proxy (I have running a docker with nginx) which is managing all SSL certifactes, you don’t need local certifactes for your Collaboraoffice. So scroll down to the SSL settings, disable SSL and enable SSL termination.
   <ssl desc="SSL settings">
        <enable type="bool" desc="Controls whether SSL encryption is enable (do not disable for production deployment). If default is false, must first be compiled with SSL support to enable." default="true">false</enable>
        <termination desc="Connection via proxy where loolwsd acts as working via https, but actually uses https." type="bool" default="true">true</termination>
- 2. Next add you Nextcloud domain in the WOPI storage section.
    <storage desc="Backend storage">
        <filesystem allow="false" />
        <wopi desc="Allow/deny wopi storage. Mutually exclusive with webdav." allow="true">
            <host desc="Regex pattern of hostname to allow or deny." allow="true">localhost</host>
            <host desc="Regex pattern of hostname to allow or deny." allow="true">nextcloud\.domain\.org</host>
- 3. Add your credentials fot the webinterface.
  <admin_console desc="Web admin console settings.">
        <enable desc="Enable the admin console functionality" type="bool" default="true">true</enable>
        <enable_pam desc="Enable admin user authentication with PAM" type="bool" default="false">false</enable_pam>
        <username desc="The username of the admin console. Ignored if PAM is enabled.">user_name</username>
        <password desc="The password of the admin console. Deprecated on most platforms. Instead, use PAM or loolconfig to set up a secure password.">super_secret_password</password>
Now restart loolwsd and check the status.
systemctl restart loolwsd.service
systemctl status loolwsd.service
Check if the https connection is working via browser https://ipaddress:9980 or curl:
curl -vkI https://localhost:9980
You can reach the webinterface with:
https://ipaddress:9980/loleaflet/dist/admin/admin.html
Reverse Proxy
Go to your reverse proxy, in my case it’s nginx proxy manager, and add another subdomain for collabora with an SSL certificate.
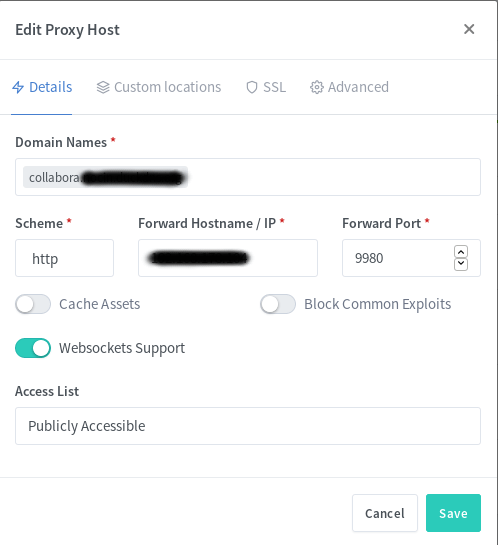
You also have to add a few custom locations. Look at the Collabora website for the some nginx configs. I used the second with “SSL terminates at the proxy”. I also added the given custom locations via the webui, e.g.:
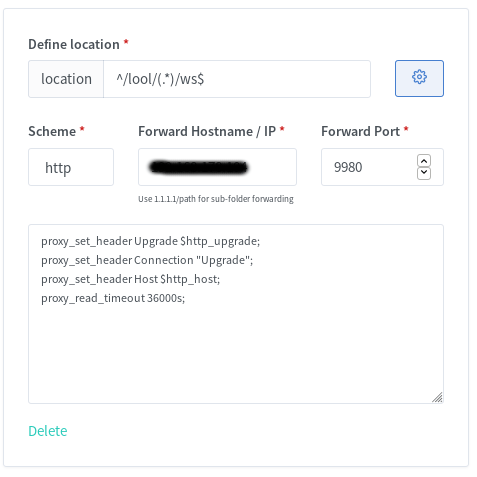
You should now be able to reach Collabora through your new subdomain via https.
https://collabora.your.domain.org/
And if you added /lool/adminws in your nginx config, you can also access the webui.
https://collabora.your.domain.org/loleaflet/dist/admin/admin.html
Install & configure Collabora Online App in Nextcloud
The easiest part is to install the Collabora Online App.
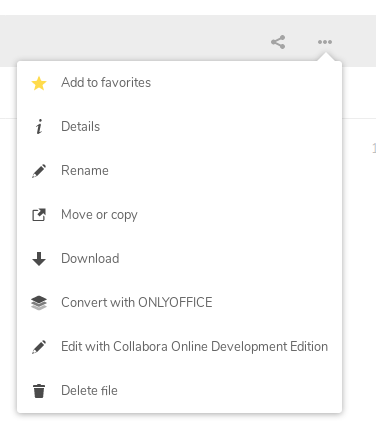
If done, go to Settings -> Collabora Online and set your Collabora Domain https://collabora.your.domain.org/ in here. Apply and edit your first excel in Nextcloud.
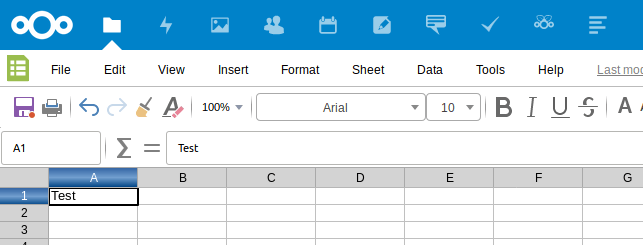
Done! 🙂
[ZFS] Rollback LXC
Look for a specific snapshot of your LXC.
sudo zfs list -rt snapshot | grep data/lxc/subvol-101
I just want to rollback 2 hours, so I choose the snapshot with timestamp 2019-12-05-1117.
...
data/lxc/subvol-110-disk-0@zfs-auto-snap_hourly-2019-12-05-0917   11,7M      -     24,2G  -
data/lxc/subvol-110-disk-0@zfs-auto-snap_hourly-2019-12-05-1017   11,9M      -     24,2G  -
data/lxc/subvol-110-disk-0@zfs-auto-snap_hourly-2019-12-05-1117   11,7M      -     24,2G  -
data/lxc/subvol-110-disk-0@zfs-auto-snap_hourly-2019-12-05-1217   11,8M      -     24,2G  -
data/lxc/subvol-110-disk-0@zfs-auto-snap_hourly-2019-12-05-1317   12,1M      -     24,2G  -
If there are one or more snapshots between the current state and the snapshot you want to rollback to, you have to add -r (force deletion) to the rollback command.
sudo zfs rollback -r data/lxc/subvol-110-disk-0@zfs-auto-snap_hourly-2019-12-05-1117