
Really handy site, to check the end of life date for different operating systems, frameworks and applications.
Tag: Homelab
[Homelab] Notes on “How To Run A Server At Home Without An IPv4 Address”
Since my domain provider does not support DynDNS, I can only create subdomains for my VPS with a static IP address, but not for any of my services hosted at home. Fortunately, there is a really cool workaround I’ve been using for some years, which I got from here: https://blog.wirelessmoves.com/2019/06/how-to-run-a-server-at-home-without-an-ipv4-address.html
Now with the migration to a new server running Ubuntu 24.04, I had to redo the steps and noticed three minor differences.
# The .ssh folder and authorized_keys file did not exist per default
mkdir .ssh
sudo nano .ssh/authorized_keys

# The systemd command to restart the ssh service
sudo systemctl restart ssh.service

# Insted of netstat I had to use 'ss' to monitor the tcp ports
watch -n 0.5 "ss -tulpn"
Since I’m really not a Linux or command line expert and would surely forget about it otherwise, I’m writing it down for my next server migration 🙂
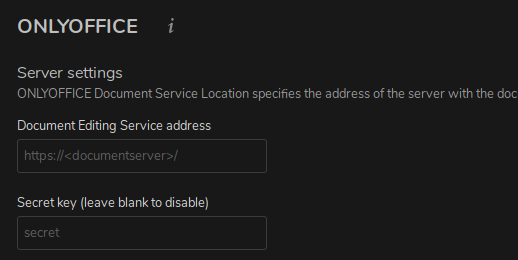
[Nextcloud] Restrict access to your ONLYOFFICE Document Service to the users of your Nextcloud instance
Enable JWT token
Add a Token in you local.json file. If your running ONLYOFFICE on linux you will find the file here:
/etc/onlyoffice/documentserver/local.json
Set inbox, outbox and browser to true and add you token in the secret part for inbox, outbox and session. I just generated a random string via Bitwarden.
   "token": {
        "enable": {
          "request": {
            "inbox": true,
            "outbox": true
          },
          "browser": true
        },
        "inbox": {
          "header": "Authorization"
        },
        "outbox": {
          "header": "Authorization"
        }
      },
      "secret": {
        "inbox": {
          "string": "token_string"
        },
        "outbox": {
          "string": "token_string"
        },
        "session": {
          "string": "token_string"
        }
Save the file and run:
supervisorctl restart all
Go to your Nextcloud web interface, open your ONLYOFFICE App and add your token beneath your server url.
Configure IP Filter
Search in the following file for “ipfilter”:
/etc/onlyoffice/documentserver/default.json
Add you domain or IP to the IP rules. Disallow everything else. Use * as wildcard. Also set useforrequest to true.
"ipfilter": {
              "rules": [{"address": "url_or_ip", "allowed": true},
                        {"address": "*",         "allowed": false}],
              "useforrequest": true,
              "errorcode": 403
            },
Now run again:
supervisorctl restart all
And test if the service is reachable.
[NGINX] Reverse Proxy
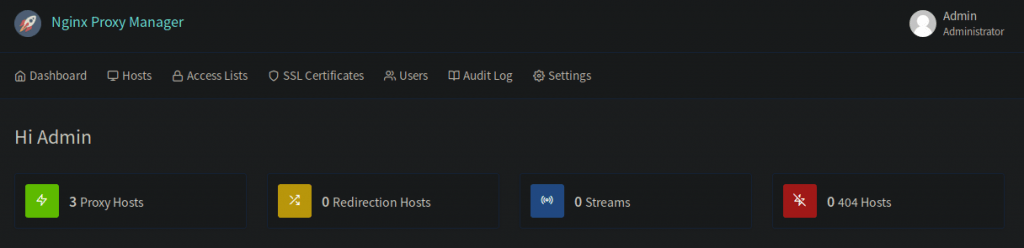
As I installed OnlyOffice to edit Word and Excel files directly from my Nextcloud, I had to setup a reverse proxy because OnlyOffice needs to run on a separate Server/Container and has to be reachable via https. First I tried to setup Nginx manually (way to complicated to handle in my opinion), then I tried Traefik (if you’re running a docker einvironment, I’m sure that’s a good solution) and in the end, I stuck with Nginx Proxy Manager. If you already have docker installed, this is by far the easiest way and also provides an awesome WebUI, where you can manage all your proxy hosts and SSL certificates.
The installation is done in just three simple steps: Set the port fowarding (80 and 443) in your router to your server/container, grab all the files in the doc/example/ folder and run
docker-compose up -d
And it’s done.
Now just enter the WebUI (ip:81) and setup all your routes.
[Proxmox] Mount dataset into LXC
Open LXC config file in your favorite editor. In this case the container name is 101:
nano /etc/pve/lxc/101.conf
Append a single line for each mountpoint you want to add. The first mountpoint is “mp0”, the second “mp1” and so on.
mp0: /data/music,mp=/mnt/nfs/music
First the source (my zpool “data”, folowing the dataset name “music”), after that the destination inside the container beginning “mp=”.
[Pi-hole] Blocklists

How to update your Pi-hole installation: pihole -up
Blocklists:
- https://raw.githubusercontent.com/StevenBlack/hosts/master/hosts
- https://sysctl.org/cameleon/hosts
- https://zeustracker.abuse.ch/blocklist.php?download=domainblocklist
- https://s3.amazonaws.com/lists.disconnect.me/simple_tracking.txt
- https://s3.amazonaws.com/lists.disconnect.me/simple_ad.txt
- https://hosts-file.net/ad_servers.txt
- https://easylist.to/easylist/easylist.txt
- https://raw.githubusercontent.com/ZeroDot1/CoinBlockerLists/master/hosts
- https://raw.githubusercontent.com/HenningVanRaumle/pihole-ytadblock/master/ytadblock.txt
- https://v.firebog.net/hosts/lists.php?type=tick
- https://github.com/mmotti/pihole-regex/blob/master/regex.list
- https://raw.githubusercontent.com/lightswitch05/hosts/master/ads-and-tracking-extended.txt
- https://hosts-file.net/grm.txt
- https://reddestdream.github.io/Projects/MinimalHosts/etc/MinimalHostsBlocker/minimalhosts
- https://raw.githubusercontent.com/StevenBlack/hosts/master/data/KADhosts/hosts
- https://raw.githubusercontent.com/StevenBlack/hosts/master/data/add.Spam/hosts
- https://v.firebog.net/hosts/static/w3kbl.txt
- https://v.firebog.net/hosts/BillStearns.txt
- https://www.dshield.org/feeds/suspiciousdomains_Low.txt
- https://www.dshield.org/feeds/suspiciousdomains_Medium.txt
- https://www.dshield.org/feeds/suspiciousdomains_High.txt
- https://www.joewein.net/dl/bl/dom-bl-base.txt
- https://raw.githubusercontent.com/matomo-org/referrer-spam-blacklist/master/spammers.txt
- https://someonewhocares.org/hosts/zero/hosts
- https://raw.githubusercontent.com/Dawsey21/Lists/master/main-blacklist.txt
- https://raw.githubusercontent.com/Perflyst/PiHoleBlocklist/master/SmartTV.txt
- https://raw.githubusercontent.com/StevenBlack/hosts/master/hosts
- mirror1.malwaredomains.com/files/justdomains
- sysctl.org/cameleon/hosts
- zeustracker.abuse.ch/blocklist.php?download=domainblocklist
- s3.amazonaws.com/lists.disconnect.me/simple_tracking.txt
- s3.amazonaws.com/lists.disconnect.me/simple_ad.txt
- hosts-file.net/ad_servers.txt
- raw.githubusercontent.com/crazy-max/WindowsSpyBlocker/master/data/hosts/win10/spy.txt
- raw.githubusercontent.com/quidsup/notrack/master/trackers.txt
- https://raw.githubusercontent.com/AdguardTeam/cname-trackers/master/combined_disguised_trackers_justdomains.txt
- https://urlhaus.abuse.ch/downloads/hostfile/
- https://raw.githubusercontent.com/kboghdady/youTube_ads_4_pi-hole/master/crowed_list.txt
You will find further blocklists here, here and here.
For whitelists look here.
For Regex Filter check here.
Test your Ad Blocking: https://d3ward.github.io/toolz/adblock
If you would like to have a Dark Theme for Pi-Hole look here or use the Firefox/Chrome extension Dark Reader.
Other interesting projects:
- PiPass (Related Reddit Post)
- Pihole Adlist Tool