Homelab, Linux, JS & ABAP (~˘▾˘)~
 

[Proxmox] Unprivileged Container: Using local directory bind mount points

https://pve.proxmox.com/wiki/Unprivileged_LXC_containers
https://www.reddit.com/r/Proxmox/comments/jz5ugx/lxc_user_mapping_help/

I had to map my lxc user nocin (uid=1000(nocin) gid=1000(nocin)) to user nocin (uid=1000(nocin) gid=1000(nocin)) on the host. So they have the same uid and gid on the host and inside the container and I had to map 1000 to 1000.

$ nano /etc/pve/lxc/114.conf

# had to append these lines
lxc.idmap: u 0 100000 1000
lxc.idmap: g 0 100000 1000
lxc.idmap: u 1000 1000 1
lxc.idmap: g 1000 1000 1
lxc.idmap: u 1001 101001 64535
lxc.idmap: g 1001 101001 64535

Also append the following line to /etc/subuid and /etc/subgid.

root:1000:1

Now all mount points are fully accessible and not owned by “Nobody/NoGroup” anymore.

If you are not able to access your home directory inside your container after the user mapping, you can change the permissions for it directly from the host. Find your lxc directory on your host and update the permissions to your current uid and gid.

$ cd /rpool/data/subvol-114-disk-0/home/
$ chown 1000:1000 -R nocin/
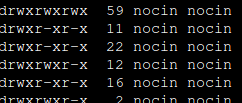
$ ls -l
drwxr-x---+ 5 nocin nocin 9 Mai 16 11:22 nocin

[NGINX] Monitoring Nginx using Netdata

Recently I saw this tutorial about monitoring Nginx with Netdata and tried it by myself. I have running Netdata on my Proxmox Host and Nginx inside LXC. So I could skip step 1 and 2 of the tutorial. Since I’m using the super simple nginx-proxy-manager, which comes as docker deployment, it took me some minutes to figure out, how to enable the Nginx ‘stub_status‘ module (which is step 3 of the tutorial). Here’s what I did.

SSH into the LXC where the Nginx Docker is running. Look up the nginx container name (root_app_1) and open a shell in the running container.

docker ps
docker exec -it root_app_1 /bin/bash

Check if the ‘stub_module‘ is already enabled. The following command should return: with-https_stub_status_module
I got it from here.

nginx -V 2>&1 | grep -o with-https_stub_status_module

Next add a location to the nginx ‘server {}‘ block in the default config, to make it reachable via Netdata. The tutorial goes to ‘/etc/nginx/sites-available/default‘, another tutorial is editing ‘/etc/nginx/nginx.conf‘, but I found the default config in ‘/etc/nginx/conf.d/default.conf’.

nano /etc/nginx/conf.d/default.conf

If nano is not installed (bash: nano: command not found), just install it. Get more information here or here.

apt update 
apt install nano -y

Insert the new location in the server { listen 80; …..} block. In my case I have running Netdata on my Proxmox host, so i added localhost and my Proxmox ip.

  location /nginx_status {
	stub_status;
	allow 192.168.178.100; #only allow requests from pve
	allow 127.0.0.1;	  #only allow requests from localhost
	deny all;		  #deny all other hosts	
  }

Save, exit your docker container and restart it.

docker restart root_app_1

SSH into Proxmox and check with curl, if you able to reach the new nginx location.

For the last step Configure Netdata to Monitor Nginx (step 4) , just follow the Netdata Wiki. Place a new file called nginx.conf on your Netdata host.

nano /etc/netdata/python.d/nginx.conf

Because Netdata is not running local, use ‘remote‘ following the url, instead of local and localhost.

update_every : 10
priority     : 90100

remote:
  url     : 'https://192.168.178.197/nginx_status'

Restart Netdata and your are done.

sudo systemctl restart netdata

[ZFS] Rollback LXC

Look for a specific snapshot of your LXC.

sudo zfs list -rt snapshot | grep data/lxc/subvol-101

I just want to rollback 2 hours, so I choose the snapshot with timestamp 2019-12-05-1117.

...
data/lxc/subvol-110-disk-0@zfs-auto-snap_hourly-2019-12-05-0917   11,7M      -     24,2G  -
data/lxc/subvol-110-disk-0@zfs-auto-snap_hourly-2019-12-05-1017   11,9M      -     24,2G  -
data/lxc/subvol-110-disk-0@zfs-auto-snap_hourly-2019-12-05-1117   11,7M      -     24,2G  -
data/lxc/subvol-110-disk-0@zfs-auto-snap_hourly-2019-12-05-1217   11,8M      -     24,2G  -
data/lxc/subvol-110-disk-0@zfs-auto-snap_hourly-2019-12-05-1317   12,1M      -     24,2G  -

If there are one or more snapshots between the current state and the snapshot you want to rollback to, you have to add -r (force deletion) to the rollback command.

sudo zfs rollback -r data/lxc/subvol-110-disk-0@zfs-auto-snap_hourly-2019-12-05-1117

[Docker] Install Docker in LXC running Debian Buster

If you already have an LXC with Debian running, add the following three lines to the lxc config (path /etc/pve/lxc/xxx.conf) and reboot the container:

lxc.apparmor.profile: unconfined
lxc.cgroup.devices.allow: a
lxc.cap.drop:

Now simply install docker.

sudo apt update && apt upgrade -y
sudo apt install apt-transport-https ca-certificates curl gnupg2 software-properties-common
curl -fsSL download.docker.com/linux/debian/gpg | sudo apt-key add -
sudo add-apt-repository "deb [arch=amd64] https://download.docker.com/linux/debian $(lsb_release -cs) stable"
sudo apt update
sudo apt install docker-ce docker-ce-cli containerd.io docker-compose

Running and managing docker containers requires sudo privileges. If you don’t want to type sudo for every commmand, add your current user to the docker group.

sudo usermod -aG docker ${USER}

Docker should now be installed, the daemon started, and the process enabled to start on boot. Check that it’s running.

sudo systemctl status docker

Test if the installtions is working correctly with hello-world.

sudo docker run hello-world

Each container you will create gets a unique ID and name you can look up with “docker ps”. To remove the docker instance just use “docker rm” followed by the ID or the container name.

sudo docker ps -a
sudo docker stop relaxed_williamson
sudo docker rm relaxed_williamson

[Docker] Install JDownloader2 Headless

The first JDownloader installation in an Debian Stretch Linux Container I did manually following this guide. It was running stable since then. Now I wanted to upgrade to Debian Buster and to took the chance trying a Docker JDownloader installation. I already had a Debian Buster Container with Docker installed (look here for a short installation guide), so I just had do spin up the new JDownloader Docker like it is described here.
With parameter -v you are able to mount a specific download location inside Docker. I also added Port 3129 to enable MyJdownloader direct connection.

docker run -d \
    --name=jdownloader-2 \
    -p 5800:5800 \
    -p 3129:3129 \
    -v /docker/appdata/jdownloader-2:/config:rw \
    -v /mnt/nfs/downloads:/output:rw \
    jlesage/jdownloader-2

If you want JDownloader to autostart and forgot the “–restart” parameter during the “run” command (as I did), just use docker update:

docker update --restart always jdownloader-2 

[Wireguard] Configuring Wireguard in LXC

Update 11.05.2020: I recommend using the PiVPN script (especially when using an unprivileged container). https://nocin.eu/wireguard-set-up-wireguard-using-pivpn-inside-lxc/

I followed these three guides: 1, 2 and 3
First set folder permissions and genereate the first key pair inside your lxc.

umask 077
wg genkey | tee privatekey | wg pubkey > publickey

Then create the config file. Mine is called wg0.conf.
As address you can take whatever IP you want. I also added NAT to get internet access with the client through my container.
For the client you have to create on the client side a key pair and enter the public key in the server wg0.conf as peer. Now your config should have an interface and a peer part.

[Interface]
Address = 192.168.1.1/24
SaveConfig = true
PostUp = iptables -A FORWARD -i wg0 -j ACCEPT; iptables -t nat -A POSTROUTING -o eth0 -j MASQUERADE
PostDown = iptables -D FORWARD -i wg0 -j ACCEPT; iptables -t nat -D POSTROUTING -o eth0 -j MASQUERADE
ListenPort = 51820
FwMark = 0xca6c
PrivateKey = <private_server_key>

[Peer]
#1. Peer Phone
PublicKey = <public_client_key>
AllowedIPs = 192.168.1.2/32

[Peer]
#2. Peer Notebook
PublicKey = <public_client_key>
AllowedIPs = 192.168.1.3/32

Then create the config on the client side. Mine is called client.conf. As peer we now enter our public server key.

[Interface]
PrivateKey = <private_client_key>
Address = 192.168.1.2/24
#this is my local pi-hole
DNS = 192.168.1.102                

[Peer]
PublicKey = <public_server_key>
AllowedIPs = 0.0.0.0/0
Endpoint = my.domain.org:51820
PersistentKeepalive = 25

That’s all we need. Now start the interface in your container, after that on the client.

wg-quick up wg0

To check the connection status just run:

wg show

I testet my connection with IP-Leak and ifconfig.me.

To stop the interface run:

wg-quick down wg0

To set up the VPN interface to be persistent across reboots, enable it as service:

sudo systemctl enable wg-quick@wg0.service

[Wireguard] Preparing Proxmox Host for Wireguard in LXC

I followed this guide for using Wireguard inside LXC on Proxmox. (Also helpfull)

echo "deb https://deb.debian.org/debian/ unstable main" > /etc/apt/sources.list.d/unstable.list
printf 'Package: *\nPin: release a=unstable\nPin-Priority: 90\n' > /etc/apt/preferences.d/limit-unstable
apt update
apt install wireguard

But as i ran “modprobe wireguard” I just got:

modprobe: FATAL: Module wireguard not found in directory /lib/modules/5.0.15-1-pve

So I ran “dkms autoinstall”… but no success.

Error! Your kernel headers for kernel 5.0.15-1-pve cannot be found.
Please install the linux-headers-5.0.15-1-pve package,
or use the --kernelsourcedir option to tell DKMS where it's located

As I run “apt install pve-headers” it installed new pve-headers but for a different kernel:

pve-headers pve-headers-5.0 pve-headers-5.0.21-1-pve

As expected, “modprobe wireguard” still returned

modprobe: FATAL: Module wireguard not found in directory /lib/modules/5.0.15-1-pve

So i checked my current kernel with “uname –kernel-release” and since my last reboot was about two weeks ago, it was running on 5.0.15-1-pve. So I did a reboot, checked the kernel again and now it was on 5.0.21-1-pve. So I did “dkms autoinstall” again, now with success:

Kernel preparation unnecessary for this kernel.  Skipping...

Building module:
cleaning build area...
make -j4 KERNELRELEASE=5.0.21-1-pve -C /lib/modules/5.0.21-1-pve/build M=/var/lib/dkms/wireguard/0.0.20190702/build..........
cleaning build area...

DKMS: build completed.

wireguard.ko:
Running module version sanity check.
 - Original module
   - No original module exists within this kernel
 - Installation
   - Installing to /lib/modules/5.0.21-1-pve/updates/dkms/

depmod....

DKMS: install completed.

“modprobe wireguard” now returned no error. I continued the guide with:

echo "wireguard" >> /etc/modules-load.d/modules.conf

Entered my already created Debian 10 container and followed the guide:

echo "deb https://deb.debian.org/debian/ unstable main" > /etc/apt/sources.list.d/unstable-wireguard.list
printf 'Package: *\nPin: release a=unstable\nPin-Priority: 90\n' > /etc/apt/preferences.d/limit-unstable
apt update
apt-get install --no-install-recommends wireguard-tools
ip link add wg0 type wireguard

Edit: To get Wireguard working, I also had to add the TUN device to the containers config, like I did for OpenVPN as well.
You’ll find the config here: /etc/pve/lxc/container_name.conf

lxc.cgroup.devices.allow: c 10:200 rwm
lxc.hook.autodev: sh -c "modprobe tun; cd ${LXC_ROOTFS_MOUNT}/dev; mkdir net; mknod net/tun c 10 200; chmod 0666 net/tun"