
Category: Proxmox
[Proxmox] Upgrade 7.4 to 8.0 – Failed to run lxc.hook.pre-start for container
After updating my Proxmox Server to PVE8.0, suddenly two lxc containers did not start anymore.
root@pve:~# pct start 192
run_buffer: 322 Script exited with status 2
lxc_init: 844 Failed to run lxc.hook.pre-start for container "192"
__lxc_start: 2027 Failed to initialize container "192"
startup for container '192' failed
I tried to view the error.log but couldn’t find any helpful information.
lxc-start -lDEBUG -o error.log -F -n 192
When googling, I stumbled across this reddit post. Although the issue was a bit different, I tried the recommended steps. The first command directly led me to the right direction…
root@pve:~# pct mount 192
mounting container failed
directory '/mnt/nfs/data/folder' does not exist
For whatever reason, after restarting proxmox it did not mount the nfs shares properly on the host. And of course, after this hint, I noticed that both containers were trying to mount some of these folders, which were actually nfs shares from my NAS. A simple mount -a on the host fixed it immediately. Besides of this little problem, everything went well with the proxmox upgrade!
[Proxmox] Unprivileged Container: Using local directory bind mount points
https://pve.proxmox.com/wiki/Unprivileged_LXC_containers
https://www.reddit.com/r/Proxmox/comments/jz5ugx/lxc_user_mapping_help/
I had to map my lxc user nocin (uid=1000(nocin) gid=1000(nocin)) to user nocin (uid=1000(nocin) gid=1000(nocin)) on the host. So they have the same uid and gid on the host and inside the container and I had to map 1000 to 1000.
$ nano /etc/pve/lxc/114.conf

# had to append these lines
lxc.idmap: u 0 100000 1000
lxc.idmap: g 0 100000 1000
lxc.idmap: u 1000 1000 1
lxc.idmap: g 1000 1000 1
lxc.idmap: u 1001 101001 64535
lxc.idmap: g 1001 101001 64535
Also append the following line to /etc/subuid and /etc/subgid.
root:1000:1
Now all mount points are fully accessible and not owned by “Nobody/NoGroup” anymore.
If you are not able to access your home directory inside your container after the user mapping, you can change the permissions for it directly from the host. Find your lxc directory on your host and update the permissions to your current uid and gid.
$ cd /rpool/data/subvol-114-disk-0/home/
$ chown 1000:1000 -R nocin/
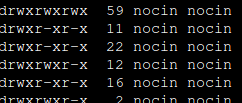
$ ls -l
drwxr-x---+ 5 nocin nocin 9 Mai 16 11:22 nocin
[Proxmox] Installing Cockpit with ZFS Manager extension
The Cockpit ZFS Manager requires Cockpit version 201 or above. In the Debian Buster repository there’s only cockpit version 188, so you have to use the buster backports repository, which contains cockpit version 223.
# install cockpit
echo "deb http://deb.debian.org/debian buster-backports main" > /etc/apt/sources.list.d/buster-backport.list
apt update
apt-get -t buster-backports install cockpit
# add ZFS manager
git clone https://github.com/optimans/cockpit-zfs-manager.git
cp -r cockpit-zfs-manager/zfs /usr/share/cockpit
# start cockpit
systemctl start cockpit.service
systemctl enable cockpit.service
systemctl status cockpit.service
Now browse to https://ip-address-of-machine:9090 and login.
[Proxmox] NFSv4 client saves files as “nobody” and “nogroup” on ZFS Share
I’m running a Proxmox Cluster with PVE1 and PVE2. On PVE2 a VM is running Debian Buster, which is mounting an zfs nfs share from PVE1. Inside the VM a script is running as root saving a backup on this nfs share. If I create a file locally (Test1) on PVE1, the owner is of course root. But since a few weeks the script running inside the VM is creating all files as nobody (Test2).
# ls -all /mnt/nfs/data
drwxr-xr-x  2 root  root       4096 Jul  5 07:19 Test1
drwxr-xr-x  2 nobody nogroup   4096 Jul  5 07:21 Test2
This is because root users are mapped to different user id’s and group’s when changing files on an nfs share. But until now, this was no problom when enabling nfs on a dataset via
zfs set sharenfs=on zpool/data
because the no_root_squash was set by default. But it looks like this was a changed in ZFS on Linux 0.8.3 and the no_root_squash option isn’t set by default anymore. To enable it again use:
zfs set sharenfs='rw,no_root_squash' zpool/data
Another way is exporting the folder via /etc/exports and adding the no_root_squash option.
# sudo nano /etc/exports
/zpool/data/ *(rw,no_subtree_check,sync,insecure,no_root_squash)
Run sudo exportfs -a after editing the exports file to enable these changes immediately.
[Proxmox] Adding the pve-no-subscription repo
For receiving updates on Proxmox, you have add the pve-no-subscription repo.
First, find the current pve-enterprise repo:
nano /etc/apt/sources.list.d/pve-enterprise.list
Comment out the pve-enterprise repo.
root@pve:~# cat /etc/apt/sources.list.d/pve-enterprise.list
#deb https://enterprise.proxmox.com/debian/pve buster pve-enterprise
To add the pve-no-subscription repo, create a new file called pve-no-subscription.list
nano /etc/apt/sources.list.d/pve-no-subscription.list
and insert the repo:
root@pve:~# cat /etc/apt/sources.list.d/pve-no-subscription.list
# PVE pve-no-subscription repository provided by proxmox.com,
# NOT recommended for production use
deb https://download.proxmox.com/debian/pve buster pve-no-subscription

# security updates
deb https://security.debian.org/debian-security buster/updates main contrib
[Proxmox] Scrub cronjob
Default scrub cronjob when installing Proxmox on ZFS:
nocin@pve:~$ cat /etc/cron.d/zfsutils-linux
PATH=/usr/local/sbin:/usr/local/bin:/sbin:/bin:/usr/sbin:/usr/bin

# Scrub the second Sunday of every month.
24 0 8-14 * * root [ $(date +\%w) -eq 0 ] && [ -x /usr/lib/zfs-linux/scrub ] && /usr/lib/zfs-linux/scrub
[Proxmox] PVE Kernel Cleaner
Script to remove old/unused kernels on your Proxmox host. Look at Github PVE Kernel Cleaner for the installation guide. To run the script use:
pvekclean
[Proxmox] Run lxc with log
If your container won’t start, run the following to get some helpful logging:
lxc-start -n 101 -F -l DEBUG -o /tmp/lxc-101.log