Homelab, Linux, JS & ABAP (~˘▾˘)~
 

[Home Assistant] Display Reolink Recordings from a NAS using the Gallery Card

A few months ago, I installed a Reolink Doorbell at our front door. Since then, I’ve used it for simple automations like sending a photo when someone is at the door. To capture a photo, I was using the camera.snapshot service. I never used the photos and videos that the doorbell itself recorded and that were stored on my TrueNAS system via FTP. Mainly because I haven’t found a good way to display the captured photos and videos on my Dashboard. But finally I was able to fill the gap with the Gallery Card, which turned out to be exactly what I needed the whole time. By using it, you can simply display the latest images and videos, even when they are stored in some kind of nested folder structure, and it also helps to parse filenames to display them in a more convenient way.

Following a brief overview of what I had to do:

  • TrueNAS
    • Create Dateset, in my case it’s: data/camera
    • Share the dataset via NFS
      • Sharing → Unix Shares (NFS) → Add → Choose your new dataset
    • Create some folder(s) on your new dataset, for example: /Reolink/Wifi-Doorbell/Recordings (to do that, simply mount the NFS share to your local machine or use the terminal)
    • Activate the FTP Service
      • Services → FTP
  • Reolink
    • Go to Settings → Surveillance → FTP
      • Insert your TrueNAS FTP credentials
      • Remote Directory: /Reolink/Wifi-Doorbell/Recordings
      • Generate subfolder by: YYYY-MM-DD
      • Select what and when you want to record something
  • Home Assistant
    • Add your Doorbell via Reolink Integration
    • Mount NFS Share
      • Settings → System → Storage → Add Network Storage
      • Name: Reolink (whatever you like)
      • Usage: Media
      • Path: /mnt/data/camera
    • Check if you can access your recordings
      • Media → My media → media → Reolink (NFS name)→ Reolink (my folder name)→ Wifi-Doorbell → Recordings
    • If you cannot open your files, you probably have to adjust your permission on the TrueNAS Dataset. Provide at least read permissions (e.g. 655)
      • Storage → Pools → camera → Edit Permissions
    • Install Gallery Card
      • HACS → Frontend → Explore & Download Repositories → Search for Gallery Card
      • Go to your Dashboard and add the card
type: custom:gallery-card
entities:
  - media-source://media_source/media/Reolink/Reolink/Wifi-Doorbell/Recordings/
maximum_files: 25
menu_alignment: top
folder_format: YYYY/MM/DD
video_loop: true
video_autoplay: true
video_muted: true
file_name_date_begins: 12
file_name_format: YYYYMMDDHHmmss
caption_format: HH:mm:ss DD/MM

Most variables are self-explanatory and also well explained by the galery-card docs, but below a few words about the settings I used, beginning with the path to the media which is provided on the entities attribute.

entities:
  - media-source://media_source/media/Reolink/Reolink/Wifi-Doorbell/Recordings/

The first part is a default value: media-source://media_source/
Followed by the usage type and name we have chosen when mounting the NSF share: media/Reolink/
Then we need the directory path: Reolink/Wifi-Doorbell/Recordings

Because we chose in the Reolink settings “Generate subfolder by: YYYY-MM-DD“, the files are stored in a hierarchy like this:

  • 2023
    • 10
    • 11
    • 12
      • 01
      • 02
      • 03
      • 04
      • 05

The gallery-card can automatically parse this, if you provide the following setting: folder_format: YYYY/MM/DD.
And because the filenames look like this: Haustuer_00_20231230143626.jpg, you have to add file_name_date_begins: 12 to skip the firs letters, and file_name_format: YYYYMMDDHHmmss to parse the date. With caption_format: HH:mm:ss DD/MM you can define the output, how you want to display the parsed timestamp.

[RaspberryPi] Installing MPD on a RaspberryPi 3 with HifiBerry AMP2

Until recently, I only used my RaspberryPi 3 as Bluetooth Speaker with the HifiBerry AMP2 and two old B&W DM601. This setup only consumes about 3 Watts idling, so its running 24h. I used the VLC Android App on my smartphone to access my music on my NAS and streamed it via Bluetooth to the Pi.

But I wanted to control the music on different devices (like Tablet, HTPC, Desktop) and was annoyed, having to reconnect my smartphone Bluetooth connection all the time when coming home. Also there is still a loss of quality with Bluetooth and i have many FLAC files now. That’s why I gave Music Player Daemon (MPD) a try. A daemon which runs on the Pi and can be controlled from different clients. It accesses my music library via Wifi directly on the NAS.

These are the steps I had to make on my Raspberry Pi:

  1. Firmware update
  2. Set up the the Hifiberry AMP2 (if not yet done)
  3. Mount NFS share with your music
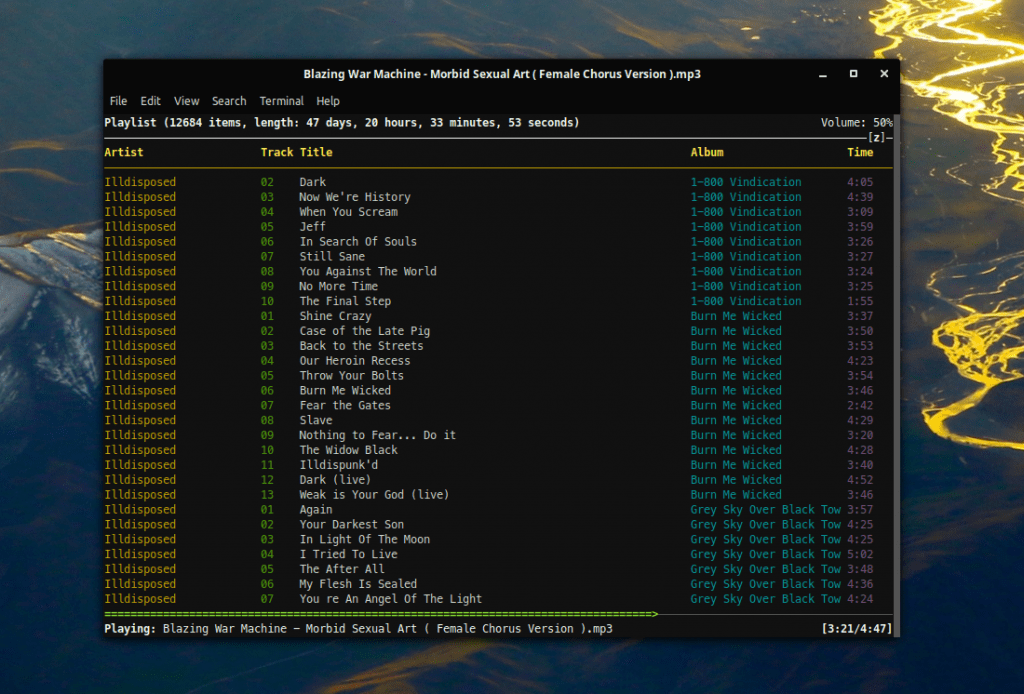
  4. Install MPD and the clients MPC and ncmpcpp
  5. Edit MPD config file
  6. Run MPC update to fill library
  7. Configure NCMPCPP
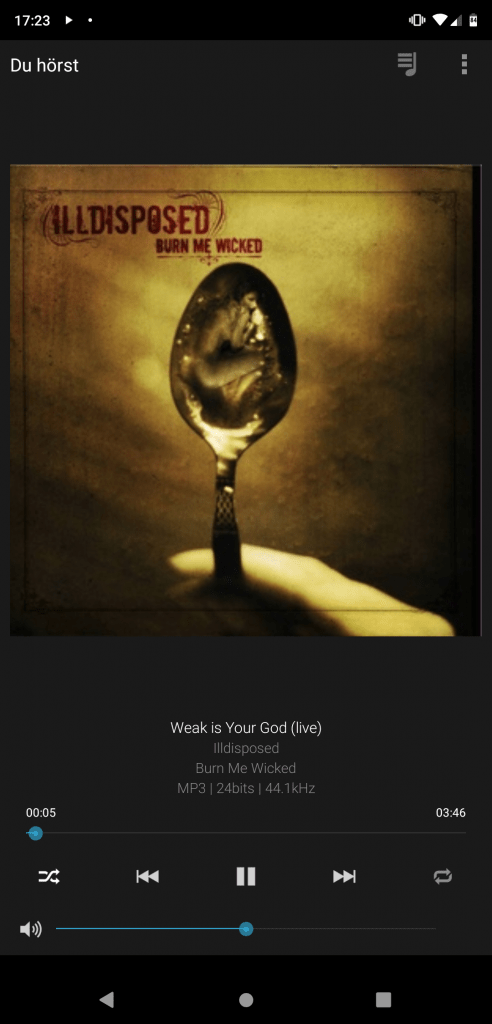
  8. MPDroid as smartphone client
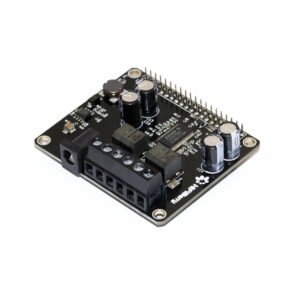
©Hifiberry AMP2

1. Firmware update

I had some audio cracking when switching a song or just pressing play and pause. Following this blog, they released a fix with in a newer firmware version, unfortunately after a while they broke it again with a later firmware version…. nevertheless I made the update and somehow I get less cracking, even if it doesn’t disappear completely.

sudo apt-get install rpi-update
sudo rpi-update
sudo reboot

Update 23.05.2020: Install PulseAudio, if the Firmware update will not help.
https://dbader.org/blog/crackle-free-audio-on-the-raspberry-pi-with-mpd-and-pulseaudio#update2
https://wiki.archlinux.org/index.php/Music_Player_Daemon/Tips_and_tricks#Local_(as_your_own_user)

2. Set up the the Hifiberry AMP2

Just follow these steps: https://github.com/project-owner/Peppy.doc/wiki/HiFiBerry-Amp

And check if user Pi is member of the audio group. If not, add him to.

$ groups
pi adm dialout cdrom sudo audio video plugdev games users input
$ sudo usermod -a pi -G audio

3. Mount NFS share

My music is stored on to a NAS and published via NFS. So I just had to mount it to my Pi.
https://www.elektronik-kompendium.de/sites/raspberry-pi/2102211.htm

sudo apt install nfs-common
sudo mkdir -p /mnt/nfs/music
showmount -e ipadress
sudo mount -t nfs -o soft ipadress:/data/music /mnt/nfs/music

Use autofs to auto mount the NFS share on boot.
https://www.elektronik-kompendium.de/sites/raspberry-pi/2102221.htm

sudo apt install autofs
sudo nano /etc/auto.nfs
sudo nano /etc/auto.master
sudo service autofs restart
mount
ls /mnt/nfs/music/
sudo reboot
#check again after reboot
ls /mnt/nfs/music/

auto.nfs

music -fstype=nfs,rw,retry=0 192.168.178.100:/data/music

auto.master

/mnt/nfs /etc/auto.nfs

4. Install MPD and the clients MPC and ncmpcpp

sudo apt update
sudo apt install mpd mpc ncmpcpp

5. Edit MPD config file and restart service

Open the mpd.conf file in your favorite editor and after editing, restart the service.

sudo nano /etc/mpd.conf
sudo systemctl restart mpd

I had to make the following changes in the config:

music_directory         "/mnt/nfs/music"
bind_to_address         "any"
auto_update             "yes"
audio_output {
        type            "alsa"
        name            "My ALSA Device"
        device          "hw:0,0"        
        mixer_type      "software"
}

Check aplay -l for the right device settings.

$ aplay -l
**** List of PLAYBACK Hardware Devices ****
card 0: sndrpihifiberry [snd_rpi_hifiberry_dacplus], device 0: HiFiBerry DAC+ HiFi pcm512x-hifi-0 [HiFiBerry DAC+ HiFi pcm512x-hifi-0]
  Subdevices: 0/1
  Subdevice #0: subdevice #0

6. Run MPC update to fill library

The Music Player Client (MPC) acts as client (as well as ncmpcpp) to MPD. MPD itself is just the daemon and has no music controlling capabilities.

#check if the output(s) is enabled
mpc outputs
#update the database (will take while)
mpc update
#look up the commands to adjust volume and play a file as test 
mpc help 

7. Configure ncmpcpp

When using ncmpcpp as client, you have to do a small configuration to tell the client to which server it should talk to. So open the config:

sudo nano ~/.ncmpcpp/config

and insert the following lines. When using ncmpcpp directly one the raspberry, set 127.0.0.1 as mpd_host. When using it on another machine (like your desktop), insert the IP of the raspberry pi.

ncmpcpp_directory =         "~/.ncmpcpp"
mpd_host =                  "127.0.0.1"
mpd_port =                  "6600"	
allow_for_physical_item_deletion = yes

Here is a cool cheatsheet on how to control ncmpcpp:
https://pkgbuild.com/~jelle/ncmpcpp/

If you prefer a GUI, install Cantata or Sonata:
https://github.com/CDrummond/cantata
https://www.nongnu.org/sonata/

8. Install MPDroid

To control MPD via Smartphone, install the MPDroid App from the F-Droid store: https://f-droid.org/en/packages/com.namelessdev.mpdroid/

[Proxmox] NFSv4 client saves files as “nobody” and “nogroup” on ZFS Share

I’m running a Proxmox Cluster with PVE1 and PVE2. On PVE2 a VM is running Debian Buster, which is mounting an zfs nfs share from PVE1. Inside the VM a script is running as root saving a backup on this nfs share. If I create a file locally (Test1) on PVE1, the owner is of course root. But since a few weeks the script running inside the VM is creating all files as nobody (Test2).

# ls -all /mnt/nfs/data
drwxr-xr-x  2 root  root       4096 Jul  5 07:19 Test1
drwxr-xr-x  2 nobody nogroup   4096 Jul  5 07:21 Test2

This is because root users are mapped to different user id’s and group’s when changing files on an nfs share. But until now, this was no problom when enabling nfs on a dataset via

zfs set sharenfs=on zpool/data

because the no_root_squash was set by default. But it looks like this was a changed in ZFS on Linux 0.8.3 and the no_root_squash option isn’t set by default anymore. To enable it again use:

zfs set sharenfs='rw,no_root_squash' zpool/data

Another way is exporting the folder via /etc/exports and adding the no_root_squash option.

# sudo nano /etc/exports
/zpool/data/ *(rw,no_subtree_check,sync,insecure,no_root_squash)

Run sudo exportfs -a after editing the exports file to enable these changes immediately.

[NFS] Mount NFS Share inside VirtualBox VM

When receiving an error mounting an NFS share inside your VM:

sudo mount -t nfs xxx.xxx.xxx.xxx:/data/media /mnt/nfs/media
mount.nfs: access denied by server while mounting xxx.xxx.xxx.xxx:/mnt/nfs/media

Just change the network adapter of your VM in VirtualBox from “NAT” to “Bridge Mode”.

As alternative you can force the usage of the TCP protocol when mounting, like it is described here.