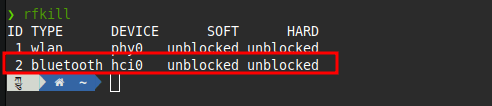
Somehow the onboard Bluetooth of my Motherboard stopped working, but the Wi-Fi was still working fine. This confused me because both are provided by the Intel Wi-Fi 6 AX200 card. The blueman-manager simply could not find the Bluetooth device anymore. Also, when running the command rfkill, it was just listing the Wi-Fi device. The second entry was missing (I took the screenshot, after Bluetooth was working again).
Since I had recently upgraded to a new kernel, I assumed this must be the problem. After testing many different kernels, it still didn’t work. Even on a kernel where it definitely worked before.
Then I stumbled across this thread Intel Wi-Fi 6 AX200 Bluetooth Stopped Working Yet Wifi is still fine. The last commenter solved his issue by unplugging the Intel Wi-Fi Card from his Motherboard and plugging it back in. To be honest, I’m not even sure if this is possible on my motherboard, as it is some onboard thing directly on the board. But this post leads me to reconnect the external antenna, which is connected with two cables on the back of the PC. Since Wi-Fi was still working all along, I did not expect anything from it, but after turning the PC back on, suddenly Bluetooth was working again. WTF! No idea how this is possible, as I have used Bluetooth and WI-FI for many months without the external antenna. Fortunately, however, it works again.
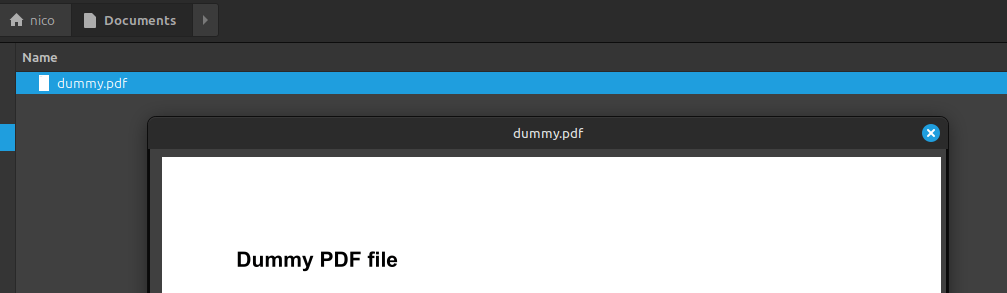
Just noticed that you can preview files when selecting a file and pressing the space bar on the keyboard. It works for images, docs, audio, videos and even PDF files. You can simply close the preview using ESC. Really handy!
The fact that some applications do not start minimized (in tray) at system startup has been annoying me for quite some time. I find it even more annoying that you can’t simply set this directly via a checkbox in the Startup Applications for each application. The problem seems to be that each application has a different parameter for this, and therefore it cannot be done generally by the operating system (at least that’s my guess). I have therefore researched the necessary parameters for the applications I use. Simply add the parameter at the end of the Startup Applications command. For some applications, you can also activate it directly in the specific settings.
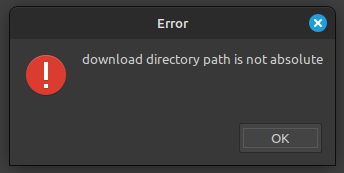
Every few months, I run into this issue when adding a torrent to transgui:
Although there is a 5-year-old closed issue on this bug, which also led to a code adjustment, this bug still seems to exist: https://github.com/transmission-remote-gui/transgui/issues/1270 The user Kethsar has probably already found the right cause and gives some hints on how to solve it. At least it helped me to find a workaround:
close transgui if it’s running, otherwise your changes will get overwritten again
I had a few D1 Minis lying around that I wanted to flash WLED onto. But when plugging into my main PC running Linux Mint 21, no device got recognized. The D1 Mini was just flashing its blue LED light 2 times and that was all. I had already checked before, whether the USB cable is also a Data Link cable, because now and then you accidentally grab a USB cable which is charging only.
Since I was pretty sure it wasn’t a hardware problem, I checked dmesg for any suspicious messages. I’m using an alias named klog to beautify the output.
And after removing brltty, my D1 Mini got recognized immediately. Fortunately, the solution was very simple. 🙂
Update 19.01.2024: If you receive Cannot open /dev/ttyUSB0: Permission denied errors, when writing to the esp, you have to add your user to the dialout group and re-login. (*)
In January 2020 I bought a Sharkoon PureWriter Keyboard and since then I had the problem that the keyboard got not recognized after my PC (which runs on Linux Mint) was coming back from suspend mode. Back then I couldn’t find a solution and was just hoping that a newer kernel release will fix this problem in the future. But it did not. So today I was searching again and stumbled again across this post, but now I noticed the new answer from April this year. And it finally solved it!
“Pywal is a tool that generates a color palette from the dominant colors in an image. It then applies the colors system-wide and on-the-fly in all of your favorite programs.”
I’m using Variety to change my wallpaper every day automatically. To always get the right colors in my terminal I added some lines in my .zshrc that will always grab the current wallpaper and pass it to PyWal. I’m sure a bash pro would do this in just one line… 🙂
sudo micro /etc/default/grub

# if not already set, update
GRUB_TIMEOUT_STYLE=menu
GRUB_TIMEOUT=5

sudo update-grub
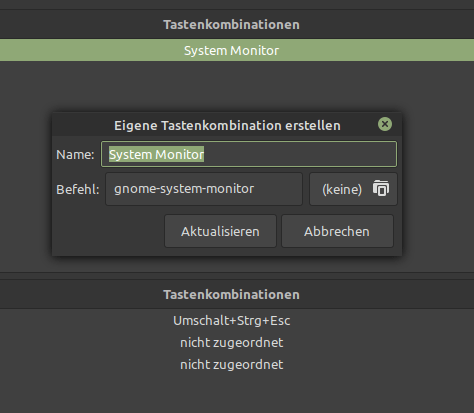
Create new shortcut for the “System Monitor”
Copying my dotfiles over. First the .aliases
alias ll='ls -Al --color=auto --block-size=MB --group-directories-first'
alias ls='ls -l --color=auto --block-size=MB --group-directories-first'
alias cp='cp -vRi'
alias rm='rm -vRi'
alias mv='mv -vi'
alias ln='ln -v'
alias mkdir='mkdir -pv' # Creates parent directories if needed
alias chown='chown -v'
alias chmod='chmod -v'
alias rmdir='rmdir -v'
alias ps='ps -f'
#alias tar='tar -xvf' #made some problems
alias df='df -Th'
alias lsd='lsd -Al --group-dirs first'
alias jobs='jobs -lr'

alias sudo='sudo ' #Allows for aliases to work with sudo.
alias pls='sudo $(history -p !!)'
alias wget='wget -qc --show-progress' #Download with WGet with pretty and useful features.
alias grep='grep -sI --color=auto' #Colorful (auto) 'grep' output.
alias psf='ps -faxc -U $UID -o pid,uid,gid,pcpu,pmem,stat,comm' #Less excessive, current-user-focused ps alternative.
alias klog="sudo dmesg -t -L=never -l emerg,alert,crit,err,warn --human --nopager" #Potentially useful option for viewing the kernel log.
alias lsblk='lsblk -o name,label,fstype,size,type,uuid'
alias ping='ping -c 5' # Stop after sending 5 pings


# Docker
alias dpsa='docker ps -a --format "table{{.ID}}\t{{.Names}}\t{{.Image}}\t{{.Ports}}\t{{.Status}}"'

# Find commands I type often so I can alias them
# https://www.jakeworth.com/alias-terminal-commands/
alias typeless='history n 20000 | sed "s/.*  //"  | sort | uniq -c | sort -g | tail -n 100'

# Micro Editor
alias mic='micro'
alias nano='micro'

# Make mount command output pretty and readable
alias mnt='mount | column -t'

# jump to my download directory
alias dl='cd "$HOME"/Downloads'

# Youtube-dl
alias dlvid='youtube-dl --add-metadata --embed-thumbnail'
alias dlmp3='youtube-dl -x --audio-format mp3 --add-metadata --embed-thumbnail'
alias dlbest='youtube-dl -f bestvideo+bestaudio'

# Git
alias git add .='git aa'
alias git commit -m='git cm'

# mkdir && cd
function mcd() {
    mkdir -p $1
    cd $1
}

# Archive extraction
# usage: ex <file>
ex ()
{
  if [ -f "$1" ] ; then
    case $1 in
      *.tar.bz2)   tar xjf $1   ;;
      *.tar.gz)    tar xzf $1   ;;
      *.bz2)       bunzip2 $1   ;;
      *.rar)       unrar x $1   ;;
      *.gz)        gunzip $1    ;;
      *.tar)       tar xf $1    ;;
      *.tbz2)      tar xjf $1   ;;
      *.tgz)       tar xzf $1   ;;
      *.zip)       unzip $1     ;;
      *.Z)         uncompress $1;;
      *.7z)        7z x $1      ;;
      *.deb)       ar x $1      ;;
      *.tar.xz)    tar xf $1    ;;
      *.tar.zst)   unzstd $1    ;;
      *)           echo "'$1' cannot be extracted via ex()" ;;
    esac
  else
    echo "'$1' is not a valid file"
  fi
}


# navigation
up () {
  local d=""
  local limit="$1"

  # Default to limit of 1
  if [ -z "$limit" ] || [ "$limit" -le 0 ]; then
    limit=1
  fi

  for ((i=1;i<=limit;i++)); do
    d="../$d"
  done

  # perform cd. Show error if cd fails
  if ! cd "$d"; then
    echo "Couldn't go up $limit dirs.";
  fi
}
Followed by my .zshrc
neofetch | lolcat

# See https://github.com/ohmyzsh/ohmyzsh/wiki/Themes
# ZSH_THEME="robbyrussell"
ZSH_THEME=powerlevel10k/powerlevel10k

# zsh-syntax-highlighting has to be the last plugin!
plugins=(git tmux zsh-autosuggestions zsh-syntax-highlighting)

# Preferred editor for local and remote sessions
 if [[ -n $SSH_CONNECTION ]]; then
   export EDITOR='micro'
 else
   export EDITOR='nano'
 fi

# To customize prompt, run `p10k configure` or edit ~/.p10k.zsh.
[[ ! -f ~/.p10k.zsh ]] || source ~/.p10k.zsh

source $ZSH/oh-my-zsh.sh

if [ -f ~/.aliases ]; then
. ~/.aliases
fi
eval $(thefuck --alias FUCK)