Using regex, you can simply reorder the parts of your date string to create a compatible ISO 8601 date string which is accepted by the new Date() constructor.
All options have in common that you first try to get the binding context from the list/table element via the event. Having the right context, you can either use the getProperty() function to get a specific property, or use the getObject() function to get all data.
I had a few D1 Minis lying around that I wanted to flash WLED onto. But when plugging into my main PC running Linux Mint 21, no device got recognized. The D1 Mini was just flashing its blue LED light 2 times and that was all. I had already checked before, whether the USB cable is also a Data Link cable, because now and then you accidentally grab a USB cable which is charging only.
Since I was pretty sure it wasn’t a hardware problem, I checked dmesg for any suspicious messages. I’m using an alias named klog to beautify the output.
And after removing brltty, my D1 Mini got recognized immediately. Fortunately, the solution was very simple. 🙂
Update 19.01.2024: If you receive Cannot open /dev/ttyUSB0: Permission denied errors, when writing to the esp, you have to add your user to the dialout group and re-login. (*)
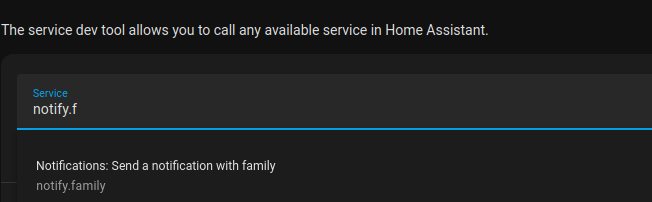
Notify Groups are useful to send notifications to a group of devices or even to different channels like Home Assistant Companion App, Telegram, Signal etc.
The new PDF.js viewer design Photon supports a light and a dark mode. By default, the theme is set automatically. To overwrite this, you can set the viewerCssTheme property.
I’ve embedded my PDF viewer in an iFrame like this:
By setting the viewerCssTheme property, you are able to change the PDF viewer theme. It can be modified using the PDFViewerApplicationOptions.set() function and there are three possible values. The property has to be set before the Viewer is initialized. To archive this, you can listen to the event webviewerloaded (read more about it here). In my case, I also had to call _forceCssTheme() after that.
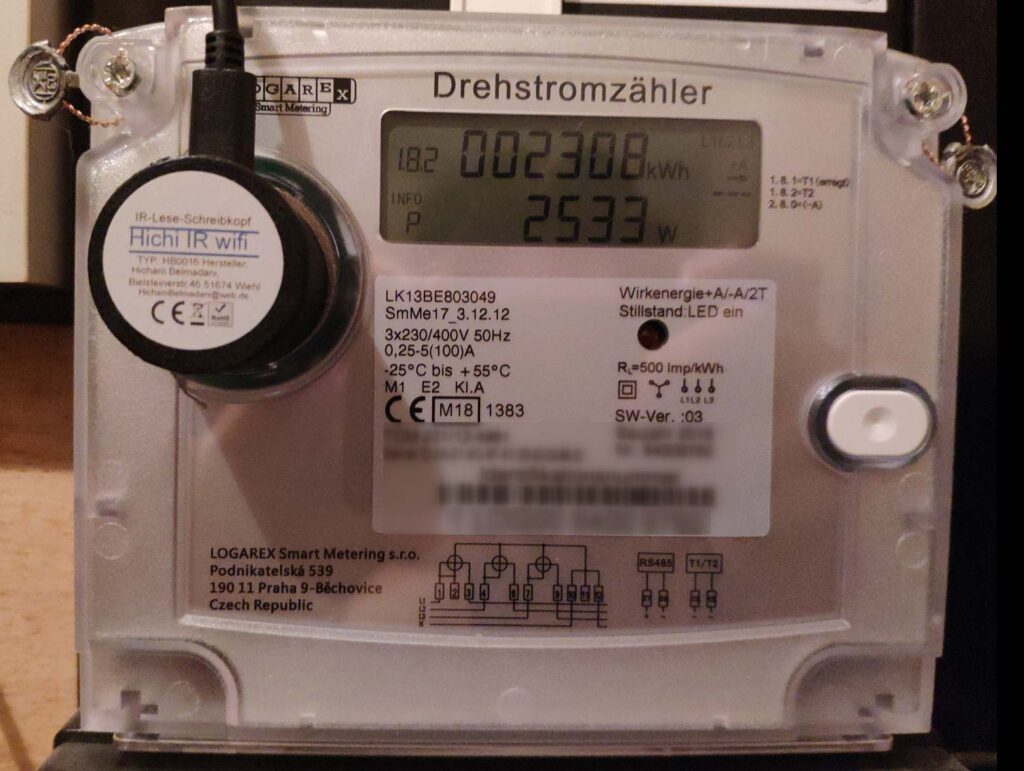
Wurde der Stromzähler in den letzten Jahren getauscht, solltet ihr eine moderne Messeinrichtung haben, welche eine Infrarot (IR) Schnittstelle für das Auslesen von Daten anbietet. Dazu gibt es bereits eine große Anzahl an Anleitungen, z. B. hier und hier. Daher nur kurz zusammengefasst, welche Schritte notwendig waren für meinen LOGAREX LK13BE803049 (Baujahr 2018).
Stromzähler vorbereiten
Um Zugriff auf alle Daten, die der Stromzähler so sammelt zu bekommen, benötigt man eine PIN. Diese PIN kann man über das Online-Portal des Messstellenbetreibers herausfinden, alternativ geht das auch via Hotline oder Mail. Hat man seine PIN, am besten in der Anleitung nachschlagen, wie die PIN eingeben (Seite 6) und wie der “vollständiger Datensatz” (Seite 8) aktiviert wird. Ansonsten bekommt man nur einen Bruchteil der vorhanden Daten zurück.
IR Lese-Schreibkopf
Kann man selber basteln für wenige Euro oder alternativ fertig kaufen. Ich habe diesen (WIFI lese-schreib-Kopf EHZ Volkszähler Hichi Smartmeter) gekauft, da hier ein ESP32 dabei ist und dieser sogar bereits mit Tasmota geflasht wurde. Um Abstürze im Betrieb zu verhindern, darauf achten, dass das Netzteil der Micro-USB Stromversorgung genug Leistung hat. Ist die Stromversorgung sichergestellt, mittels Smartphone mit dem vom ESP32 geöffneten Access Point verbinden und die WLAN Daten des Heimnetzes im Tasmota Webinterface eingeben (sollte sich automatisch öffnen nach der AP Verbindung). Nun kann das ganze Teil mithilfe des Magneten am Stromzähler über der IR Schnittstelle (Optische Datenschnittstelle D0) angebracht werden. Im Idealfall hat man dafür noch eine freie Steckdose in der Nähe des Stromzählers.
Script anlegen in Tasmota
Erneut das Tasmota Webinterface aufrufen, am besten diesmal vom Desktop PC, und über den Button Consoles zu Edit Script navigieren. Dort müssen nun einige Zeilen eingetragen werden, die sich je nach Stromzähler unterscheiden können. Eine Übersicht der möglichen Werte des LOGAREX Zählers findet ihr in der Anleitung auf Seite 10. Bei mir sah das Ergebnis dann so aus:
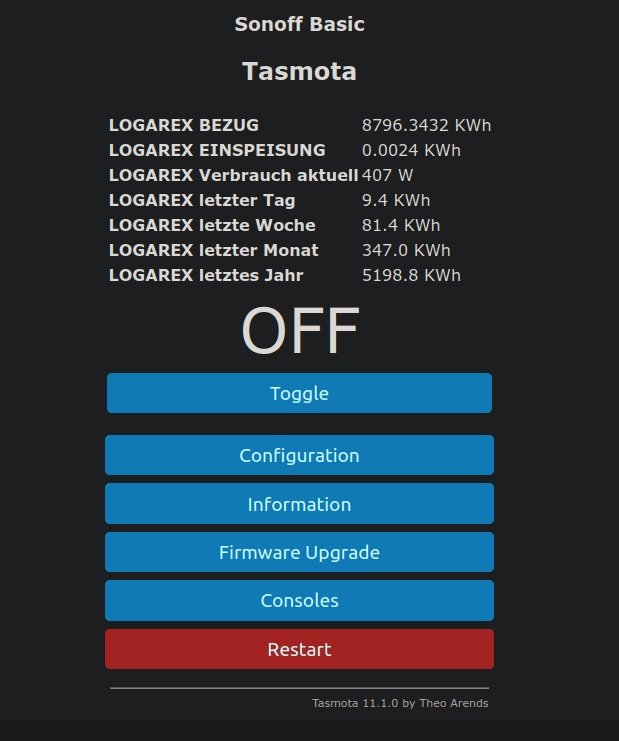
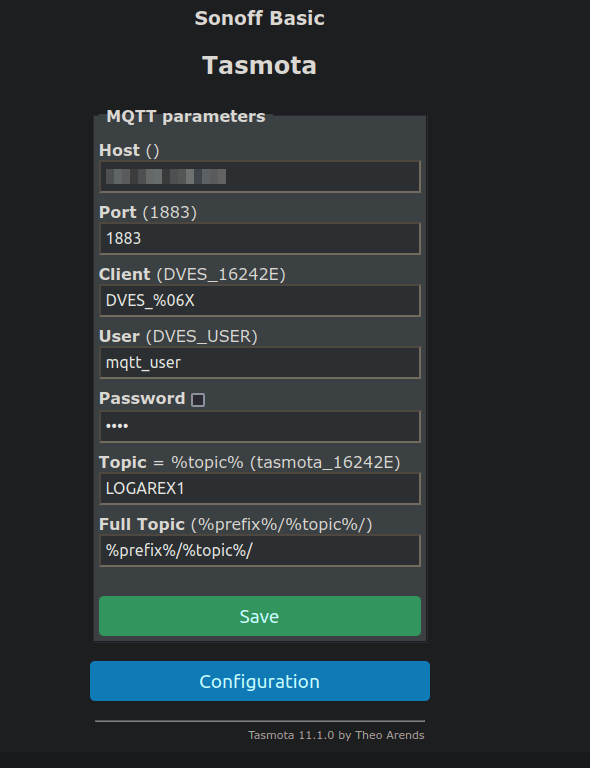
Via MQTT und Tasmota Integration können die Werte direkt an Home Asisstant übertragen werden und z.B. im Energy Dashboard verwendet werden. Dafür einfach die Schritte unter 4b von dieser Anleitung umsetzten. Falls MQTT auf eurem Home Assistant noch nicht eingerichtet ist, müsst ihr das noch tun. Dafür gibt es auch einen Haufen Anleitungen oder Videos. Am besten einfach eine recht aktuelle Anleitung heraussuchen. Bei der Einrichtung legt ihr auch einen separaten User für MQTT an, welchen ihr dann angeben müsst in Tasmota. So sah es bei mir dann aus.
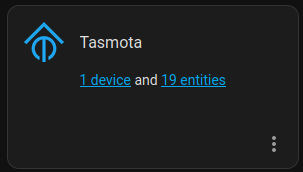
In der Tasmota Integration in Home Assistant wurde das Device mit entsprechen Entitäten direkt gefunden.
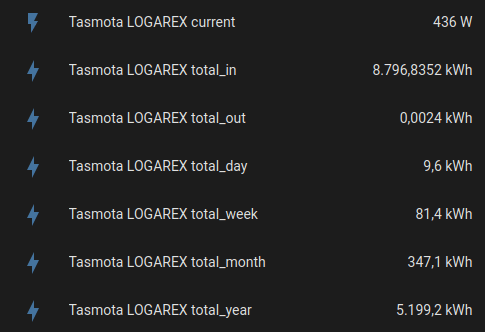
Da die Werte jedoch ohne Einheit übertragen werden, muss diese noch händisch in der configuration.yaml gepflegt werden. Wenn ich mich recht erinnere, ist danach ein Neustart von Home Assistent erforderlich.
 # Tasmota Stromzähler
homeassistant:
  customize:
    sensor.tasmota_logarex_total_in:
      device_class: energy
      unit_of_measurement: "kWh"
      state_class: total_increasing
    sensor.tasmota_logarex_total_out:
      device_class: energy
      unit_of_measurement: "kWh"
      state_class: total_increasing
    sensor.tasmota_logarex_current:
      device_class: power
      unit_of_measurement: "W"
    sensor.tasmota_logarex_total_day:
      device_class: energy
      unit_of_measurement: "kWh"
      state_class: total_increasing
    sensor.tasmota_logarex_total_week:
      device_class: energy
      unit_of_measurement: "kWh"
      state_class: total_increasing
    sensor.tasmota_logarex_total_month:
      device_class: energy
      unit_of_measurement: "kWh"
      state_class: total_increasing
    sensor.tasmota_logarex_total_year:
      device_class: energy
      unit_of_measurement: "kWh"
      state_class: total_increasing
So sieht die Anzeige der Sensoren direkt etwas brauchbarer aus. 🙂
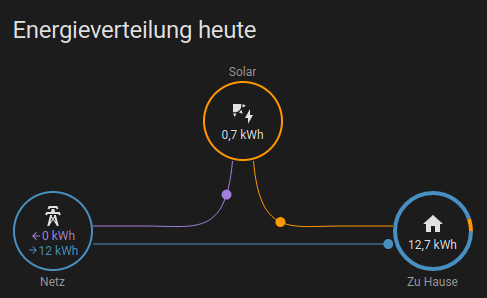
Die schöne Energieverteilungsanzeige vom Energy Dashboard kann auch in jedem anderen Dashboard verwendet werden via:
type: energy-distribution
link_dashboard: true
Einen Überblick der weiteren Energy Cards findet man hier.
Im Energy Dashboard kann auch ein Preis für die kWh hinterlegt werden. So sieht man direkt seinen Verbrauch für ausgewählte Zeiträume. Hier mal ein extremes Beispiel, an dem wir den ganzen Tag Äpfel eingekocht und Kuchen gebacken haben. So ein Verbrauch ist bei uns natürlich nicht die Regel. 🙂
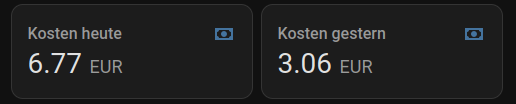
Für mein Smartphone Dashboard habe ich dann noch die neue Statictics Card genutzt, um einen noch einfacheren Einblick in meine laufenden Kosten zu bekommen. Die Anordnung erfolgt durch eine Grid Card.
The enablePermissions property can be modified using the PDFViewerApplicationOptions.set() function. The property has to be set before the Viewer is initialized. To archive this, you can listen to the event webviewerloaded (read more about it here).
                document.addEventListener("webviewerloaded", async () => {
                    let pdfViewerIFrame = document.getElementById("pdf-js-viewer")
                    //https://github.com/mozilla/pdf.js/blob/master/web/app_options.js
                    pdfViewerIFrame.contentWindow.PDFViewerApplicationOptions.set("enablePermissions", true) //allow PDF documents to disable copying in the viewer
                    pdfViewerIFrame.contentWindow.PDFViewerApplicationOptions.set("defaultUrl", "") //prevent loading default pdf
                    }
                })
I was again working on a task for my hierarchical tree structure (see previous post here). This time I needed to find a specific object with a specific property value.
I needed a function that was able to find any object by providing only the NodeId value. Fortunately I stumbled accross some excellent code snippet by Scott Sauyet which is exactly doing what I needed: