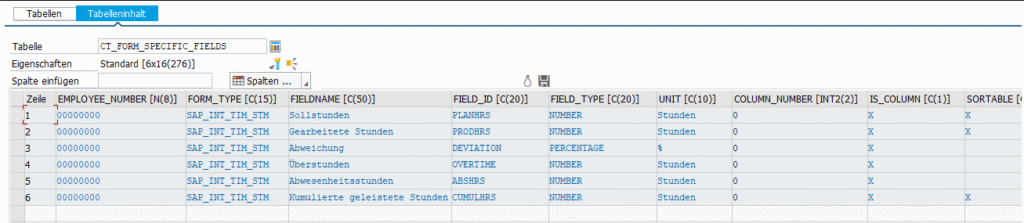
In der Meine Formulare App können über den BAdI HCMFAB_B_MYFORMS ganz einfach Spalten ausgeblendet werden. Dafür eine BAdI Implementierung anlegen und die Methode FILL_FORM_SPECIFIC_FIELDS ausprogrammieren. Zum Entfernen einer Spalte muss diese einfach aus dem CHANGING Parameter ct_form_specific_fields gelöscht werden.
Dabei einfach über den FORM_TYPE auf das entsprechende Formular filtern und die gewünschte Spalte entfernen:
DELETE ct_form_specific_fields WHERE form_type = 'SAP_INT_TIM_STM' AND field_id = 'DEVIATION'. "Abweichung entfernen
I recently had the situation, that after a standalone Gateway System got patched, a custom app in the My Inbox app did not load anymore, when clicking on a workitem. When opening the network tab in the dev tools, you could see three requests send over and over again. It called the manifest.json, a batch request to the OData Service and some i18n.properties calls. You could also see the app files in the sources tab, which means that app had already loaded correctly but could not be displayed because it kept restarting for some reason.
Since everything worked before the system patch and the custom app wasn’t changed, it must have been related to an updated My Inbox app or to the new UI5 version, which affected the custom app.
This “repeatedly loading” was exactly my problem! And since the Gateway got patched, I guess a new My Inbox version came with it. When checking the manifest.json in the custom app, there was no async property at all. After adding "async": true to the mainfest.json, the custom app started to load successful again. Nice!
After redefining an OData Service like it is described here, you also have to add your new service in your Extension Project, so that the App knows, that it should use your redefined service instead of the default one. In the WebIDE there was a wizard that helped you with this task. In BAS there is also a wizard, but only for Adaptions Projects. For a classic extension project, there is no wizard anymore, and you have to manually add your new service to the manifest.json. But it is quite simple. You have to add your new service as data source and then also as a model. When no model name is provided, it will be used as default model.
I was wondering for quite some time, what the difference is between Extension Projects and Adaptions Projects. In the comments to this blog post, I finally found the answer from Oliver Graeff:
Adaptation projects are one of the capabilities of SAPUI5 flexibility, which lets developers, key users and end users adapt/extend SAPUI5 applications. Adaptation projects are the go-to solution for developer adaptation in SAPUI5 and are the ‘next-generation’ extension projects. Using the concepts of SAPUI5 flexibility, adaptation projects offer many more possibilities, such as extending SAP Fiori elements applications or extending apps without pre-defined extension points.
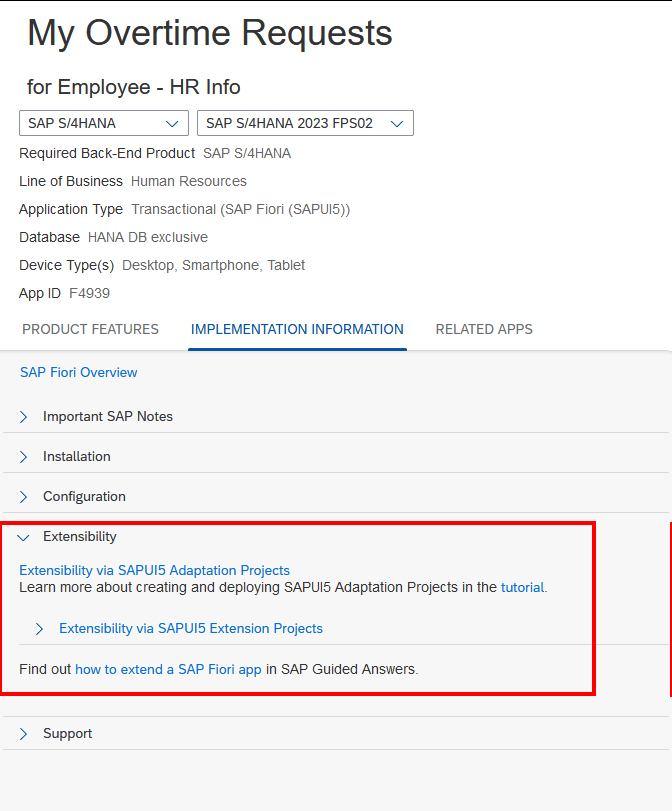
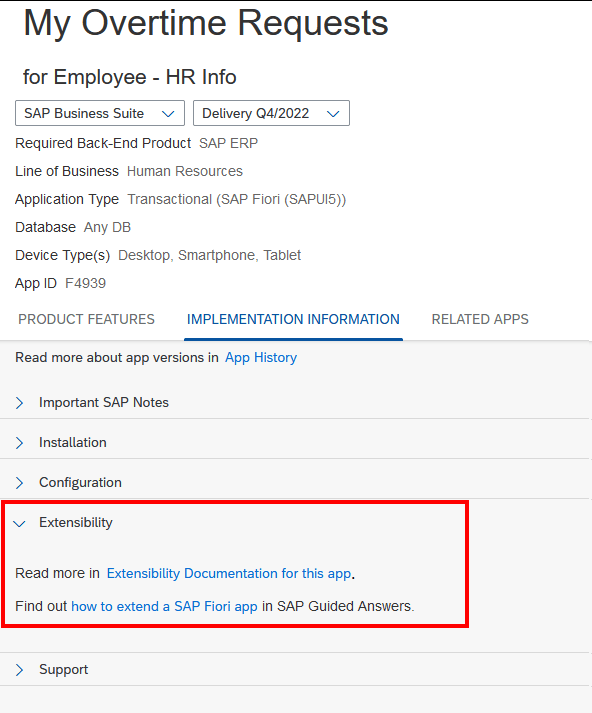
To check for a specific application, what the recommended extension approach is, simply go to the Fiori Reference Library, search for your app, choose the backend system (S/4 or Business Suite) and the current release version, navigate to Implementation Information and expand Extensibility. For example, My Overtime Requests on S/4HANA can be extended via an Adaption Project.
But on R/3, the only approach is an Extension Project.
This is discussed for many years and unfortunately will not be implemented in the UI5 framework itself (see here). There are already different blogs describing how to build a wrapper for oData requests (for example here and here).
But with ES2024 it now got super simple to do this:
this.getView().bindElement({
				path: sObjectPath,
				events: {
					dataRequested: (oEvent) => {}, // Executed when a request to server is send
					dataReceived: (oEvent) => {},  // Executed when data from server is received
					change:(oEvent) => {},         // Executed everytime you do ElementBinding
				}
			})
The events for dataRequested and dataReceived are only fired, when data is requested or data is received from a backend. This is not the case, when the requested data is already available in the model from a previous backend call. In such situations, the change event comes in handy.
// Returns the current security token if available; triggers a request to fetch the security token if it is not available.
const token = this.getModel().getSecurityToken() // Deprecated

// Returns a promise, which will resolve with the security token as soon as it is available.
const token = await this.getModel().securityTokenAvailable()
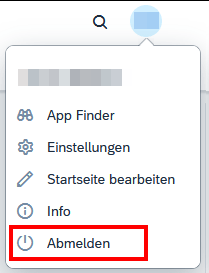
Use the attachLogoutEvent of the ushell container to trigger your approuter logout endpoint, that needs to be configured in your xs-app.json. The code in my launchpad.html looks like this: