
ps -aux | grep containerId
kill -9 processId
[Software] Using pdfunite to merge PDF documents
First install pdfunite:
sudo apt update
sudo apt install poppler-utils
Syntax:
pdfunite source1.pdf source2.pdf merged_output.pdf
If a pdf file is located in a different folder, you have to add the path like this: $home/Downloads/source1.pdf
If you want to merge all pdf’s of the current folder you cant type:
pdfunite *.pdf merged_output.pdf
An alternative with GUI is PDF Arranger.
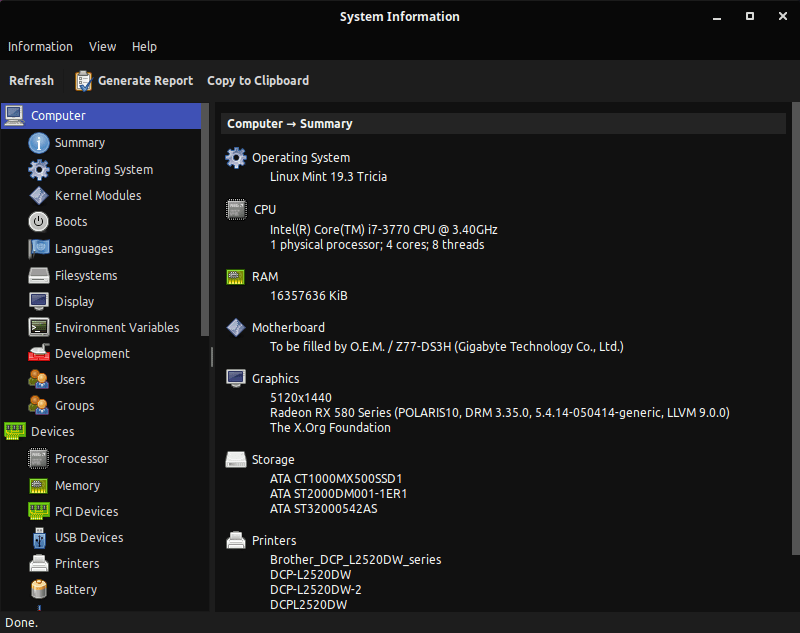
[Software] HardInfo
“HardInfo is a system profiler and benchmark for Linux systems. It is able to obtain information from both hardware and basic software, and organize it in a simple to use GUI.”
https://github.com/lpereira/hardinfo/
sudo apt install hardinfo
[Nextcloud] Run OnlyOffice Document Server in Docker
If you don’t already have it, you first have to install Docker. Then just get the docker-compose.yml for OnlyOffice
wget https://raw.githubusercontent.com/ONLYOFFICE/Docker-DocumentServer/master/docker-compose.yml
and activate the JSON Web Token validation.
nano docker-compose.yml
      - JWT_ENABLED=true
      - JWT_SECRET=your_secret
      - JWT_HEADER=Authorization
Now just run the container.
sudo docker-compose up -d
To use OnlyOffice with Nextcloud, your container needs to reachable via https, so you need to add a subdomain and SSL Certificate in your Nginx reverse proxy. Then just go to your Nextcloud installation and install the OnlyOffice Addon. There just enter the new domain to your OnlyOffice Docker Container and the JSON Web Token. Office files should now be editable in OnlyOffice.
[ABAP] Select-Option for ALV Layout
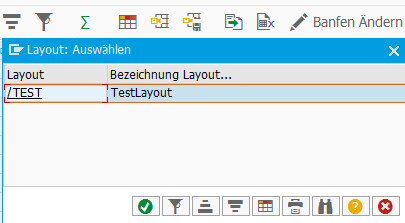

SELECTION-SCREEN BEGIN OF BLOCK b3 WITH FRAME TITLE text-b03.
PARAMETERS: p_vari TYPE slis_vari.
SELECTION-SCREEN END OF BLOCK b3.

INITIALIZATION.

  "Load default layout
  DATA: ls_layout TYPE salv_s_layout_info,
        ls_key    TYPE salv_s_layout_key.

  ls_key-report = sy-repid.

  ls_layout = cl_salv_layout_service=>get_default_layout( s_key    = ls_key
                                                          restrict = '1' ).
  p_vari = ls_layout-layout.

AT SELECTION-SCREEN ON VALUE-REQUEST FOR p_vari.

  "Value Help
  DATA: ls_layout TYPE salv_s_layout_info,
        ls_key    TYPE salv_s_layout_key.

  ls_key-report = sy-repid.

  ls_layout = cl_salv_layout_service=>f4_layouts( s_key    = ls_key
                                                  restrict = '1' ).
  p_vari = ls_layout-layout.
[Router/Firewall] Hard- & Software Sammlung
Software
Hardware
- APU-board (z.B. apu4d4 mit 4 NICs)
- Voleatech (liefert Modelle mit pfSense aus)
- NRG Systems IPU Systeme
- Zotac (z.B. ZBox Nano)
- Protecli
- Qotom
- GL-iNet (OpenWRT Wifi Routers)
Einfach zu bedienende Fertiglösungen
- UniFi Security Gateway (OS ist EdgeOS, fork von Vyatta), evtl. in Kombination mit UniFi AP
- MikroTik (OS ist RouterOS)
[Nextcloud] Maintenance mode
# Change into your nextcloud directory
cd /var/www/nextcloud/

# Enable Nextcloud-Maintenance mode
sudo -u www-data php occ maintenance:mode --on

# Do something...

# Disable Nextcloud-Maintenance mode
sudo -u www-data php occ maintenance:mode --off
[Terminal] Shorcut overview

Further shortcuts:
| Ctrl-L | Cleans the screen |
| Ctrl-Y | Pastes back the stuff erased by Ctrl-K or Ctrl-U |
| Ctrl-C | Aborts a application |
| Ctrl-Z | Suspend a application. Resume it again by fg (resume in foreground) and bg (resume in background). Use jobs if you have multiple suspended applications and use fg %# (where # is the job number) to get it back on screen or end it with kill %#. |
| Ctrl-D | is same as typing exit |
| Pos1 | like Ctrl-A |
| End | like Ctrl-E |
| Ctrl-R | Search terminal history |
| Ctrl-G | Exit searching terminal history |
Some of the shortcuts are also recognized by other applications, like Ctrl-U on Ubuntu’s graphical login screen.
[Nextcloud] Run NextCloudPi Docker with external storage
Links
NextCloudPi (Docs)
NextCloudPi on DockerHub
Current installation process (Outdated installation process, but contains some usefull information)
Installation
If you want to use the external storage app to mount an NFS share in Nextcloud, there are two ways when using Docker. Mount the NFS share directly inside the Docker container. This would be easier when the container is already up and runing. Or mount the NFS share on the Host and pass the mountpoint as an argument when creating the Docker container: -v /mnt/nfs/:/mnt/nfs/
DOMAIN=your.domain.com
docker run -ti -d -p 4443:4443 -p 443:443 -p 80:80 -v ncdata:/data -v /mnt/nfs/:/mnt/nfs/ --name nextcloudpi ownyourbits/nextcloudpi $DOMAIN --restart=unless-stopped
Now wait until you see ‘Init done’ in the logs.
docker logs -f nextcloudpi
ncdata
If you ever need direct access to your storage, you can find out where your files are located with:
docker inspect nextcloudpi
Scroll up to “Mounts” and look for the path behind “Source”.
"Source": "/var/lib/docker/volumes/ncdata/_data"
Now you still have to navigate through a few folders. I finally found my files here:
ls /var/lib/docker/volumes/ncdata/_data/nextcloud/data/ncp/files/
Update to latest NCP version
docker exec -it nextcloudpi ncp-update
[Docker] Wallabag installation
https://www.wallabag.org
https://github.com/wallabag/docker
Just replace https://your_domain with your domain.
docker run -d --name wallabag --restart=always -v /opt/wallabag/data:/var/www/wallabag/data -v /opt/wallabag/images:/var/www/wallabag/web/assets/images -p 80:80 -e SYMFONY__ENV__DOMAIN_NAME=https://your_domain -e SYMFONY__ENV__FOSUSER_REGISTRATION=false wallabag/wallabag
Check with docker ps if the docker container is successfully up and running. Now just add a new subdomain with ssl in your nginx-proxy-manager.
Default login is wallabag:wallabag.
Their corresponding android app is also available on F-droid: https://f-droid.org/en/packages/fr.gaulupeau.apps.InThePoche/