You can access the request parameter from anywhere in the *_DPC_EXT class via:
mr_request_details->parameters
You can access the request parameter from anywhere in the *_DPC_EXT class via:
mr_request_details->parameters
DATA(lv_string) = REDUCE #( INIT str = || FOR line IN table_of_strings NEXT str = str && line ).
const { executeHttpRequest } = require('@sap-cloud-sdk/http-client')
const FormData = require('form-data')
try {
//Create payload
const form = new FormData()
form.append('file', fileContent, {
contentType: 'application/pdf'
filename: 'test.pdf'
})
//Create headers
const headers = {
...form.getHeaders(),
'Content-Length': form.getLengthSync(),
}
//Send to Destination
const response = await executeHttpRequest(
{ destinationName: 'TESTINATION' },
{
method: 'POST',
url: 'myApiPath',
headers: headers,
data: form,
responseType: 'arraybuffer' // if you need the response data as buffer to prevent UTF-8 encoding
}
)
console.log({response})
} catch (error) {
console.error(error.message)
}
I have a CAP Service that provides a PDF file that I needed to display in a Fiori Elements frontend using the sap.m.PDFViewer. The viewer should be placed in a section on the object page after navigating from the ListReport main page.
My CAP Service has the following annotations to provide the PDF.
entity pdfFiles : cuid, managed {
content : LargeBinary @stream @Core.MediaType: mediaType @Core.ContentDisposition.Filename: fileName @Core.ContentDisposition.Type: 'inline';
mediaType : String @Core.IsMediaType: true;
fileName : String @mandatory;
}
Add a custom section to your view following this example: https://sapui5.hana.ondemand.com/test-resources/sap/fe/core/fpmExplorer/index.html#/customElements/customSectionContent
Two steps are necessary.
1. Add a new section via the manifest. The template path should match your app namespace.
"ObjectPage": {
"type": "Component",
"id": "ObjectPage",
"name": "sap.fe.templates.ObjectPage",
"viewLevel": 1,
"options": {
"settings": {
"editableHeaderContent": false,
"entitySet": "pdfFiles",
"content": {
"body": {
"sections" : {
"myCustomSection": {
"template": "sap.fe.core.fpmExplorer.customSectionContent.CustomSection",
"title": "{i18n>pdfSection}",
"position": {
"placement": "After",
"anchor": "StandardSection"
}
}
}
}
}
}
}
}
2. Add the section content by defining a new fragment in the file CustomSection.fragment.xml
<core:FragmentDefinition xmlns:core="sap.ui.core" xmlns="sap.m" xmlns:l="sap.ui.layout" xmlns:macro="sap.fe.macros">
<ScrollContainer
height="100%"
width="100%"
horizontal="true"
vertical="true">
<FlexBox direction="Column" renderType="Div" class="sapUiSmallMargin">
<PDFViewer source="{content}" title="{fileName}" height="1200px">
<layoutData>
<FlexItemData growFactor="1" />
</layoutData>
</PDFViewer>
</FlexBox>
</ScrollContainer>
</core:FragmentDefinition>
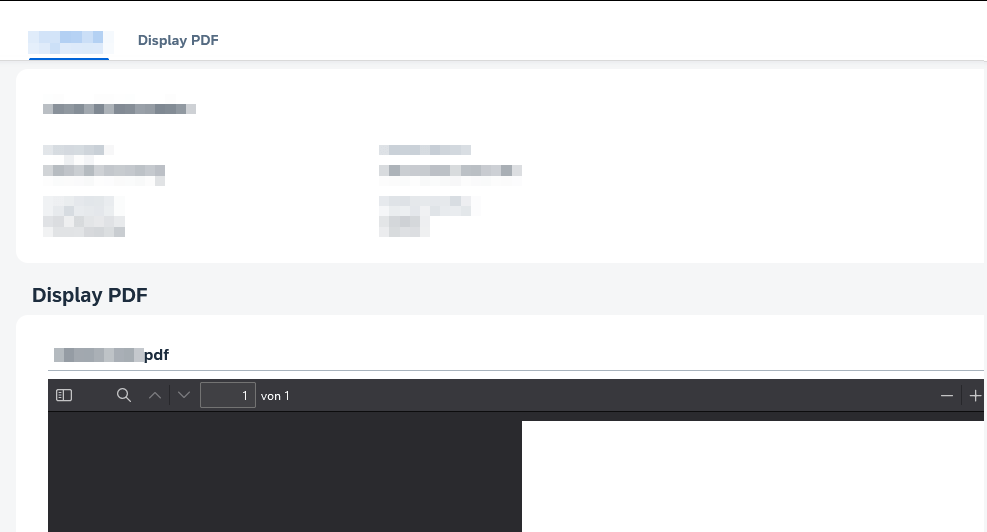
On the ObjectPage you will now have a new section containing the PDFViewer.

data-model.cds
using {
managed
} from '@sap/cds/common';
entity managedEntity: managed {
key ID : UUID;
field : String;
}
annotations.cds
using myService as service from '../../srv/myService';
annotate service.managedEntity with @(
Capabilities.SearchRestrictions: {Searchable: false},
UI.PresentationVariant : {
SortOrder : [{
Property : createdAt,
Descending: true
}],
Visualizations: ['@UI.LineItem']
},
UI.HeaderInfo : {
TypeName : '{i18n>myEntity}',
TypeNamePlural: '{i18n>myEntities}',
},
UI.SelectionFields : [
createdAt,
createdBy
],
UI.LineItem : [
]
) {
createdAt @UI.HiddenFilter : false;
createdBy @UI.HiddenFilter : false;
};
Go to https://me.sap.com/app/sappassport, request your certificate and install it in your Browser. Working with the BTP is much more convenient now, as you don’t have to enter your credentials all the time.

In the documentation they always use a star in string literals like this o => o.`*` to select all fields, but when running this it always failed. However, after some tests I found that this format works with brackets o => o.('*')
https://cap.cloud.sap/docs/guides/providing-services/#–-deep-read
entity myEntity: cuid, managed {
field1 : String;
comp : Composition of one myComposition;
}
aspect myComposition: cuid, managed {
myCompField: String;
}
const result = await SELECT.from(myEntity)
.columns(e => {
e('*')
e.comp(c => c.myCompField) //expand composition, but only select 'myCompField'
})
Update 14.09.2023: is now fixed (#)
A Composition of one can be updated via the Parent Entity, like we would do it, when dealing with an Association to one.
entity myEntity: cuid, managed {
field1 : String;
comp : Composition of one myComposition;
}
aspect myComposition: cuid, managed {
myCompField: String;
}
const { myEntity } = srv.entities
const EntityComposition = srv.entities['myEntity.myComposition'] // composition
srv.after('CREATE', EntityComposition , async (comp, req) => {
await UPDATE(myEntity, comp.ID)
.set({
comp : [{ myCompField: 'test' }]
})
})
A Composition of many must be updated via the actual Composition Entity.
entity myEntity: cuid, managed {
field1 : String;
comp : Composition to many myComposition;
}
aspect myComposition: cuid, managed {
myCompField: String;
}
const EntityComposition = srv.entities['myEntity.myComposition'] // composition
srv.after('CREATE', EntityComposition , async (comp, req) => {
await UPDATE(EntityComposition, { up__ID: comp.up__ID, ID: comp.ID }).set({ myCompField: 'test' })
})
How to create an uploadSet in combination with a CAP backend: https://blogs.sap.com/2021/08/18/my-journey-towards-using-ui5-uploadset-with-cap-backend/
You can test the uploadSet CAP backend part using these http calls:
### Create file
# @name file
POST http://localhost:4004/v2/admin/Files
Authorization: Basic admin:
Content-Type: application/json
{
"mediaType": "image/png",
"fileName": "picture.png",
"size": 1000
}
### Fill Variable from Response
@ID = {{file.response.body.$.d.ID}}
### Upload Binary PNG content
PUT http://localhost:4004/v2/admin/Files({{ID}})/content
Authorization: Basic admin:
Content-Type: image/png
< ./picture.png
### Get uploaded png
GET http://localhost:4004/v2/admin/Files({{ID}})/content
Authorization: Basic admin:
The picture.png file must be in the same folder as the http test file.
"cds": {
"requires": {
"sfsf": {
"kind": "odata-v2",
"credentials": {
"destination": "<set during runtime>",
"path": "/odata/v2",
"requestTimeout": 18000000
}
}
}
},
/*
* Handover query to some external SF OData Service to fecth the requested data
*/
srv.on("READ", Whatever, async req => {
const sf_api_def = cds.env.requires['sfsf'] //defined in package.json
sf_api_def.credentials.destination = "myDestinationName" //set your Destination name, could come from a customizing table
const sfsfSrv = await cds.connect.to(sf_api_def)
return await sfsfSrv.run(req.query)
})