It took me some time to figure out, how I can provide a label for an action parameter.
I try to separate all my translations in label.cds file. This means, the annotations are not placed where the entities or actions are defined. If you have the action definition and the label annotations in one file, you could simply do the following for an action:
trip-service.cds
entity Trip as projection on db.Trip
actions {
action approval();
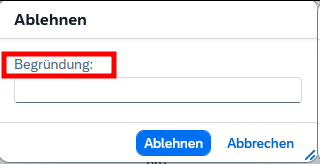
action rejection(reason: String @title: '{i18n>reason});
};
But if you separate both, you need to access somehow the defined action to add the annotation. Following a short snippet, how it works. The important part is, that you have to write a complete new annotation block for your actions.
trip-service.cds without label
service tripService @(requires: 'authenticated-user') {

    entity Trip as projection on db.Trip
        actions {
            action approval();
            action rejection(reason: String);
        };

}
label.cds
using my.namespace as db from '../db/index';
using tripService from '../srv/trip-service';

annotate db.Trip with @title: '{i18n>trips}' {
    description   @title      : '{i18n>description}';
    status        @title      : '{i18n>status}';
    // etc.
}

// solution
annotate tripService.Trip actions {
    rejection(reason @titlel: '{i18n>reason}' )
}
I was having a situation, where I needed to access file content via an association. This led to two problems, one in the backend and one in the frontend.
### Get file content via association
GET http://localhost:4004/odata/v4/admin/MainEntity({{ID}})/file/content
Authorization: Basic user:password
This did not work, because in this case, we don’t get the required file ID in the Files handler in req.data.ID (find the reason here), which is needed to read the file from the external system. Therefore, I had to implement the following workaround (line 5-8), which checks from which entity we are coming and is fetching the requested file ID from the DB.
    srv.on('READ', Files, async (req, next) => {
        //if file content is requested, return only file as stream
        if (req.context.req.url.includes('content')) {

            // workaround: when File is requested via Association from MainEntity, as the ID is then not provided directly
            if (req.context.req.url.includes('MainEntity')) {
                req.data.ID = await SELECT.one.from(req.subject).columns('ID')
            }

            const file = await SELECT.from(Files, req.data.ID)
            if (!file) return next() // if file not found, just handover to default handler to get 404 response

            try {
                const stream = await getMyStreamFromExternalSystem(req)
                return [{ value: stream }]
            } catch (err) {
                req.error(`Could not read file content`)
            }

        } else return next() // else delegate to next/default handlers without file content
    })
This way, the file content can now be read directly via File and also via MainEntity following the association.
The next challenge was to display this file content in a Fiori Elements app. This works out of the box, if the file content is called directly from the Files entity, means not over an association. But if the file content is coming via an association, it seems like the Fiori Elements framework is creating an incorrect backend call. It tries to call the mediaType from the MainEntity instead of the Files entity, resulting in a failing odata call, which looks like this /odata/v4/service/MainEntity(key)/mediaType instead of /odata/v4/service/MainEntity(key)/file/mediaType. The only workaround I found was to overwrite the @Core.MediaType annotation coming from the Files entity by setting the mediaType to a hard value in the annotation.yaml of the Fiori Elements App.
annotate service.fileservice@(
UI.FieldGroup #FileGroup : {
$Type: 'UI.FieldGroupType',
Data : [
{
$Type: 'UI.DataField',
label: 'Main ID',
Value: ID,
},
{
$Type: 'UI.DataField',
label: 'File ID',
Value: file.ID,
},
{
$Type: 'UI.DataField',
Value: file.content,
},
{
$Type: 'UI.DataField',
Value: file.mediaType,
},
{
$Type: 'UI.DataField',
Value: file.fileName,
},
{
$Type: 'UI.DataField',
Value: file.size,
},
],
},
UI.Facets : [
{
$Type : 'UI.ReferenceFacet',
ID : 'GeneratedFacet2',
Label : 'File Information',
Target: '@UI.FieldGroup#FileGroup',
},
],
);
// Workaround as currently display file content via an association in Fiori Elements is incorrectly trying to fetch the media type.
// Therefore add a fix value for the media type. Of course, this only works, if you only expect a specific file type.
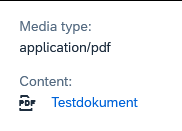
annotate service.Files with {
@Core.MediaType : 'application/pdf'
content
};
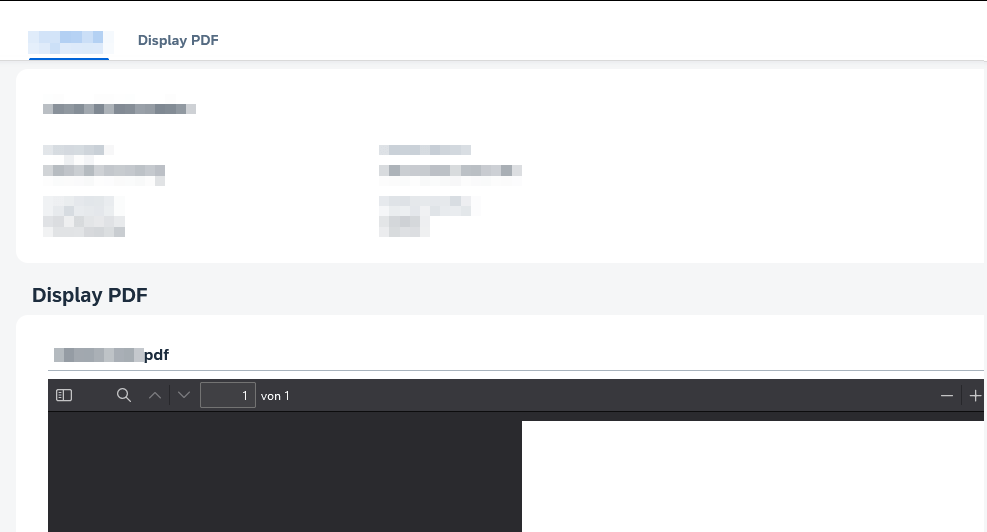
In the Fiori Elements App it will now be displayed like this and by clicking on the Context, it will successfully load the file from the backend:
I had a generated Fiori Elements App (done by using @sap/generator-fiori), containing a List, where I needed to add a custom column containing a Button. I found this well explained in the official documentation:
I followed the instructions exactly, but it didn’t work. When comparing my manifest.json again with the example, I noticed one minor difference. In my generated App, there was an extra items/ in front of the @com.sap.vocabularies.UI.v1.LineItem.
My generated AppThe manifest.json sample
After removing items/ the custom column was suddenly visible. When I noticed the difference, I thought that would never be the reason. Luckily, I tested it after all. That really is a big problem with Fiori Elements. These are problems that can no longer be solved by debugging or similar.
Here some more helpful links, when challenging with a custom column:
I have a CAP Service that provides a PDF file that I needed to display in a Fiori Elements frontend using the sap.m.PDFViewer. The viewer should be placed in a section on the object page after navigating from the ListReport main page.
My CAP Service has the following annotations to provide the PDF.
mkdir ~/.npm-global
npm config set prefix '~/.npm-global'
mkdir ~/.npm-global/lib
#add the following line to your .bashrc or .profile or .zshrc
export PATH=~/.npm-global/bin:$PATH
Step 1: Provide an OData V4 service
git clone https://github.com/sap-samples/cloud-cap-samples remote-odata-service
cd remote-odata-service
npm i
npm i -g @sap/cds-dk
cds watch fiori
Step 2: Generate a SAP Fiori elements List Report Object Page (LROP) app with Fiori tools
1. Open VSC, press Ctrl + P and search for > Fiori: Open Application Generator
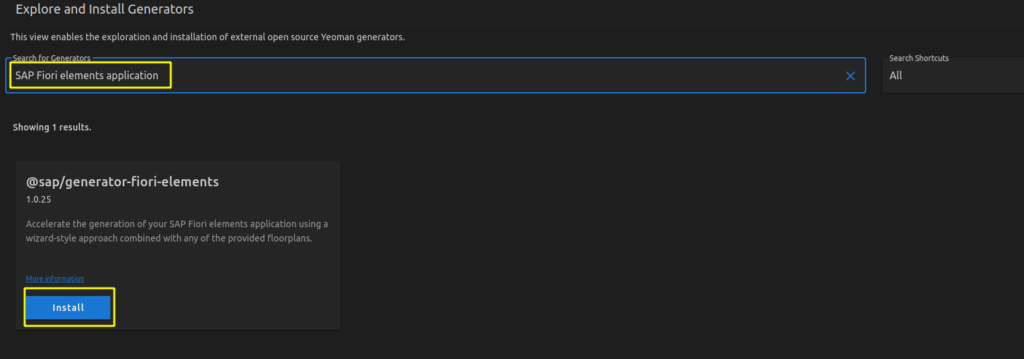
2. Choose SAP Fiori elements application In my case there was no default generator, so first I had to install it.
3. Select List Report Object Page 4. Select Connect to an OData Service as Data source and enter as URL http://localhost:4004/browse 5. Choose Books as the Main entity and texts as Navigation entity 6. Complete the mandatory information module name (e.g. bookshop) and Project folder path for storing your app. Of course, you can also fill in the optional information.
Step 3: Make changes in package.json and ui5.yaml required for using OpenUI5
specVersion: '2.2'
metadata:
  name: 'fiorielements_openui5'
type: application
framework:
  name: OpenUI5
  version: "1.85.0"
  libraries:
  - name: sap.m
  - name: sap.ui.core
  - name: sap.uxap
  - name: themelib_sap_fiori_3
server:
  customMiddleware:
  - name: fiori-tools-proxy
    afterMiddleware: compression
    configuration:
      ignoreCertError: false # If set to true, certificate errors will be ignored. E.g. self-signed certificates will be accepted
      backend:
      - path: /browse
        url: http://localhost:4004
  - name: fiori-tools-appreload
    afterMiddleware: compression
    configuration:
     port: 35729
     path: webapp
Step 4: Run the V4 application
cd ~/projects/fiorielements_openui5
npm i
npm start
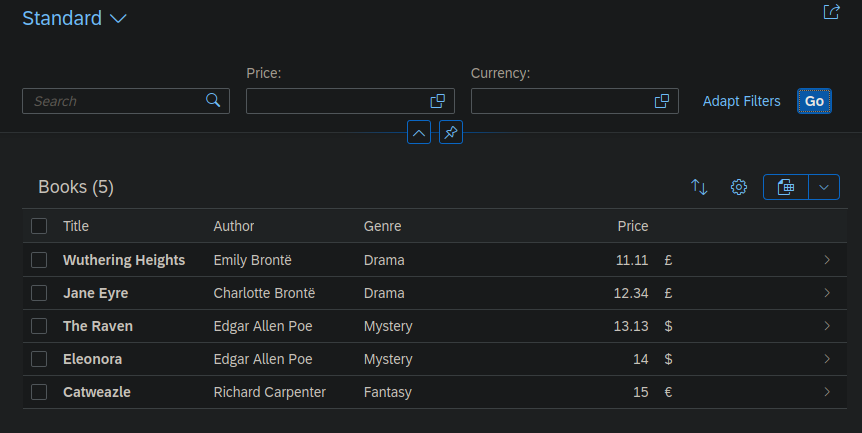
Now http://localhost:8080/index.html should be opened in your browser. “Note: Clicking on the Go button in List Report application might request user and password. Please enter user alice, no password.” Finally I got my list items.