Homelab, Linux, JS & ABAP (~˘▾˘)~
 

[Home Assistant] Zigbee Devices I use in my Smarthome

This is just a personal list of Zigbee devices I use at home. The list is sorted in the order in which I bought the devices. You can tell this by the fact that I paid way too much for the first few devices before I got into the “AliExpress” game. 🙂

Helpful databases:
https://www.zigbee2mqtt.io/supported-devices
https://zigbee.blakadder.com/

ManufacturerModelTypeZ2MParingBattery/PoweringBest price I got it forComment
BlitzwolfBW-SHP13 Smart SocketPlug (incl. power measurement)#Pair this device with a long press (5 seconds) on the on/off button230v9,45€
BlitzwolfBW-SHP15 Smart SocketPlug (incl. power measurement)#Pair this device with a long press (5 seconds) on the on/off button230v8,98€
GermaPlugPlugPair this device with a long press (5 seconds) on the on/off button230v8,97€
Ikea TRÅDFRI MotionMotion sensor#Press pairing button 4 times2xCR20329,99€
Ikea TRÅDFRI RepeaterSignal Repeater#Push the reset button of the device with a paperclip for 5 seconds230v
Ikea TRÅDFRI LEDLED bulb E27#230v
IkeaTRÅDFRI Wireless dimmerDimmer / switchI’ve actually never used it.
IkeaTRÅDFRI SteckdosePlug#Press and hold the reset button until the white light starts fading230vFrom my eight devices, one already died.
IkeaBADRINGWater Leakage Sensor#Press the pairing button 4 times within 5 seconds1xAAA
IkeaE1743Dimmer / switch#Press the pairing button 4 times1xCR2032I’ve actually never used it.
Müller-LichttintLED bulb E14230v15,00€
Xiaomi MijiaGZCGQ01LMLight sensor11,75€Had no real use case for the device so far.
AqaraMCCGQ11LMContact sensor#Press and hold the reset button on the device for +- 5 seconds (until the blue light starts blinking).1xCR16328,56€Somehow, this device loses the connection to my Zigbee network every few months, and reconnection always causes problems.
AqaraWSDCGQ11LMTemperature and humidity sensor#Press and hold the reset button on the device for +- 5 seconds (when the blue blinks, immediately release the button for pairing to start).1xCR203213,93€Somehow, this device loses the connection to my Zigbee network every few months, and reconnection always causes problems.
AqaraSSM-U01Single Switch Module T1 (with neutral)#Press button on device for 8 seconds, or toggle external switch 5 times (if it does not work, continue toggling the switch).230v24,00€Supports rocker switch (bistable / Wippschalter) or rebound switch (monostable / Wipptaster). Switch mode can be changed via Zigbee2MQTT.
FAQ. Manual.
Ledvance (ex. OSRAM)SMART+ GardenpoleLED Garden lighting#Turn light 5x for 5 sec on and 5 sec off230v34,99€
LedvanceSMART+ BT TIBEA Pendant Tunable WhiteLED Pendant lamp#Turn light 5x for 5 sec on and 5 sec off230v
OSRAM (LIGHTIFY)Classic A60 W clearLED bulb E27Turn light 5x for 3 sec on and 5 sec off230v7,99€These bulbs can lead to problems in the Zigbee network. Cannot find the source anymore, where I’ve read this…
LidlLIVARNO LUX HG06106CLED bulb E27#Check zigbee2mqtt docs230v
LidlSilverCrest HG06335/HG07310Motion sensor#Factory reset the motion detector by holding the reset button (little hole on the right side, not the button on the back) for 5 seconds.In my experience, I had many issues pairing this device using Zigbee2MQTT. With ZHA it was always working on the first try. Also, it helped to remove the battery before paring.
Very poorly performing motion detector… already replaced it.
LidlLIVARNO Smart Home Outdoor-LED-BandLED Strip#Turn device on/off 3 times230vSome LEDs are not working anymore.
LidlLIVARNO home LED-BandLED Strip#Turn device on/off 3 times230vThe LED controller makes a high-pitched noise, which is super annoying.
After about 3 years, the controller stopped working completely.
PhilipsLWA001LED bulb E27#Only by using the Philips RWL021 remote. Press on & off buttons on the remote for 5 seconds close to the lamp. (#)230v
PhilipsRWL021Dimmer / switch#Factory reset the Hue dimmer switch by pressing and holding the setup button on the back for 10 seconds.CR2450Can also be used to reset Zigbee devices of other brands.(#)
SonoffSNZB-02DTemperature and humidity sensor#Press pairing button for 5 seconds CR245012,62€Somehow, this device loses the connection to my Zigbee network every few months. Check here for troubleshooting. I replaced it with another temp sensor.
SonoffZBMINIL2Smart Switch (no neutral)#Press the pairing button for 5 seconds, until the signal LED flashes slowly.
230v12,28€Supports rocker switch (Wippschalter) and push button (Wipptaster). To change mode, press the pairing button very fast three times (so fast that the relay does not get trigger while doing that) until the green LED flashes 3 times.
ONENUOTH01ZTemperature and humidity sensor#Press pairing button for 5 seconds (review)3xAAA11,13€Somehow, this device loses the connection to my Zigbee network every few months. That’s why I replaced it.
WenzhiWZ-M100-WPresence sensor#Connect via USB cable and press pairing button for 5 seconds5v USB-C11,83€Device is spamming the network with default firmware.
Device also works via ZHA via a custom quirk (see comments here).
There is also a custom firmware, but it cannot be flashed via OTA.
_TZE204_ztc6ggyl
TuyaZG-205Z/APresence sensor#Connect via USB cable and press pairing button for 5 seconds5v USB-C12,22€So far, the only Zigbee presence sensor, that is not spamming.
_TZE200_2aaelwxk
WenzhiMTG275-ZB-RLPresence sensor#Press and hold pairing button for more than 3 seconds230v17,64€Device is spamming the network. Check here.
_TZE204_dtzziy1e
ONENUOTS0207Water leak sensor#Press and hold pairing button until red LED is flashing2xAAA3,79€
eWeLinkSNZB-04Contact sensor#Press and hold the RESET button for 5 seconds till red LED flashes2xAAA2,29€
HEIMANHS1SASmoke detector#Press and hold the RESET button for 2 seconds till Test Button LED flashes green1x CR17335/CR123A15,79€
TuyaPA-44ZSmoke detector#Press and hold test/mute button for 10 seconds till LED flashes quickly1x CR173356,39€Low battery alert: ≤20%
TuyaTS0505B_1LED Ceiling Light#Turn device on/off 3 times230v18,81€The colors have very low brightness, nearly unusable during daytime
AlectoSMART-HEAT10Thermostat#Press 7 times on the display2xAA (1,5V)15,99€The device can be paired, without attaching it to a valve.
Does not provide many entities. Also, very bad battery lifetime.
TuyaSZ-A60-18WLED bulb E27#Turn device on/off 3 times4,39€Brand: Gleco | 500-999 lumen
AVATTOME168Thermostat#Rotate the knob until temperature state is ‘OF’, press and hold the knob for 5 seconds. Wi-Fi icon should flash.2xAA (1,5V)16,70€Set the temperature to maximum (35°C) before installation.
Tuya (Moes)TRV601Thermostat#In manual mode, turn the knob counterclockwise until the screen displays ‘OF’. Press and hold the middle button for 3 seconds until the WI-FI icon flashes.3xAA (1,5V)16,41€I noticed that it helps to re-insert the batteries, if the device won’t pair. Also, it’s important to first attach the thermostat to the valve and run the adapting process first.
This is so far my favorite TRV, as it provides more entities than the other ones.
MoesBHT-002-GAThermostat#Turn thermostat off, press and hold the temperature down button for +- 8 seconds230v28,40€Very positive review, but in my case the device is spaming the zigbee network… And unfortunately, sometimes there a some temperature spikes, which destroy the history graph in HA. This is also mentioned in the comments of the review.
Lucky via this thread, I found a custom firmware that can be flashed via OTA.
TuyaSmart SocketPlug (incl. power measurement)#
Pair this device with a long press (5 seconds) on the on/off button
230v2,93€
TuyaZTH08-ETemperature and humidity sensor#Press and hold the reset button on the device for +- 5 seconds 3xAAA5,86€
TuyaZTH01 Temperature and humidity sensor#Press and hold the reset button on the device for +- 5 seconds (until the network indicator at the top of the display starts blinking).2xAAA2,60€In Zigbee2MQTT, recognized as TS0201
MoesMS-105ZSmart Dimmer#To reset the device you need to have a switch wired between L and S, or short them using a tool like a voltmeter. Press the switch for 10 times, then wait for one second. If successful, you will hear three long beeps followed by a series of short beeps that will continue until the device is paired.
230v8,90€
SonoffZBMINIR2Smart Switch#Press the pairing button for 5 seconds, until the signal LED flashes slowly.230v1,73$
(1,52€)
Tuya (Zemismart)SPM02V2.5Power meter#Press the reset button 3~5 seconds til the LED is quickly flashing400v32,45€Unfortunately device is spamming the network a bit. The report interval can be changed on devices with newer firmware version. My device seems to have an older firmware and update is only possible via official hub…
MoesMoes ZS-EUD_1gangSmart touch dimmer#Press and hold On/Off Button for 5 seconds230v16,01€
eWeLinkSNZB-04_eWeLinkContact sensor#Press reset key for more than 6s until the indicator is flashingCR20232,60€It is labeled C3007 on the box.
Small device, but very bad battery lifetime.
SonoffTRVZBThermostat#Turn the device off and hold down the top button for 3 seconds.
The device must first be attached to the valve.
3xAA12,98€It’s possible to adjust the valve opening and closing degree.
TuyaTH02ZTemperature and humidity sensor#Press paring button (next to the batteries underneath the cover) for 5 seconds2xAAA3,50€It is labeled TH08Z-B on the box
eWeLinkSNZB-02Temperature and humidity sensor#Press and hold the RESET button for 5 seconds till red LED flashes2xAAA2,43€Got paired as SNZB-02, but it does look like a TH02Z
TuyaTS0203 (black)Contact sensor#Press and hold the reset switch on the device, the pinhole on the side of the device, using the provided reset pin for +- 5 seconds2xAAA3,70€It is labeled ZD06 on the manual. The device is working great, but the quality of the case seems to be very low.
TuyaTS0203 (white)Contact sensor#Press and hold the reset switch on the device, the pinhole on the side of the device, using the provided reset pin for +- 5 seconds2xAAA2,31
eWeLinkSNZB-03Water Leakage Sensor#Press and hold the RESET button for 5 seconds till red LED flashes2xAAA3,50€Got paired as SNZB-03 (motion sensor), but does look like an IH-K665. Switch in HA from occupancy to moisture in the device settings.
Tuya809WZTMotion sensor#Use a pin to press and hold the “SET button” of the sensor for 5s until the indicator flashes quickly. (button at the bottom, LED is at the front)2xAAA2,58€
ZbeaconTH01Temperature and humidity sensor#Press and hold the RESET button for 5 seconds till red LED flashes2xAAA2,31€
DycsmYG400ASmoke detector#Press and hold the RESET button for 5 seconds till LED flashes2xAAA5,93€
TuyaTS0603Garage door opener#Press reset key for about 10 seconds until the indicator light flashes quickly230v13,08€
HOBEIANZG-204ZV
Motion & temperature & humidity sensor
#Press and hold the RESET button for 3 seconds till LED flashes2xAAA1.78$
(~1,50€)
  
Device does not work. Motion is detected every few seconds until the battery is empty.
ONENUO (Tuya)ZP01Motion sensor#Press and hold the RESET button for 5 seconds till red LED flashes2xAAA2.58€
HOBEIANZG-102ZMVibration sensor#Press and hold the RESET button for 3 seconds till LED flashes2xAAA2.21$
Telink Semiconductor (Tuya)TS0202Motion sensor#Press and hold the RESET button until LED flashes2xAAA1.86$ (~1,43€)

[Home Assistant] YAML Anker und Aliase

In YAML werden Anker (&) und Aliase (*) verwendet, um Redundanzen zu vermeiden, indem Konfigurationsblöcke einmal definiert und an anderer Stelle wiederverwendet werden. Super praktisch!

https://support.atlassian.com/bitbucket-cloud/docs/yaml-anchors

definitions: 
  steps:
    - step: &build-test
        name: Build and test
        script:
          - mvn package
        artifacts:
          - target/**

pipelines:
  branches:
    develop:
      - step: *build-test
    main:
      - step: *build-test

Damit kann man die ein oder andere Home Assistant Konfiguration etwas verkürzen.

[Home Assistant] Sciencer smart lock V1 Pro+

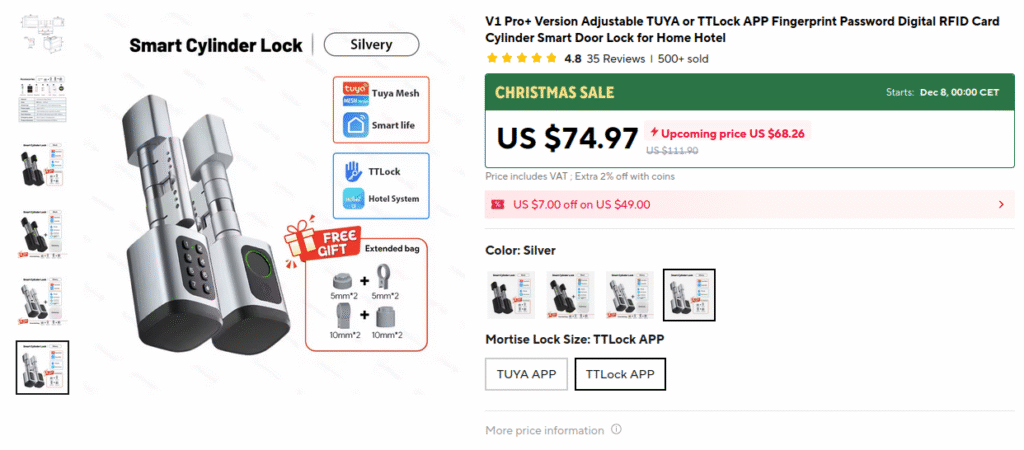
I always wanted to try one of these cheap Smart Locks from AliExpress. In November, I saw a good offer and ordered one. Most of these Smart Locks have Bluetooth and can be connected to Wi-Fi using an extra hub. Depending on the lock version, it can either be used with the Tuya App or the TTLock App. In some comments I’ve read, that TTLock is the better way, when planing to integrate the lock in Home Assistant.

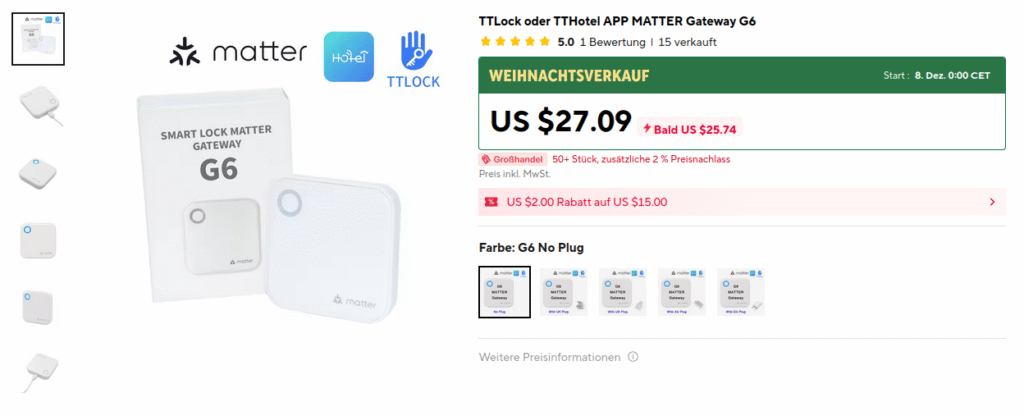
Additionally, in some comments that I don’t find anymore, someone wrote that the new G6 Hub supports Matter, and this way the lock can be added locally to Home Assistant, instead of the TTLock Cloud based service. But only one lock per Hub can be published via Matter. I found no information what entities will be published by the Hub via Matter. That’s why I ordered one and tested myself.

I bought the following two devices:

Sciener smart lock V1 Pro+ for 50,95$ in the TTLock version without Gateway

Smart Lock Matter Gateway G6 for 24,07$

Setup was super easy and the lock works perfectly fine! Setting up the hub and the TTLock app was also easy.

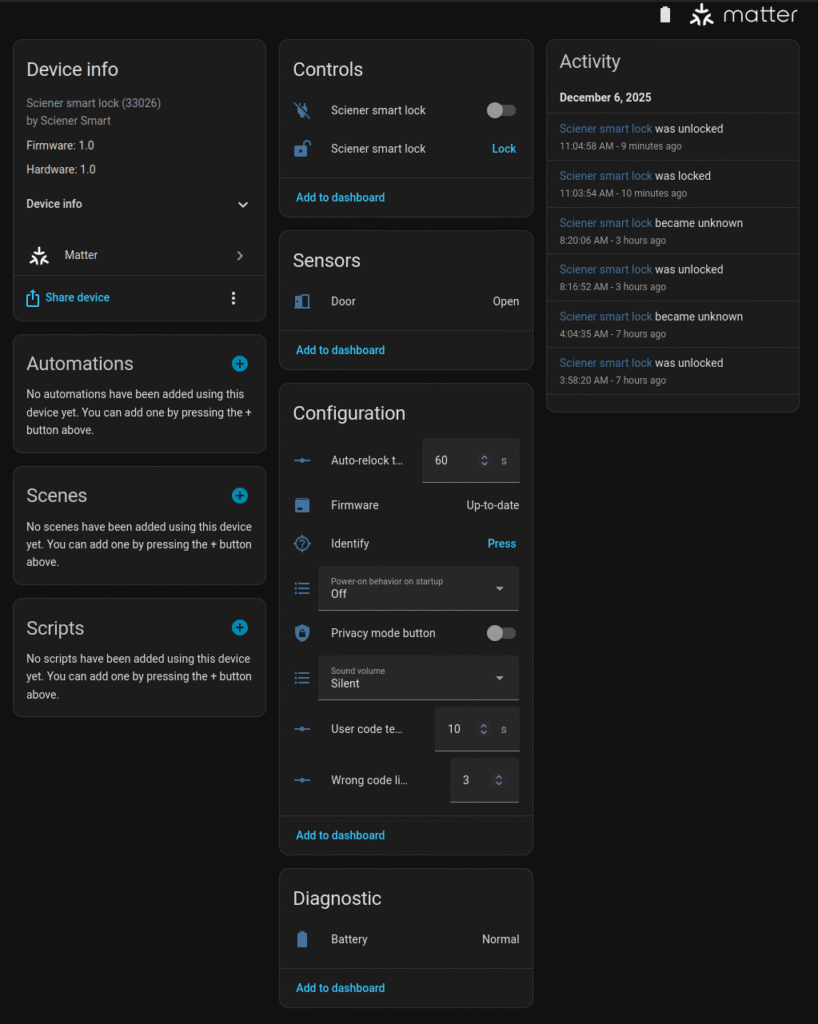
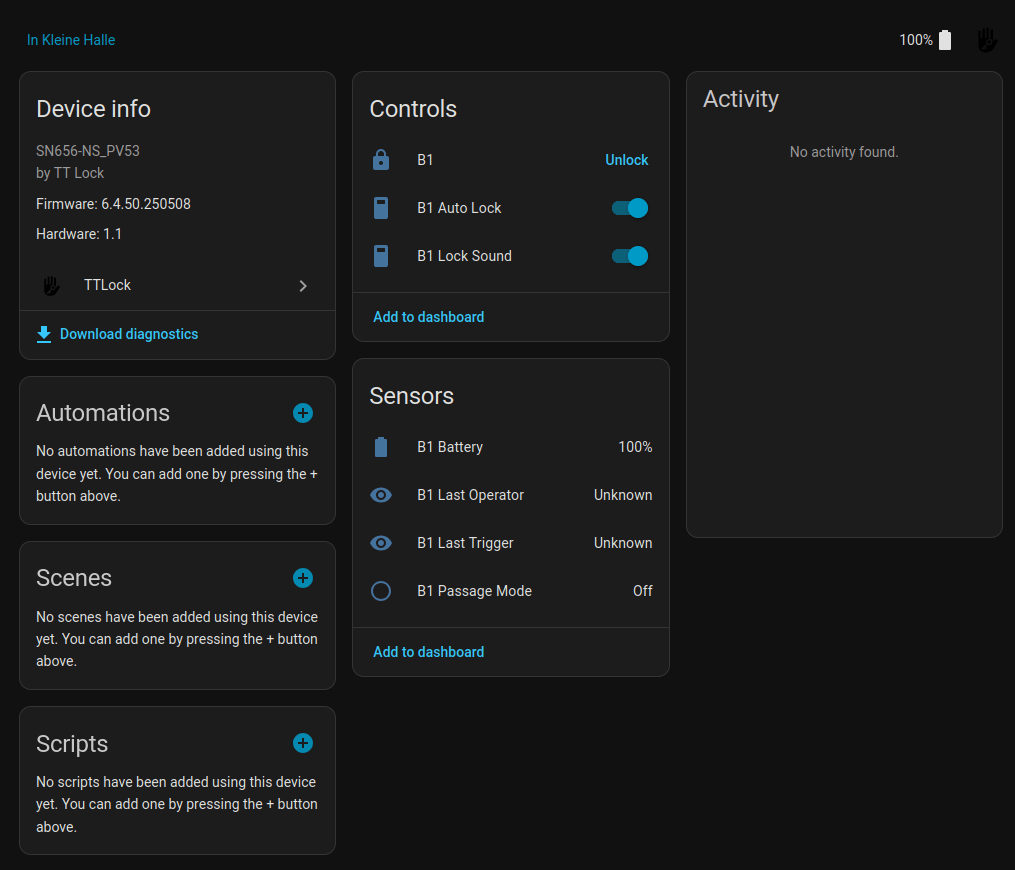
Here is a screenshot what I got after adding the Hub to Home Assistant via Matter.

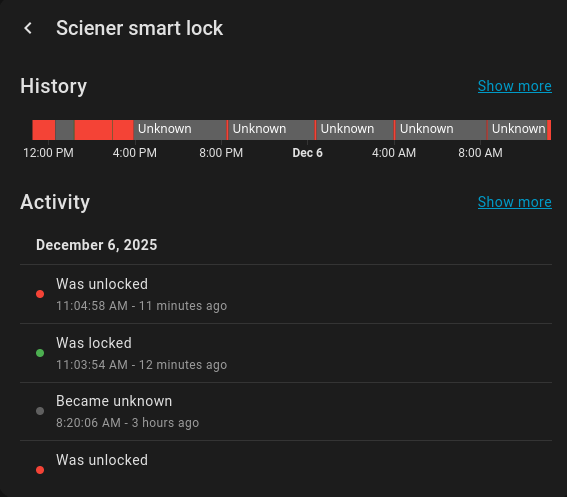
This looked promising, but it turned out, nothing ever gets updated…. the only thing that updates occasionally is the lock.sciener_smart_lock control (second control in the screenshot), but most of the time it is in status unknown. Not sure what is going on here, but even is the status is not unknown, it stays in the status “unlocked” most of the time, even if the lock is currently locked. However, it is possible to unlock the door via Home Assistant, but most of the time you first have to hit Lock, although it is already locked, and then Unlock. But in daily use, you would rarely open the lock via Home Assistant anyway, as using the fingerprint is much quicker. However, for me, it was more important to monitor who and when unlocked the door, but this information is not provided.

As the Matter integration turned out to be a fail, I set up the TTLock integration, which depends on the cloud.

Using TTLock it is a similar situation. At least the lock control is always in status Locked, and the lock can be unlocked from Home Assistant, but the sensors are never updated and also there is no lock history. Means opening the lock using the fingerprint, does lead to any update in the Home Assistant lock history. So even the TTLock Integration does not provide any real value…

I guess the lock does not provide many updates to the hub to enhance the battery lifetime. This means monitoring the lock in Home Assistant is currently very limited. Anyway, the lock is a great improvement in our daily lives, and I already wonder how I managed to live without it all these years. 🙂

Update 24.06.2026: Over the past two weeks, the fingerprint sensor suddenly stopped working properly. For some reason, it would only recognize my finger every third or fourth time. It turned out that after replacing the battery – even though the app still showed 25% – everything worked perfectly again.

So the first set of batteries lasted a little over half a year, which is pretty good, since we use our door often! And by “often” I mean about 10 to 20 times a day, and even more often in the summer, since we also use the door to go out into our garden!

[Home Assistant] Update firmware on Sonoff Zigbee USB Dongle-P

Recently, I saw this video showing a super easy way to update the firmware of a SONOFF Zigbee Stick: https://www.youtube.com/watch?v=-_bE_PbZwO0

Just for reference, this was the way I did it previously: https://nocin.eu/home-assistant-update-firmware-on-sonoff-zigbee-usb-dongle-p/

Following just a few notes and screenshots, doing a firmware update using the SONOFF Dongle Flasher.

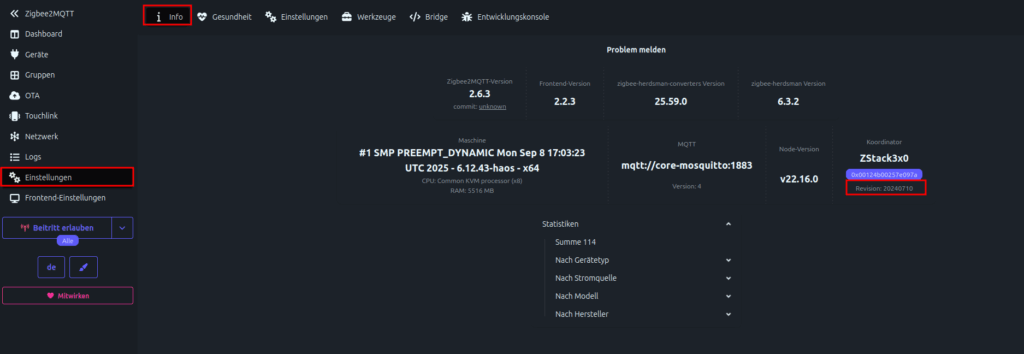
1. Optional: Check current firmware version

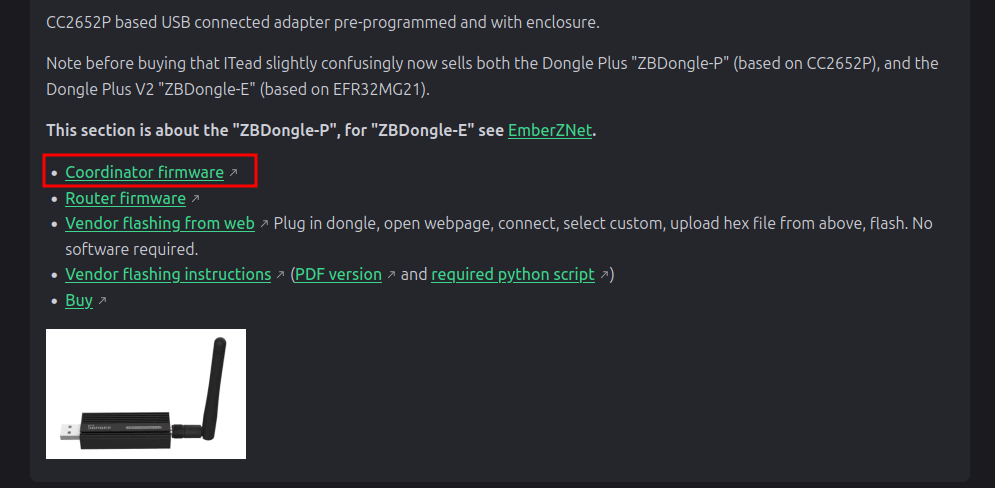
and compare with latest firmware version here

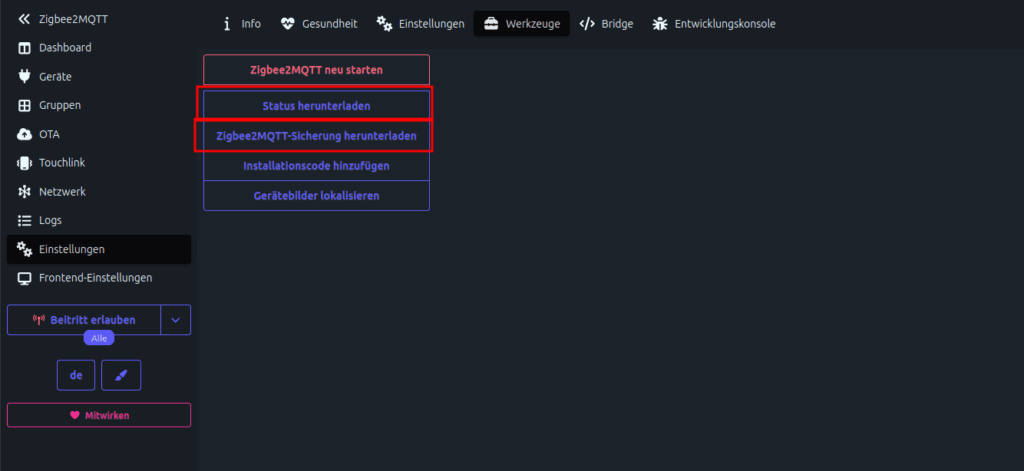
2. Do a backup

3. Stop Z2M and install the SONOFF Dongle Flasher

Install https://github.com/iHost-Open-Source-Project/hassio-ihost-addon

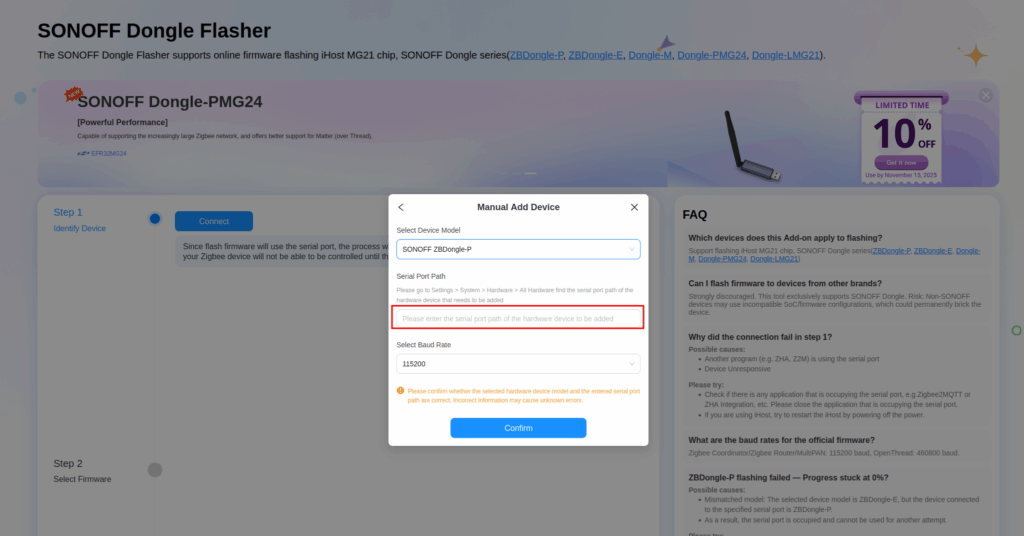
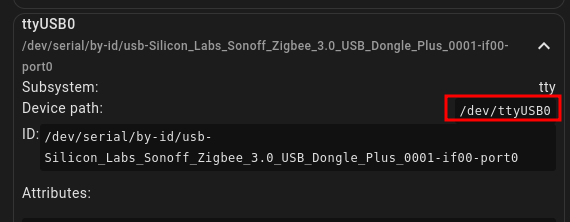
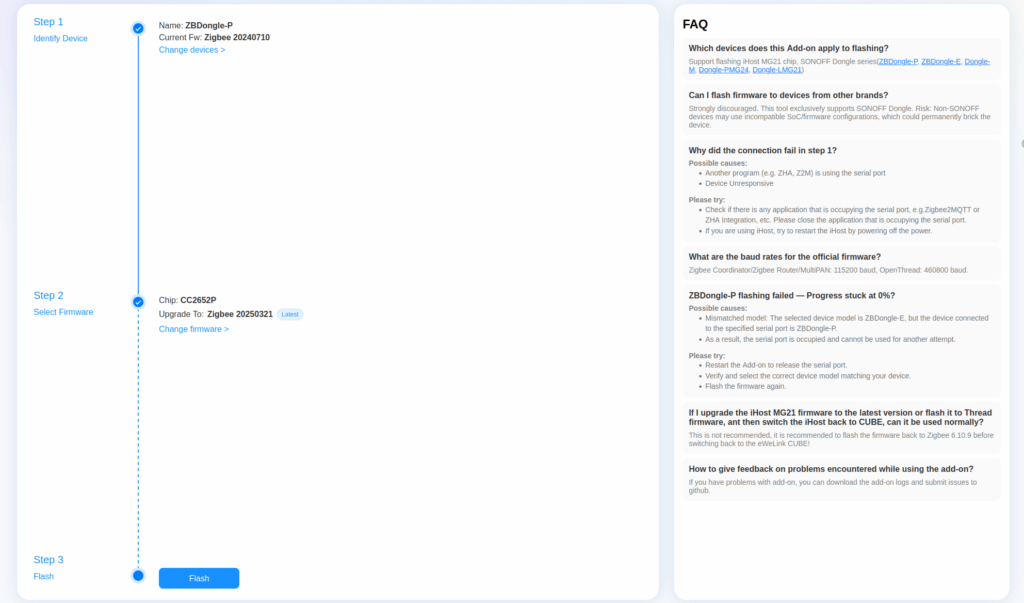
Start Add-on, open WebUI and hit the connect button. If your dongle is not found, simply manually add the device. The rest is pretty self-explanatory.

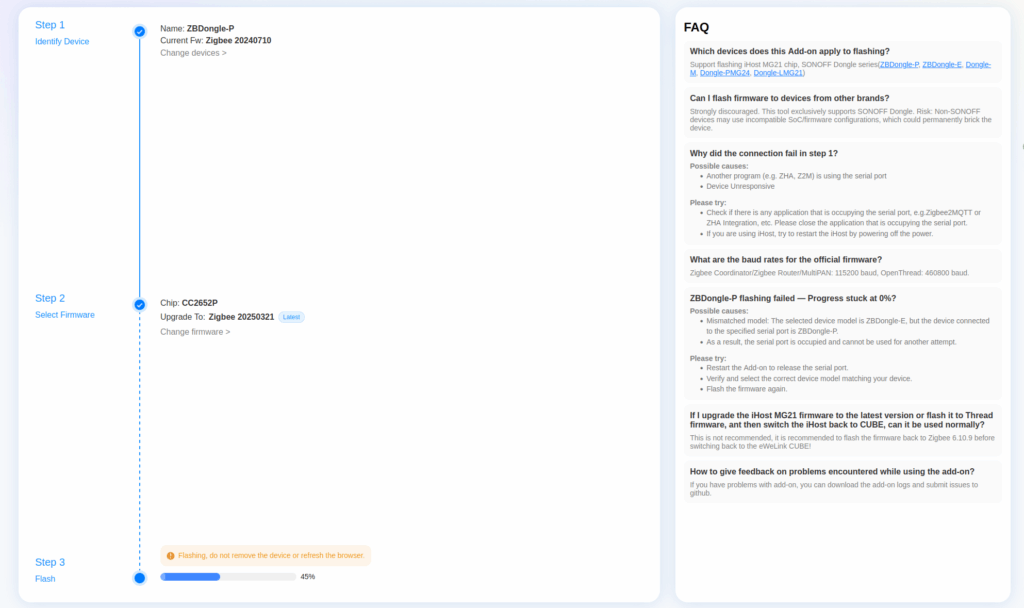
4. If flash was successful, stop SONOFF Dongle Flasher and Start Z2M again. Check new version in Z2M WebUI. And that’s it.

[Home Assistant] Zigbee Garagentoröffner

Wir haben zu unserem alten Haus auch eine alte Doppelgarage bekommen. Die Garage ist in einem Zustand, dass man sie eigentlich nur noch abreißen kann. Aufgrund des Alters ist sie so schmal, dass heute gängige Autos quasi gar nicht hineinpassen. Von den zwei Garagentoren ist immerhin eines elektrisch. Verbaut ist ein Genie Screw Drive Antrieb. Die Firma Genie gibt es heute noch, unser Modell ist aber sicher >30 Jahre alt und gibt es natürlich nicht mehr im Sortiment.

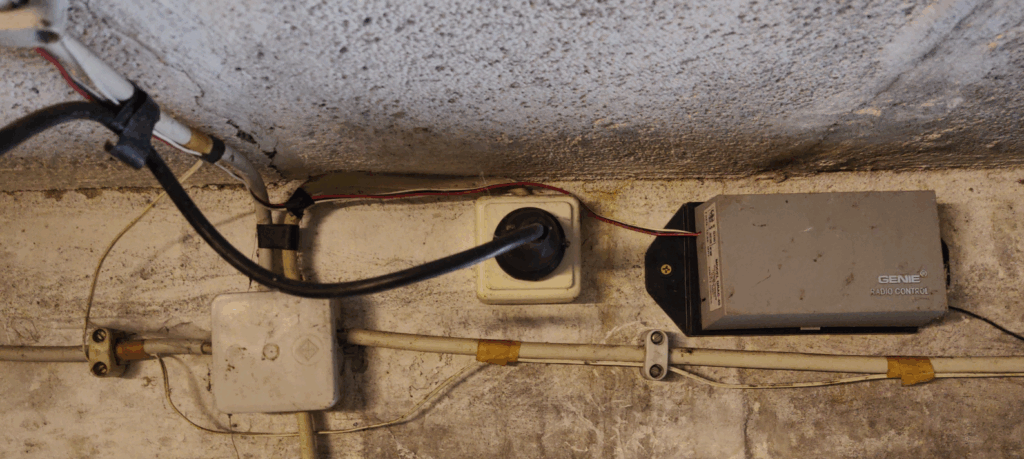
Das Tor öffnen kann man über einen Taster oder einer Fernbedienung. Dafür wurde zusätzlich noch ein Genie Radio Control Modul verbaut (der graue Kasten rechts neben der Steckdose). In der Steckdose ist praktischerweise der Garagentormotor angeschlossen. Und der weiße dünne Draht, der an dem Stromkabel nach rechts langläuft, führt zum Taster.

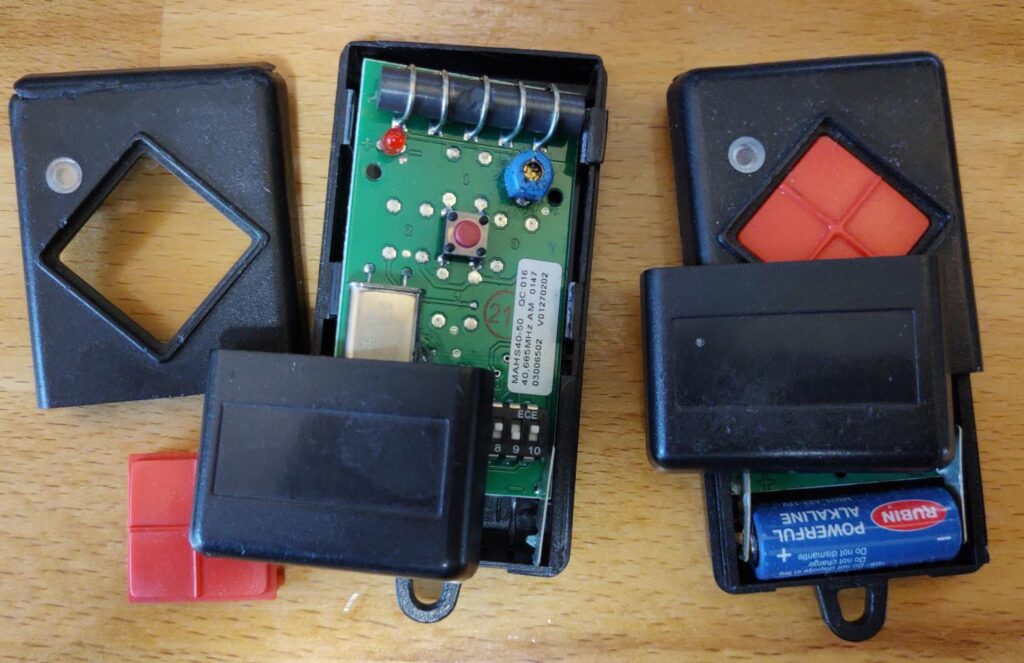
Die Fernbedienungen hatten mittlerweile beide das zeitliche gesegnet. Na gut, über eine sind wir auch mit einem Auto drübergefahren… 🙂

Interessanterweise gibt es den Dickert Handsender MAHS40-01 (10 Codierschalter) heute noch. Der Preis ist natürlich absolut lächerlich mit >30€.

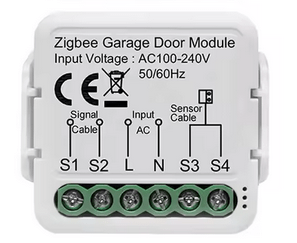
Nach kurzer Recherche auf AliExpress habe mir daher lieber einen Zigbee Garagentoröffner gekauft für 13,08€.

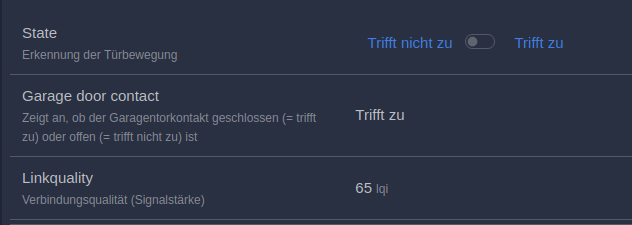
Erheblich günstiger und nun kann die Garage auch in Home Assistant integriert werden. Erkannt wird der MANHOT Garage Door Opener in Zigbee2MQTT als Tuya TS603. Zwei Entitäten werden bereitgestellt, eine zum Öffnen und Schließen des Tores und eine weitere zeigt den aktuellen Status des Tores an.

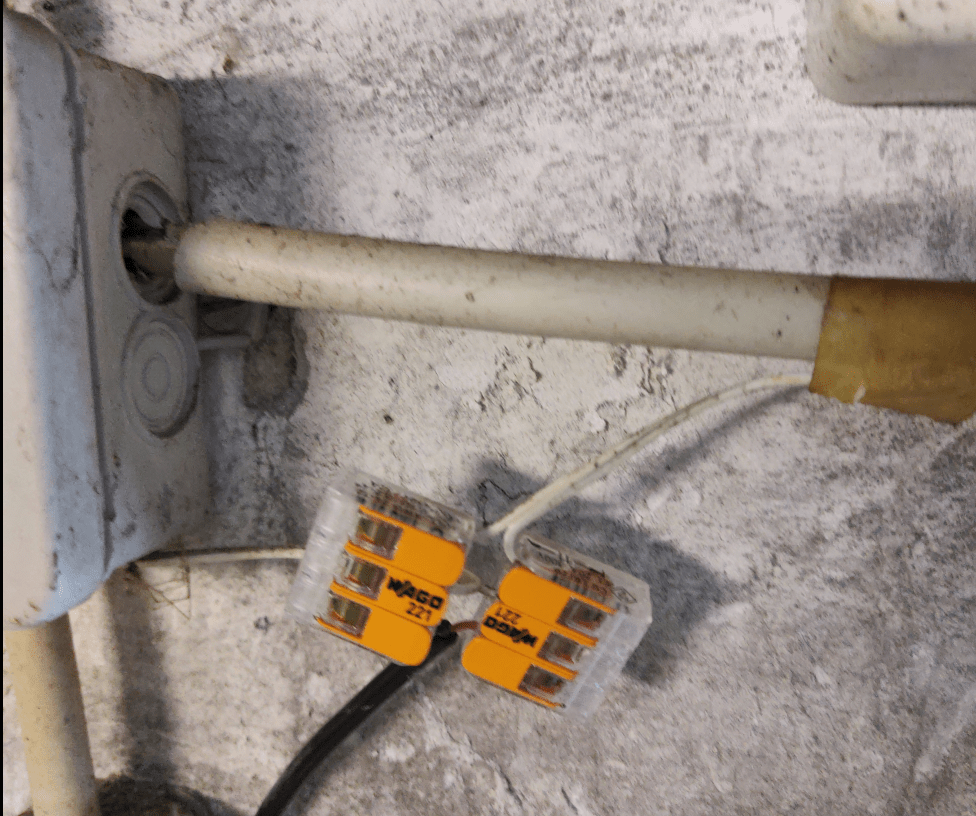
Die Installation habe ich mir so einfach wie möglich gemacht. Einen Schönheitswettbewerb bei der Verkabelung gewinnt man in unserer abrissreifen Garage sowieso nicht mehr. Ich habe daher einfach den Draht vom Taster durchtrennt

und dann wieder mit zwei 3er WAGO Klemmen verbunden, sodass die Taster Funktion erhalten bleibt. Die WAGOs sind eigentlich etwas zu groß für den dünnen Draht, aber hatte gerade nichts Besseres zur Hand. Und auf eine Lüsterklemme hatte ich noch wenig Lust.

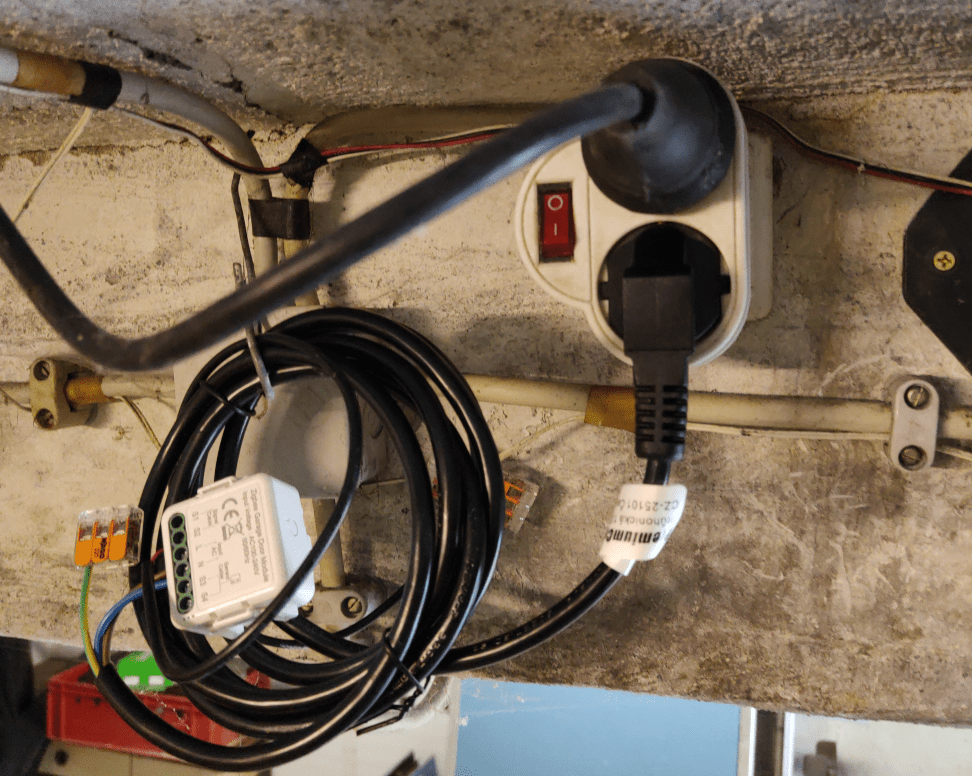
Das schwarze Kabel war bereits beim Zigbee Garagentoröffner beigelegt und habe ich in die verbliebenen freien WAGO Plätze gesteckt und mit dem anderen Ende in den Zigbee Schalter. Jetzt fehlte nur noch Strom und der Sensor für den Zustand des Tores (offen/geschlossen). Da ich die alte Verkabelung in der Aufputzdose nicht anrühren wollte, habe ich mir einfach einen 2-fach Steckdosenadapter genommen und für die 230v Stromversorgung des Schalters einen alten Stecker (mit viel zu langem Kabel), den ich irgendwo mal abgeschnitten hatte.

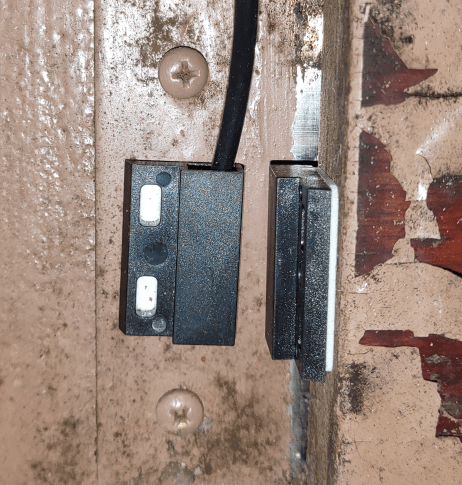
Jetzt noch den Sensor mit dem Zigbee Schalter verbunden und das andere Ende zum Tor geführt und drangeklebt (ja, das Tor müsste mal lackiert werden…).

Und das war es auch schon! Neben dem Taster und den Fernbedienungen kann das Tor nun auch via Home Assistant gesteuert werden.

An beiden Toren hatte ich bereits Tür/Fenster Kontaktsensoren, um einfach prüfen zu können, ob wir das Tor offen stehen lassen haben. Die Sensoren werden mit 2 x AAA-Batterien betrieben und müssen vermutlich alle 2-3 Jahre getauscht werden. Zumindest an einem Tor kann ich mir das jetzt aber sparen.

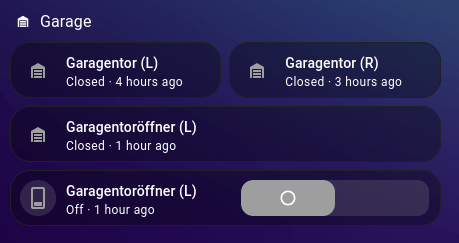
Eine geeignete Darstellung auf dem Dashboard fehlt mir allerdings noch.

    [Home Assistant] HASS VM High CPU Usage on Proxmox

    Since my Proxmox Server is also my HTPC in my living room, I noticed that suddenly the CPU fan became very noisy. When checking all LXCs and VMs, it turned out that the Home Assistant VW was the cause.

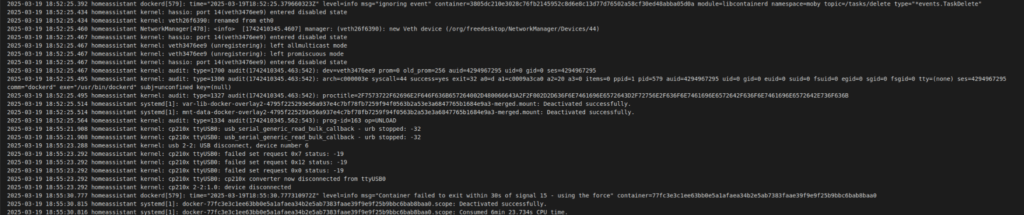
    When checking the Supervisor logs, I saw that there was a docker container that got terminated. This seemed to match the CPU usage pattern I checked before.

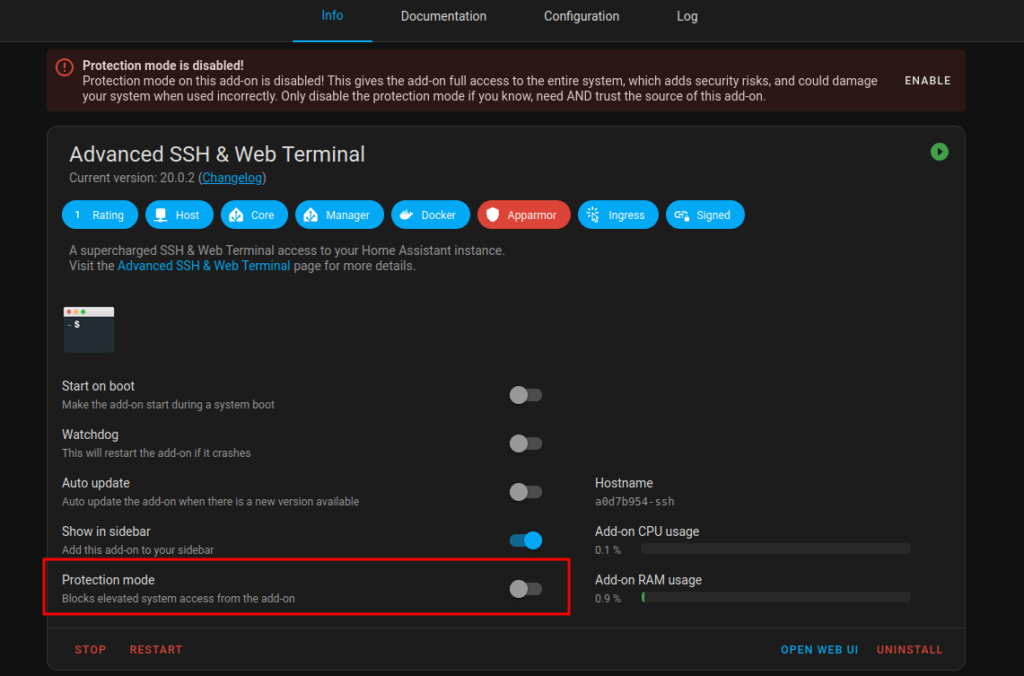
    To inspect the docker container via the Advanced SSH & Web Terminal add-on, you must disable the Protection mode first.

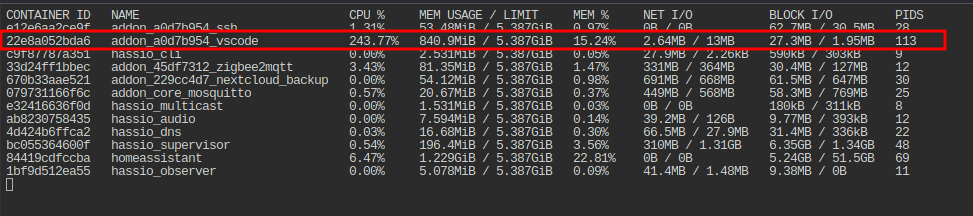
    After that, simply run docker stats.

    If there are no suspicious values, simply open some of the add-ons in another window and check how the values behave. In the above screenshot, I simply opened the VSCode editor, and you can immediately see an extreme high CPU usage. After a quick search, I found open issues that seem to be related to this issue:

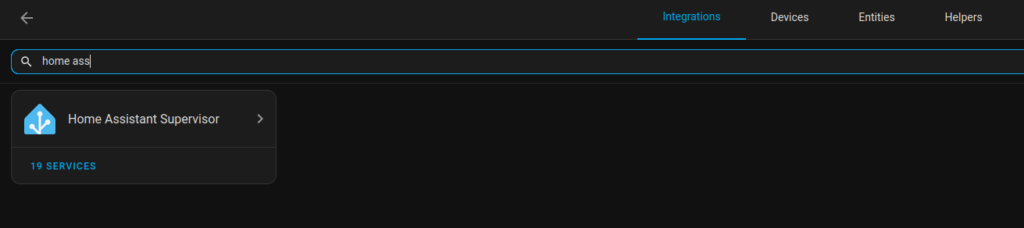
    As a workaround, a user had the idea to simply restart VSCode via an automation, when its CPU rises above a threshold. To do this, you have to enable some CPU & Memory sensors of the VSCode add-on. Search for your Home Assistant Supervisor Integration.

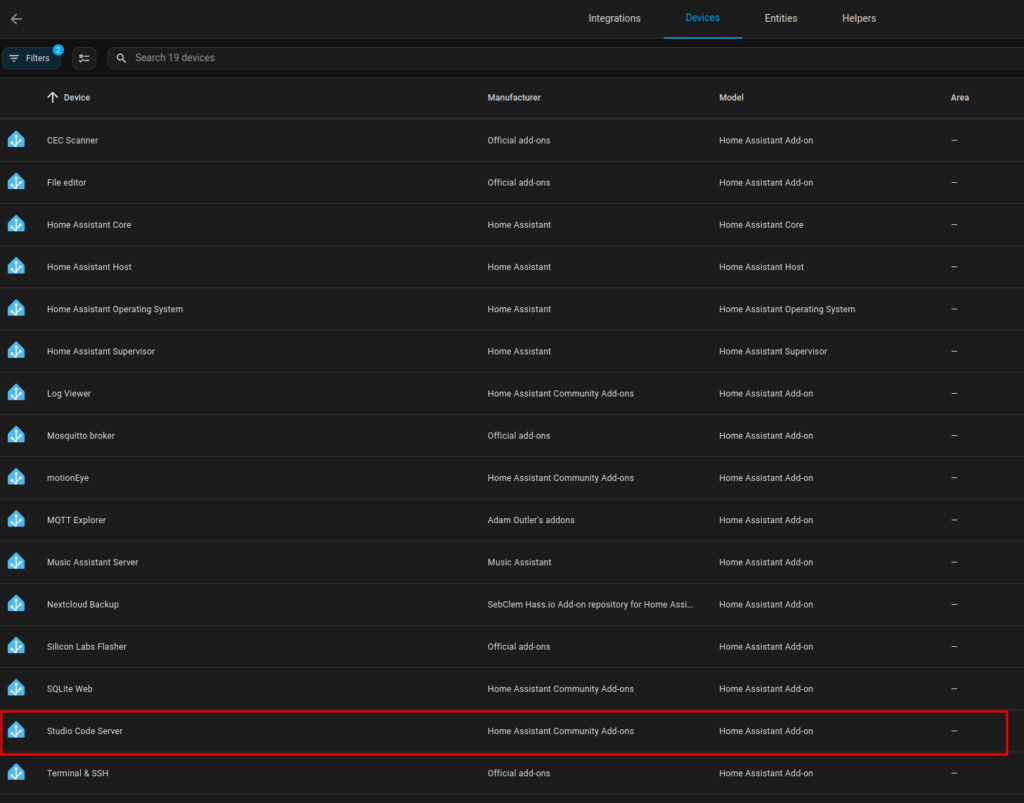
    Select the Studio Code Server add-on.

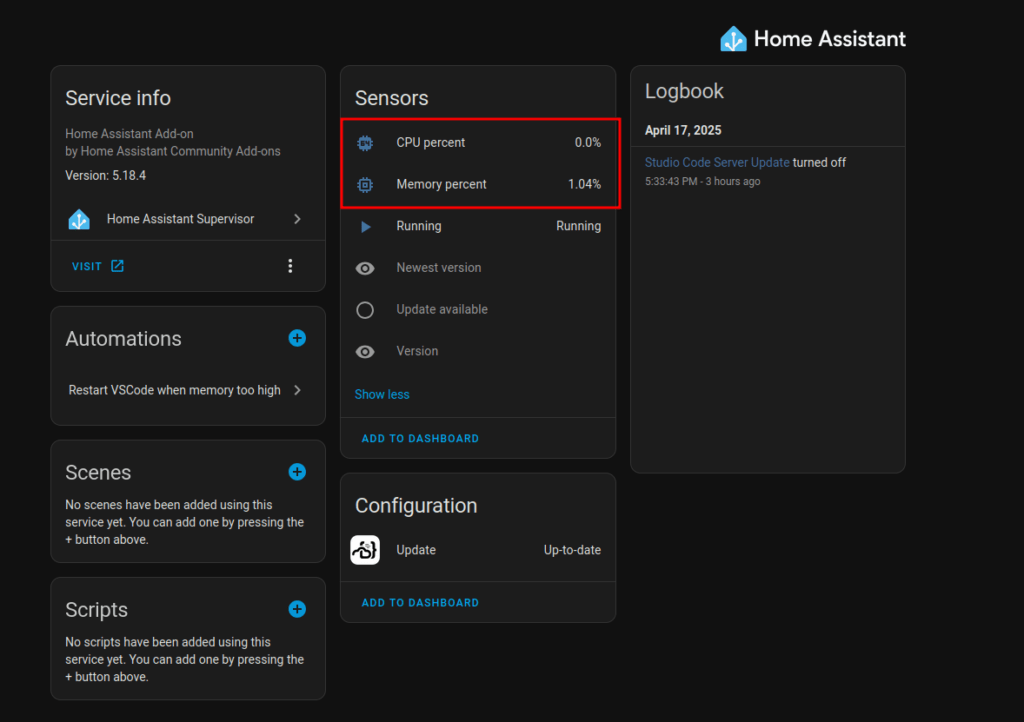
    And enable the sensors.

    Now you can set up a simple automation like the following.

    alias: Restart VSCode when cpu/memory too high
    description: ""
    triggers:
      - trigger: numeric_state
        entity_id:
          - sensor.studio_code_server_cpu_percent
        for:
          hours: 0
          minutes: 5
          seconds: 0
        above: 50
      - trigger: numeric_state
        entity_id:
          - sensor.studio_code_server_memory_percent
        above: 30
        for:
          hours: 0
          minutes: 5
          seconds: 0
    conditions: []
    actions:
      - action: hassio.addon_restart
        metadata: {}
        data:
          addon: a0d7b954_vscode
    mode: single


    Since I have the automation setup, the Proxmox CPU fan is quiet again and the VM behaves normal.

    [Home Assistant] Editor shortcuts

    All VS Code shortcuts will also work in Home Assistant. I mostly need the following:

    TabMove lines to right
    Ctrl + Tab (on Linux Mint it’s Shit + Tab)Move lines to left
    Ctrl + Alt + Mouse selectionMark area over multiple lines (works only in YAML editor)
    Ctrl + Shift + KDelete row
    Alt + Arrow key up or downMove row(s) up or down
    Alt + Shift + Arrow downDuplicate selected rows
    Ctrl + Shit + /Comment line/area

    Also, you can simply expand the window you are working in, by clicking on the window title.

    [Home Assistant] Person card with step counter

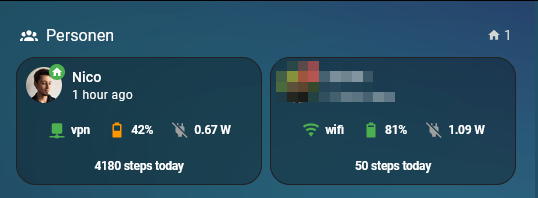
    I recently enhanced the person cards on my dashboard to display some mobile phone sensor data (check here). In addition, I now also added the daily steps by using the Steps sensor of my mobile phone in combination with a utility helper sensor, which counts the daily steps, as the mobile Steps sensor is an increasing counter without daily reset. This is how it looks now:

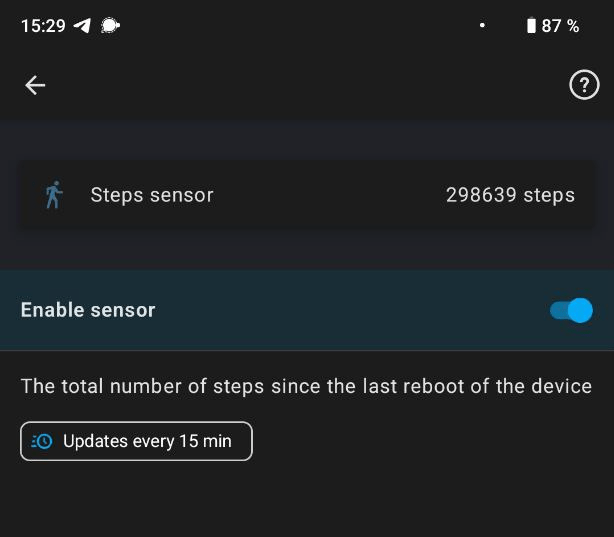
    To include the daily steps, you first have to enable the Steps sensor in the Home Assistant Companion App on your mobile phone.

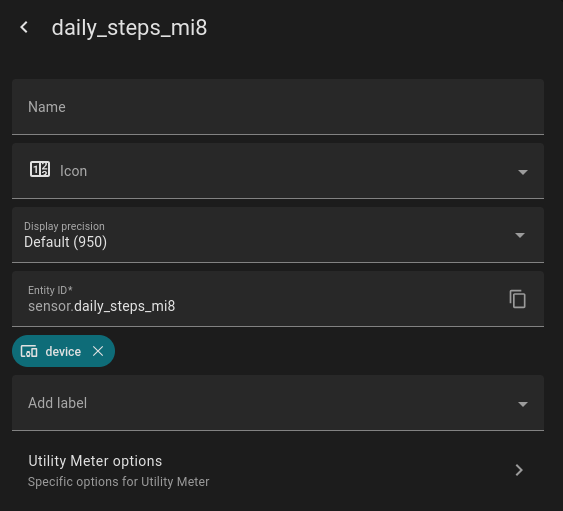
    Next, create a utility sensor which uses the Steps sensor as Input and daily resets the counted steps.

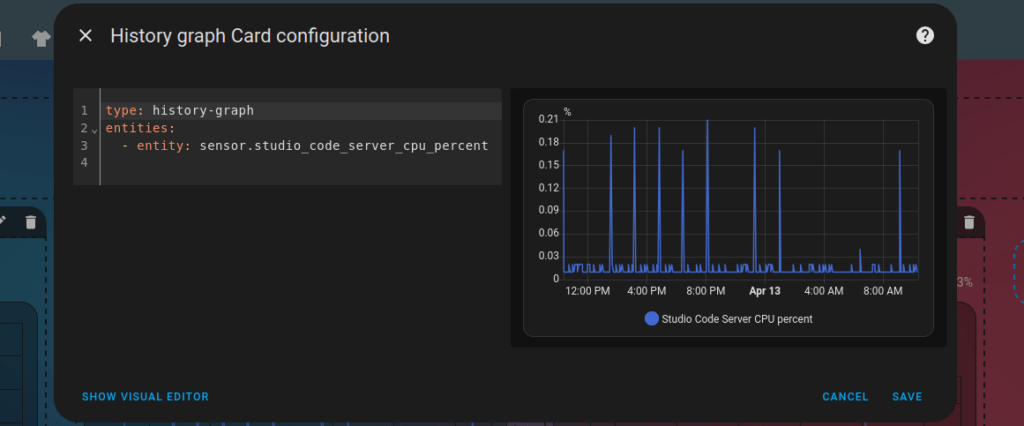
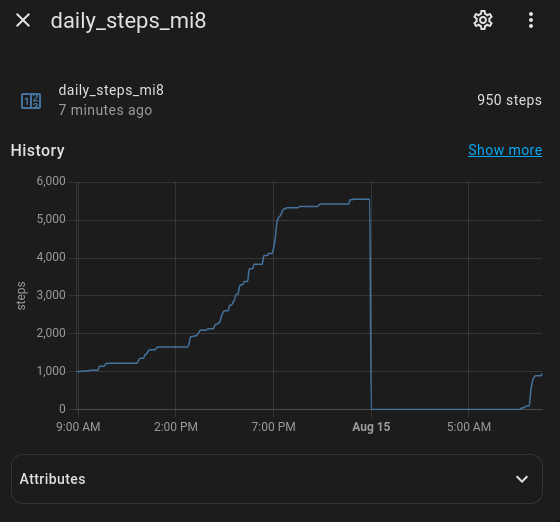
    The utility sensor history should look like this after a few days:

    Now we can add the utility sensor to the dashboard. As I’m using the vertical-stack-in-card, I simply had to add a new horizontal-stack to the person card to get a new line, and include a mushroom-chips-card which displays the steps.

      - type: horizontal-stack
        cards:
          - type: custom:mushroom-chips-card
            alignment: center
            card_mod:
              style: |
                ha-card {
                    --chip-font-size: 0.32em;
                    --chip-icon-size: 0.5em;
                    --chip-border-width: 0;
                    --chip-box-shadow: none;
                    --chip-background: none;
                    --chip-border: none;
                    --chip-spacing: none;
                    --chip-font-weight: bold;
                }
            chips:
              - type: template
                entity: sensor.daily_steps_mi8
                content: "{{ states('sensor.daily_steps_mi8')}} steps today"
                tap_action:
                  action: more-info
    

    I noticed, that the Steps sensor sometimes does not count steps, and it helps to have some separate steps counter app running on the phone like Paseo.

    [Home Assistant] Combine Adaptive Lightning, motion activated light and lights turned on by sunset

    I have some motion activated lights in my home, for example in the kitchen. During daytime, the kitchen light should simply be turned on and off by the motion sensor. But when the sun sets, I like to turn on most of the lights in the house to 1% brightness, so that you never walk into a completely dark room. In this case, the motion sensor should not turn the kitchen light on and off, but instead should increase the brightness and afterward go back to the previous state of 1% brightness. And with “increase the brightness”, I don’t mean a fix value, but instead it should set the right brightness provided by the Adaptive Lightning integration. When it’s late, and the sleep mode is tuned on for the house, the kitchen light of course should be turned off, and when it is turned on, it should respect the configured sleep values from Adaptive Lightning settings.

    Most things turned out to be quite easy by using Scenes to store the current light state and of course by using the great Adaptive Lightning features. But my automation had one important gap. When someone was is the kitchen, means kitchen light was turned on by the motion sensor, and we had sunset in this exact moment, it would always turn down the brightness to 1%, because the automation which turns on all lights to 1% brightness when the sun sets got triggered. Also, when the person left the kitchen, the previous stored scene was loaded, which was created before sunset, means it turned off the kitchen light, instead of the now required 1% brightness. This was of course really confusing for people in the kitchen…

    I needed a way, to only activate the 1% sunset brightness, when no one is currently in the kitchen. The solution was a wait_template which checks if currently a motion automation is running in the kitchen. I could have also used the wait check on motion sensor directly, but I wanted to be able to use timeouts in my automation, which can be longer than the actual motion detection.

    The important snippet is this one, which checks if no automation is currently running:

    {{ is_state_attr('automation.bewegungsmelder_kuche', 'current', 0) }}
    

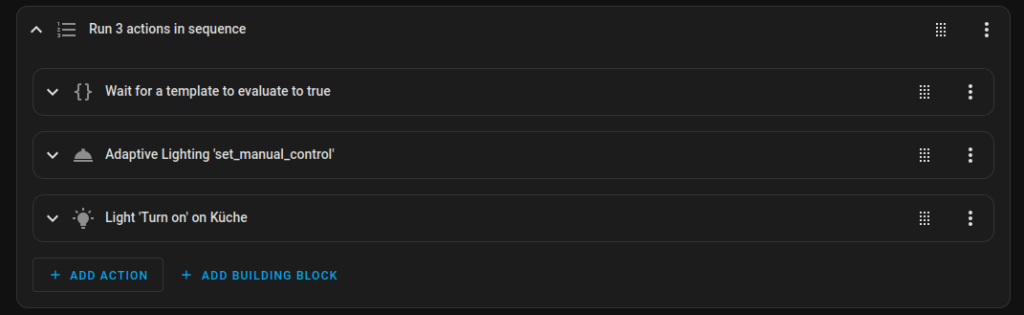
    And this is the whole part I have added to my sunset automation (and also for the sleep automation similarly) for every room, which has a motion activated light:

    sequence:
      - wait_template: "{{ is_state_attr('automation.bewegungsmelder_kuche', 'current', 0) }}"
        continue_on_timeout: true
      - action: adaptive_lighting.set_manual_control
        metadata: {}
        data:
          manual_control: true
          lights:
            - light.kueche
      - action: light.turn_on
        metadata: {}
        data:
          brightness_pct: 1
          kelvin: 2000
        target:
          entity_id: light.kueche
    enabled: true


    It simply waits until the motion sensor automation is done, then turns on the manual_control flag in Adaptive Lightning, so it does not adjust the light automatically, as it should stay at 1%, and finally turns on the light with 1% brightness. The only drawback is, that there is a millisecond where the light is turned off by the motion automation and until this wait_template fires and turns the light back on to 1% brightness. But as in this case no one should be in the room anymore, I can live with that.

    And this is my motion sensor automation for the kitchen:

    alias: Bewegungsmelder Küche
    description: ""
    mode: single
    triggers:
      - entity_id:
          - binary_sensor.0xb4e3f9fffeb689d4_occupancy
        to: "on"
        trigger: state
    conditions: []
    actions:
      - data:
          scene_id: zustand_kueche_alt
          snapshot_entities:
            - light.kueche
        action: scene.create
      - action: adaptive_lighting.set_manual_control
        metadata: {}
        data:
          manual_control: false
          lights:
            - light.kueche
      - target:
          entity_id:
            - light.kueche
        data:
          transition: 5
        action: light.turn_on
        enabled: true
      - wait_for_trigger:
          - entity_id:
              - binary_sensor.0xb4e3f9fffeb689d4_occupancy
            to: "off"
            for:
              hours: 0
              minutes: 0
              seconds: 10
            trigger: state
      - target:
          entity_id: scene.zustand_kueche_alt
        data:
          transition: 5
        action: scene.turn_on
    

    Before turning on the kitchen light, it stores the current state in a scene, then always disables the manual_control flag (in case the sunset automation turned it on), so that when in the next step the light is turned on, it automatically adjusts the brightness to the right value. When no motion is detected for 10 seconds, it restores the previous scene.