I have some motion activated lights in my home, for example in the kitchen. During daytime, the kitchen light should simply be turned on and off by the motion sensor. But when the sun sets, I like to turn on most of the lights in the house to 1% brightness, so that you never walk into a completely dark room. In this case, the motion sensor should not turn the kitchen light on and off, but instead should increase the brightness and afterward go back to the previous state of 1% brightness. And with “increase the brightness”, I don’t mean a fix value, but instead it should set the right brightness provided by the Adaptive Lightning integration. When it’s late, and the sleep mode is tuned on for the house, the kitchen light of course should be turned off, and when it is turned on, it should respect the configured sleep values from Adaptive Lightning settings.
Most things turned out to be quite easy by using Scenes to store the current light state and of course by using the great Adaptive Lightning features. But my automation had one important gap. When someone was is the kitchen, means kitchen light was turned on by the motion sensor, and we had sunset in this exact moment, it would always turn down the brightness to 1%, because the automation which turns on all lights to 1% brightness when the sun sets got triggered. Also, when the person left the kitchen, the previous stored scene was loaded, which was created before sunset, means it turned off the kitchen light, instead of the now required 1% brightness. This was of course really confusing for people in the kitchen…
I needed a way, to only activate the 1% sunset brightness, when no one is currently in the kitchen. The solution was a wait_template which checks if currently a motion automation is running in the kitchen. I could have also used the wait check on motion sensor directly, but I wanted to be able to use timeouts in my automation, which can be longer than the actual motion detection.
The important snippet is this one, which checks if no automation is currently running:
{{ is_state_attr('automation.bewegungsmelder_kuche', 'current', 0) }}
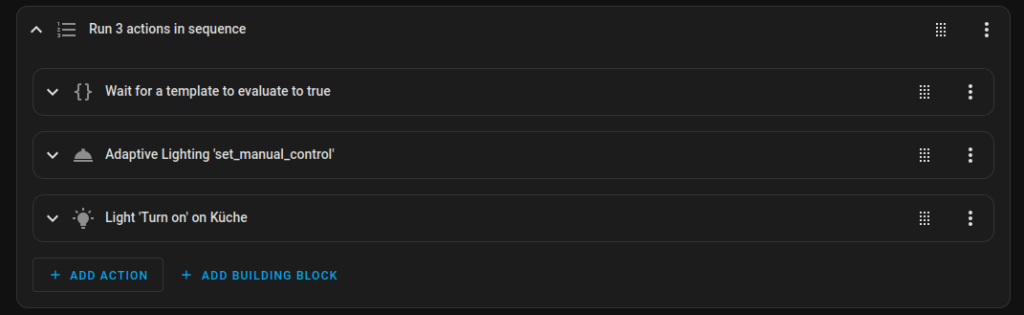
And this is the whole part I have added to my sunset automation (and also for the sleep automation similarly) for every room, which has a motion activated light:
sequence:
  - wait_template: "{{ is_state_attr('automation.bewegungsmelder_kuche', 'current', 0) }}"
    continue_on_timeout: true
  - action: adaptive_lighting.set_manual_control
    metadata: {}
    data:
      manual_control: true
      lights:
        - light.kueche
  - action: light.turn_on
    metadata: {}
    data:
      brightness_pct: 1
      kelvin: 2000
    target:
      entity_id: light.kueche
enabled: true
It simply waits until the motion sensor automation is done, then turns on the manual_control flag in Adaptive Lightning, so it does not adjust the light automatically, as it should stay at 1%, and finally turns on the light with 1% brightness. The only drawback is, that there is a millisecond where the light is turned off by the motion automation and until this wait_template fires and turns the light back on to 1% brightness. But as in this case no one should be in the room anymore, I can live with that.
And this is my motion sensor automation for the kitchen:
alias: Bewegungsmelder Küche
description: ""
mode: single
triggers:
  - entity_id:
      - binary_sensor.0xb4e3f9fffeb689d4_occupancy
    to: "on"
    trigger: state
conditions: []
actions:
  - data:
      scene_id: zustand_kueche_alt
      snapshot_entities:
        - light.kueche
    action: scene.create
  - action: adaptive_lighting.set_manual_control
    metadata: {}
    data:
      manual_control: false
      lights:
        - light.kueche
  - target:
      entity_id:
        - light.kueche
    data:
      transition: 5
    action: light.turn_on
    enabled: true
  - wait_for_trigger:
      - entity_id:
          - binary_sensor.0xb4e3f9fffeb689d4_occupancy
        to: "off"
        for:
          hours: 0
          minutes: 0
          seconds: 10
        trigger: state
  - target:
      entity_id: scene.zustand_kueche_alt
    data:
      transition: 5
    action: scene.turn_on
Before turning on the kitchen light, it stores the current state in a scene, then always disables the manual_control flag (in case the sunset automation turned it on), so that when in the next step the light is turned on, it automatically adjusts the brightness to the right value. When no motion is detected for 10 seconds, it restores the previous scene.