I had the task to insert additional vacation days to the TimeAccount of some employees. To do this, you have to insert some new entries in the related TimeAccountDetail entity.
The official documentation states that you can create a TimeAccountDetail via UPSERT, and there is even an example. A very bad formatted example….
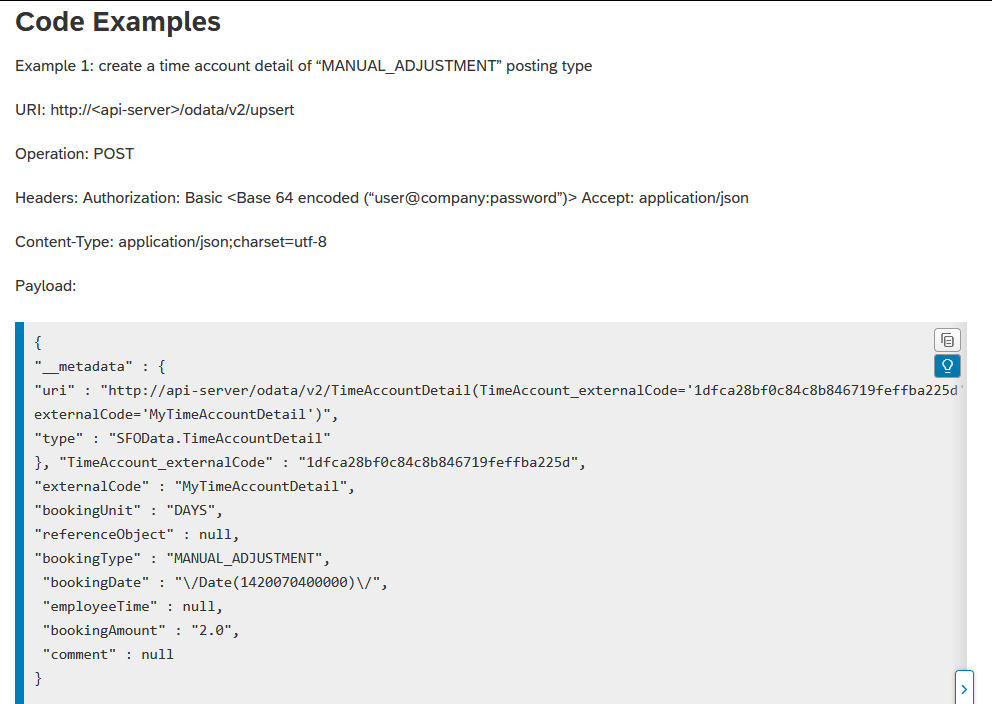
But to me, it was unclear, what I have to provide as externalCode. Obviously, TimeAccount_externalCode required the externalCode of the TimeAccount, which the entry should belong to. But I was expecting that the TimeAccountDetail externalCode should be created, when UPSERTing the entry. Somehow the documentation is missing some explanation here… But in the note 2243841 I found the missing hint:
While using API calls, Successfactors system would not generate unique external Code for TimeAccountDetail API. You will have to explicitly provide external code which should be unique.
Ok, so simply provide a random externalCode. Following my UPSERT Request:
### The related TimeAccount, where the entry should belong to. Can be fetched via another API call
@TimeAccount_externalCode=aac183cdc57242cb9f7454131f0da069

### Create a random TimeAccountDetail externalCode
@externalCode=70b54990b44440fab4c5084c971cc744

### Insert balances
GET {{$dotenv sf_api_url}}/odata/v2/upsert
Authorization: Basic {{$dotenv sf_api_auth_base64}}
Accept: application/json
Content-Type: application/json

{
  "__metadata" : {
    "uri" : "http://my-sf-demo-api-server/odata/v2/TimeAccountDetail(TimeAccount_externalCode='{{TimeAccount_externalCode}}',externalCode='{{externalCode}}')",
    "type" : "SFOData.TimeAccountDetail"
  },
  "TimeAccount_externalCode" : "{{TimeAccount_externalCode}}",
  "externalCode" : "{{externalCode}}",
  "bookingUnit" : "DAYS",
  "bookingType" : "MANUAL_ADJUSTMENT",
  "bookingDate" : "\/Date(1747872000000)\/",
  "bookingAmount" : "1",
  "comment" : "Urlaub"
}
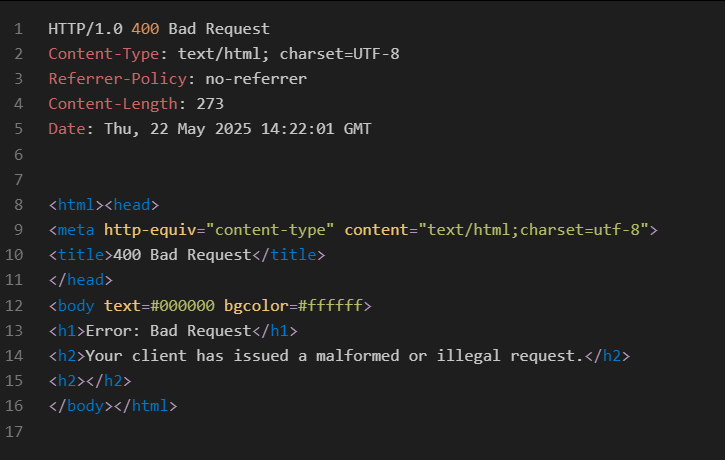
But what ever I tried as externalCode, it always failed…
In note 2243841, there is also the last sentence:
We generally do not suggest to use Upsert operation for TimeAccountDetail OData API due to external code limitation.
This confused me even more, but as the note is from 2016, I thought it could be outdated, and the official API documentation is correct. But it seems the opposite is right….
When trying a normal POST instead of an UPSERT, it immediately worked.
### The related TimeAccount, where the entry should belong to. Can be fetched via another API call
@TimeAccount_externalCode=aac183cdc57242cb9f7454131f0da069

### Create a random TimeAccountDetail externalCode
@externalCode=70b54990b44440fab4c5084c971cc744

### Insert balances
POST {{$dotenv sf_api_url}}/odata/v2/TimeAccountDetail
Authorization: Basic {{$dotenv sf_api_auth_base64}}
Accept: application/json
Content-Type: application/json

{
  "TimeAccount_externalCode" : "{{TimeAccount_externalCode}}",
  "externalCode" : "{{externalCode}}",
  "bookingUnit" : "DAYS",
  "bookingType" : "MANUAL_ADJUSTMENT",
  "bookingDate" : "\/Date(1747872000000)\/",
  "bookingAmount" : "1",
  "comment" : "Urlaub"
}
Not sure if I did something wrong when using UPSERT, but why should I even use an UPSERT, if I can simply use a normal POST request. Once again, poor SAP documentation has cost me a lot of my lifetime…