
const { PDFDocument } = require('pdf-lib')

// file = { fileName: 'test1.pdf, content: arraybuffer }

const originalPdf = await PDFDocument.load(file.content, { ignoreEncryption: true })
const newPdf = await PDFDocument.create()
const [firstPage] = await newPdf.copyPages(originalPdf, [0]) // <-- 0 is the first page
newPdf.addPage(firstPage)
const firstPagePdf = await newPdf.save()

file.content = Buffer.from(firstPagePdf)
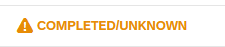
[CAP] Multitenant Job Scheduler – Request timeout after 15 seconds
For Jobs running longer than 15 seconds, you have to manually inform the Job Scheduler if your operation succeeded or not. Else, your job will only stay in status COMPLETED/UNKNOWN due to the timeout.
Informing the Job Scheduler about your succeeded operation can be done vie REST API Endpoint Update Job Run Log. You can read more about Long-Running (Async) Jobs here. I therefore wrote a function named updateJobStatus, which I call at the end of every long-running endpoint. It checks if the endpoint is called manually or via Job Scheduler service and updates the Job Run Log using the @sap/jobs-client if required.
const cds = require('@sap/cds')
const LOG = cds.log('JobService')
const xsenv = require("@sap/xsenv")
const JobSchedulerClient = require("@sap/jobs-client")

async function fetchAccessToken(url, creds) {
    const response = await fetch(`${url}/oauth/token`, {
        method: 'POST',
        body: 'grant_type=client_credentials&client_id=' + creds.uaa.clientid + '&client_secret=' + creds.uaa.clientsecret,
        headers: {
            'Content-Type': 'application/x-www-form-urlencoded'
        }
    })
    return await response.json()
}

async function getJobscheduler(req) {
    xsenv.loadEnv()
    const services = xsenv.getServices({
        jobscheduler: { tags: "jobscheduler" }
    })
    if (!services.jobscheduler) req.reject("no jobscheduler service instance found")

    const subdomain = (process.env.NODE_ENV === 'production') ? req.http.req.authInfo.getSubdomain() : 'customer1' // workaround for local testing
    const domain = `https://${subdomain}.${services.jobscheduler.uaa.uaadomain}`
    const token = await fetchAccessToken(domain, services.jobscheduler)

    const options = {
        baseURL: services.jobscheduler.url,
        token: token.access_token
    }
    return new JobSchedulerClient.Scheduler(options)
}

async function updateJobStatus(req) {
    const jobId = req.headers['x-sap-job-id']
    const scheduleId = req.headers['x-sap-job-schedule-id']
    const runId = req.headers['x-sap-job-run-id']

    if (!jobId || !scheduleId || !runId) return
    LOG.info('Endpoint is called via Job Scheduler')

    const scheduler = await getJobscheduler(req)

    const payload = {
        jobId: jobId,
        scheduleId: scheduleId,
        runId: runId,
        data: { success: true, message: 'The endpoint has successfully executed the long-running job' }
    }

    scheduler.updateJobRunLog(payload, function (err, result) {
        if (err) return LOG.error('Error updating run log: %s', err)
        //Run log updated successfully
        LOG.info('Run log updated successfully')
    })
}

module.exports = {
  updateJobStatus
}
[CAP] Multitenant Job Scheduler – Fixing Scope issue
When I was integrating the Job Scheduler service into my Multitenant Application, I ran into the following JWT Token issue, when the Job Scheduler was calling my CAP action. Means the job creation was already working fine and was also displaying the right tenant for my job, but the Job Scheduler was not able to successfully call the given endpoint. This is the error I got in the logs:
Error: Jwt token with audience: [
'sb-a1e9d3b8-2bee-47db-xxxx-07e5a54aec1e!b180208|sap-jobscheduler!b3',
'uaa'
] is not issued for these clientIds: [
'sb-MyApp-mtdev-App!t180208',
'MyAp-mtdev-App!t180208'
].
After reading some of the great blogs from Carlos Roggan, I noticed that I forgot to grant the Job Scheduler the necessary authority to actual call my CAP action. So I added the following lines to the xs-security.json file
    {
      "name": "$XSAPPNAME.jobscheduler",
      "description": "Scope for Job Scheduler",
      "grant-as-authority-to-apps": [
        "$XSSERVICENAME(job-scheduler)"
      ]
    }
and also annotated my CAP action using the new scope @(requires: ['jobscheduler']).
I redeployed everything, but the issue still persists. 🙁
Turned out, for the standard plan, tokens are cached in Job Scheduler up to 12 hours.
https://help.sap.com/docs/job-scheduling/sap-job-scheduling-service/secure-access?locale=en-US

After waiting 12 hours, the endpoint was successfully called by the Job Scheduler. 🙂
[JavaScript] Check if iterator is undefined when using a for…of loop
Just saw this trick, how you can do a for…of loop which also checks if the iterator is null or undefined. Normally, you would check this by another if statement before starting the for..of loop, like here
const d = undefined

if (d) {
  for (const x of d ) {
  	console.log(x)
  }
}
or by using a try...catch
try {
  for (const x of d) {
    console.log(value)
  }
} catch (e) {
  console.error(e) // TypeError: undefined is not iterable
}
But instead of if or try...catch, you could use d || [], to check if d is Falsy, and if it’s false, no iterations are performed and no errors are thrown. The disadvantage of this approach is that you create an unneeded array and the readability may be poor depending on the situation.
for (const x of d || []) {
	console.log(x)
}
Of course, the first and the last snippet can also be done in one line
if (d) for (const x of d ) console.log(x)

for (const x of d || []) console.log(x)
[CAP] Timeout on long-running endpoint
In my application, I have a function that can take quite a long time to process, depending on the data selected. Two external systems were involved in the processing, so a lot of round trips were made. Of course, I tried to parallelize the calls to the external systems as much as possible, but it still took a long time. During the development in BAS everything worked fine, but during the deployment in BTP I encountered some errors, depending on the amount of data selected.
In the console, I could see, that it was a 504 Gateway Timeout.
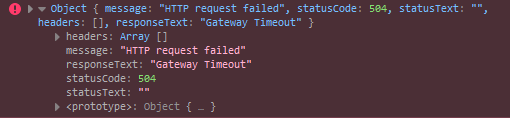
Luckily, the CAP docs are already explaining the possible reason for this. The approuter has a default timeout of 30 seconds for destinations. This matched my observation, that this issue only occurred when deployed.
https://www.npmjs.com/package/@sap/approuter#destinations
In my case, the destination for my backend service is configured in the mta.yaml directly on the approuter. By simply adding the timeout property and by increasing the timeout from 30 seconds to 2 minutes, I could get rid of the errors.
  - name: my-approuter
    type: approuter.nodejs
    path: app/approute
    build-parameters:
      builder: npm-ci
      ignore:
        - "node_modules/"
        - "default-env.json"
        - "manifest*.yml"
    requires:
      - name: srv-api
        group: destinations
        properties:
          name: srv-api
          url: ~{srv-url}
          forwardAuthToken: true
          timeout: 120000 # <--------------------------------- add timeout to your cap service destination
      - name: my-xsuaa
      - name: my-destination
      - name: my-html5-repo-runtime
[CAP] Get subdomain in a multitenant scenario
Until recently, I was always decoded the JWT to get the subdomain of a subscribed tenant like this:
const jwt = retrieveJwt(req)
const subdomain = decodeJwt(jwt).ext_attr.zdn
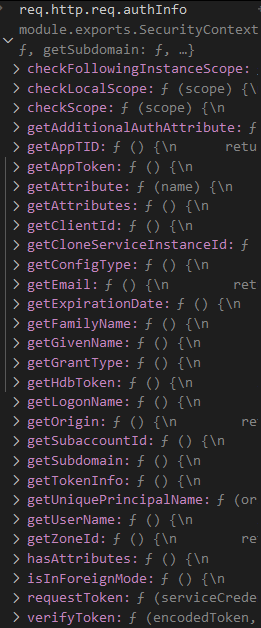
I now noticed that you can also use the original request object and the getSubdomain function of the authInfo object. It’s provided by @sap/xssec and is only available when using XSUAA, means not with mocked authentication. This way you can get the subdomain in a single line:
const subdomain = req.http.req.authInfo.getSubdomain()
And there are some more helpful functions, that are documented here:
[CAP] Get service and approuter URLs of your running CAP application in a service handler
In your mta.yaml you can define environment variables, which are filled during deployment. They can be filled with MTA Development and Deployment Parameters. Click here for an overview.
To get the URL of your deployed CAP service, simply use the ${default-url} parameter and pass the value to a variable below the properties attribute, e.g. SRV_URL. The approuter has to provide its default-url, which can then be used in the service for a variable, e.g. APPROUTER_URL.
  #####################################################################################################################
  # Approuter
  #####################################################################################################################
  - name: approuter
    type: approuter.nodejs
    path: app/approuter
    provides:
      - name: app-api
        properties:
          app-url: ${default-url}   # <---------------------------- provides approuter url
          app-uri: ${default-uri}   # <---------------------------- provides approuter uri/hostname
          app-protocol: ${protocol} # <---------------------------- provides approuter protocol

  #####################################################################################################################
  # Business Service Module
  #####################################################################################################################
  - name: mySrv
    type: nodejs
    path: gen/srv
    requires:
      - name: app-api # <---------------------------------------- required to access the provided variables of the approuter
    properties:
      SRV_URL: ${default-url}
      APPROUTER_URL: ~{app-api/app-url}
      SUBSCRIPTION_URL: ~{app-api/app-protocol}://\${tenant_subdomain}-~{app-api/app-uri}
After deployment, you can now access the URL via process.env.SRV_URL in a service handler. During development, simply use the .env file to provide the SRV_URL value.
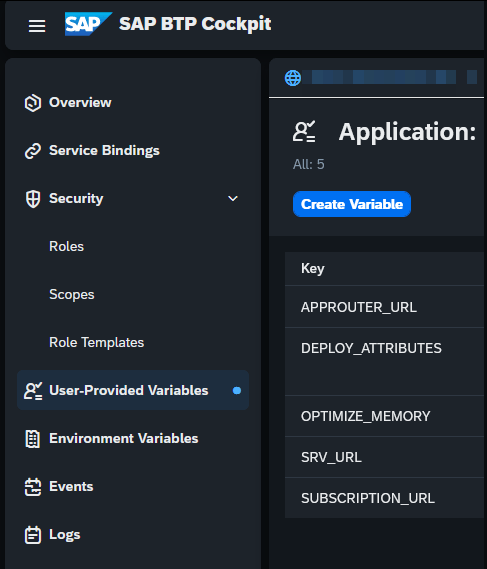
You can check all the variables via the BTP Cockpit: Subaccount → Space → Select application → User-Provided Variables
[Home Assistant] Zigbee2MQTT – ‘MAC channel access failure’ (225)
Suddenly, some weeks ago, devices in my Zigbee network started to become sometimes unavailable and did not respond. This occurred at random times and on random devices. When checking the Zigbee2MQTT logs, it was flooded with MAC channel access failure error messages.

When searching for this error message, this GitHub issue pointed me to the potential issue: Network Interferences (probably Wi-Fi). See also the official docs here.
I have two ZigBee networks in parallel. One using ZHA and the Conbee II stick running on channel 20. And one using Zigbee2MQTT using a Sonoff ZBDongle-P (CC2652P) running on channel 11, which had the network issues. Without further investigation, I thought, let’s check what channel my own Wi-Fi is using and if it is on channel 11, simply change it to something else (which turned out to be a completely wrong approach). In my FritzBox router, the channel selection was configured as “auto”. So no specific channel set. That made sense to me, as the ZigBee issues randomly appeared, so perhaps only when the Wi-Fi switched to a channel, ZigBee was already using.
Without further investigation, I simply set the Wi-Fi channel to 1, so that it does not interact with Zigbee channel 11 (just to mention it here again: this is completely incorrect!). But things got worse, instead of better.
After reading this great blog post about building a stable Zigbee network and seeing the graph from Metageek about Wi-Fi and Zigbee channels, I noticed my issue…
Wi-Fi Channel 11 <> Zigbee Channel 11
By simply looking at the Metageethek graph, I understood why I made things even worse. My newly selected Wi-Fi channel 1 interfered directly with Zigbee2MQTT channel 11.
SmartHomeScene is recommending the following channel settings in their blog post:
- Zigbee channel 11, Wi-Fi channel 6 or 11
- Zigbee channel 15, Wi-Fi channel 11
- Zigbee channel 20, Wi-Fi channel 1
- Zigbee channel 25, Wi-Fi channel 1 or 6
So I tried switching my WI-FI to channel to 11, which should not interference with ZigBee channel 11. And yes, Zigbee2MQTT was now running fine, but suddenly the MAC channel access failure error messages appeared on ZHA. Seems like the ZHA ZigBee channel 20 was sill too close to WI-FI channel 11. So I thought, why not using a WI-FI channel, which is completely out of the ZigBee range. I switched my Wi-Fi from channel 11 to channel 13, and everything runs smooth since then. Finally, my ZigBee network is “rock solid”! 🙂
Update 19.04.2024: The Zigbee network was now working without issues for a few days, but suddenly my ESP Devices started to drop off the WI-FI network… When searching, I found this blog post, where it’s recommended to avoid channel 12-14 when using ESP devices. As I didn’t want to get into conflict with the Zigbee network again, I changed the channel from 13 to 12 as a test. And after a few days, I can now say that Zigbee and ESP devices are running smoothly. Finally!
[SAPUI5] Add your own Logout functionality to the Launchpad Sandbox
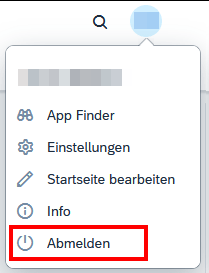
Use the attachLogoutEvent of the ushell container to trigger your approuter logout endpoint, that needs to be configured in your xs-app.json. The code in my launchpad.html looks like this:
    <script>
        sap.ui.getCore().attachInit(() => {

            sap.ushell.Container.createRenderer('fiori2', true).then(renderer => renderer.placeAt("content"))

            sap.ushell.Container.attachLogoutEvent(e => {
                e.preventDefault()
                window.location.replace('/do/logout')
            }, false)

        })
    </script>
This way, you can reuse the default logout dialog logic the launchpad provides.
For completeness, find also my approuter configuration and custom logout page below.
My xs-app.json:
{
  "welcomeFile": "index.html",
  "authenticationMethod": "route",
  "logout": {
    "logoutEndpoint": "/do/logout",
    "logoutPage": "/logged-out.html"
  },
  "sessionTimeout": 60,
  "routes": [
    {
      "source": "^/logged-out.html$",
      "localDir": ".",
      "authenticationType": "none"
    },
    {
      "source": "^/launchpad.html$",
      "localDir": ".",
      "authenticationType": "xsuaa",
      "cacheControl": "no-cache, no-store, must-revalidate"
    },
    {
      "source": "^/appconfig/(.*)$",
      "localDir": ".",
      "authenticationType": "xsuaa"
    },
    {
      "source": "^/user-api(.*)",
      "target": "$1",
      "service": "sap-approuter-userapi",
      "authenticationType": "xsuaa"
    },
...
  ]
}
My logged-out.html file, placed in the approuter folder next to the launchpad.html:
<!DOCTYPE html>
<html>

<head>
    <meta http-equiv="X-UA-Compatible" content="IE=edge" />
    <meta http-equiv="Content-Type" content="text/html;charset=UTF-8" />
    <meta name="viewport" content="width=device-width, initial-scale=1.0" />
    <title>Logged out</title>
    <style>
        h2 {
            font-family: "Arial", sans-serif;
        }
        .centered {
            position: absolute;
            top: 50%;
            left: 50%;
            transform: translate(-50%, -50%);
        }
    </style>
</head>

<body>
    <div class="centered">
        <h2>You are now logged out</h2>
    </div>
</body>

</html>
[Home Assistant] Update firmware on Sonoff Zigbee USB Dongle-P
Update 03.11.2025: There is now a much simpler way, check post here.
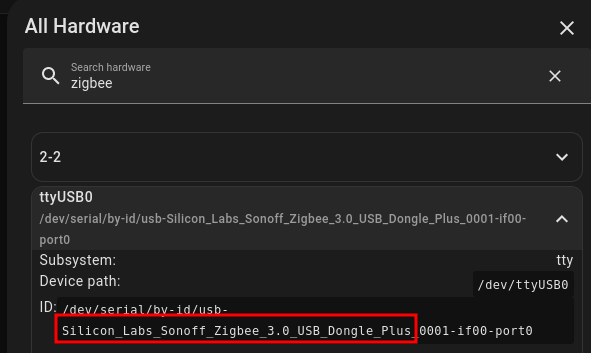
First, confirm that you have a Sonoff Zigbee 3.0 USB Dongle Plus. Go to Settings → Hardware → All Hardware → Search for Zigbee
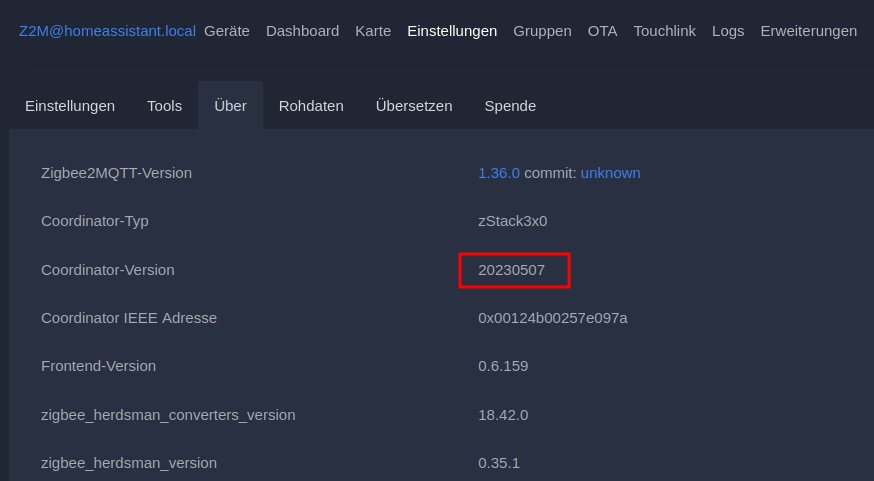
Check your current firmware version:
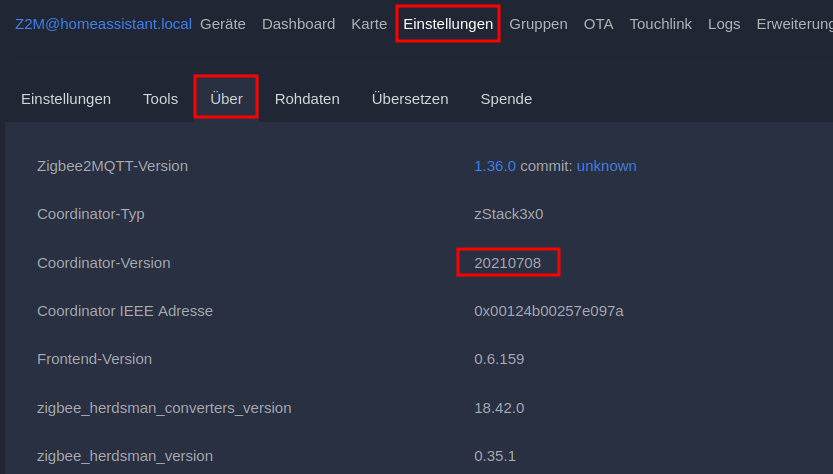
Important: Stop Zigbee2Mqtt before flashing, as described in the docs!

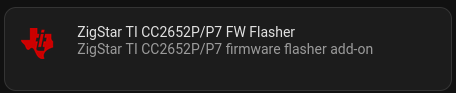
Now let’s add the ZigStar repository: Settings → Add-ons → Add-on Store → Three dots → Repositories → Add https://github.com/mercenaruss/zigstar_addons
After that, install the Add-on for Texas Instruments CC2652P7 based radios.
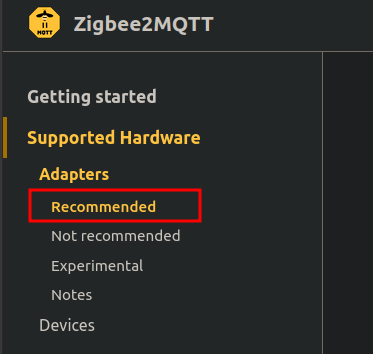
Copy the firmware link from here: https://www.zigbee2mqtt.io/guide/adapters/
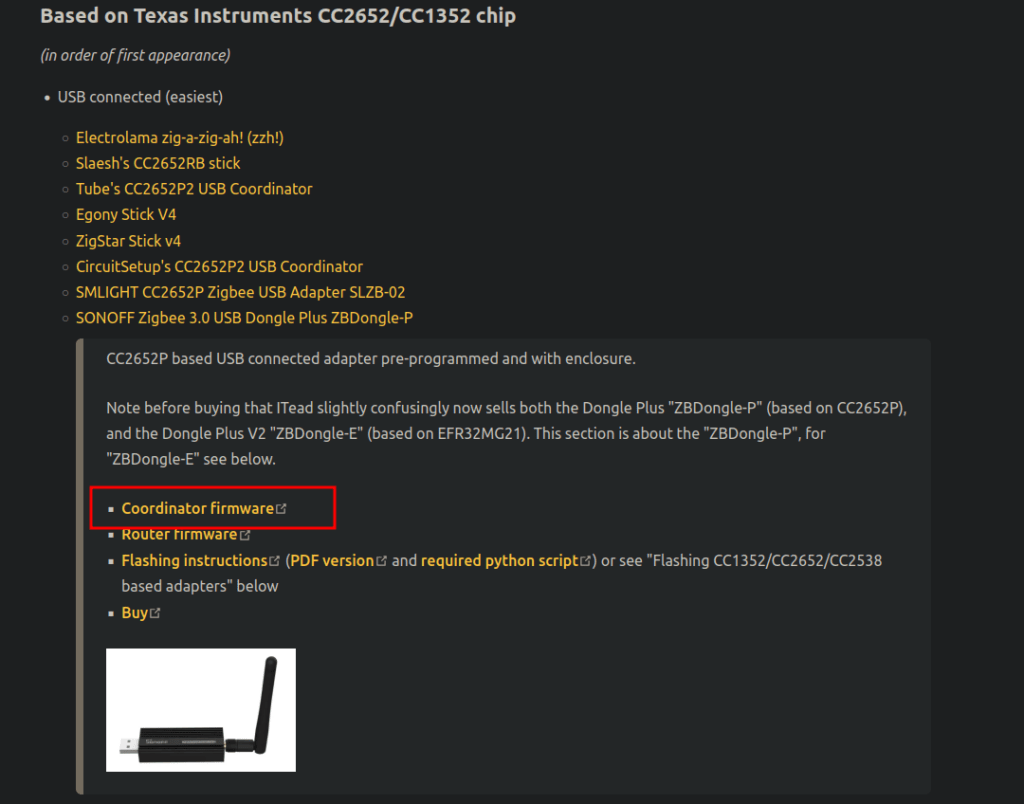
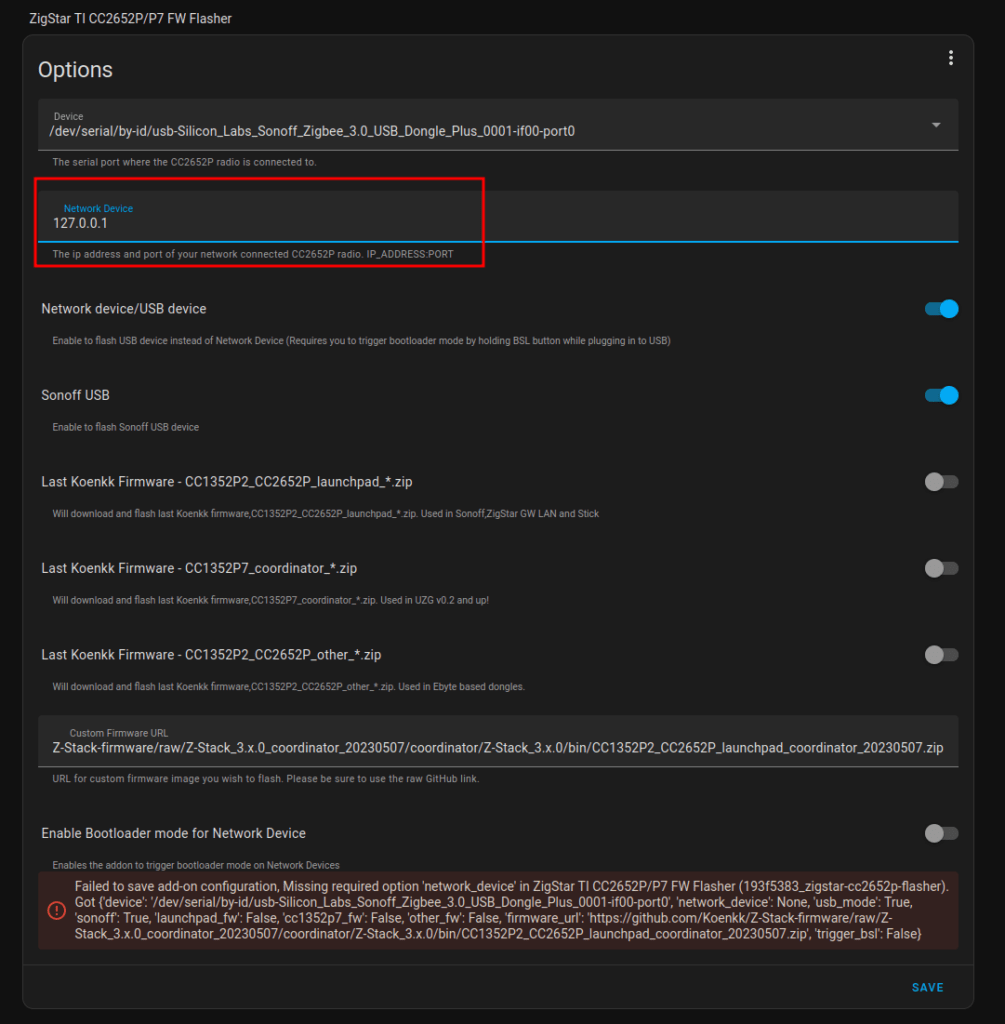
Got to the Configuration of the installed ZigStar Add-on and paste the firmware link and select the two radio buttons like bellow.

If you receive an error when saving the configuration, simply add 127.0.0.1 as Network Device and save again.
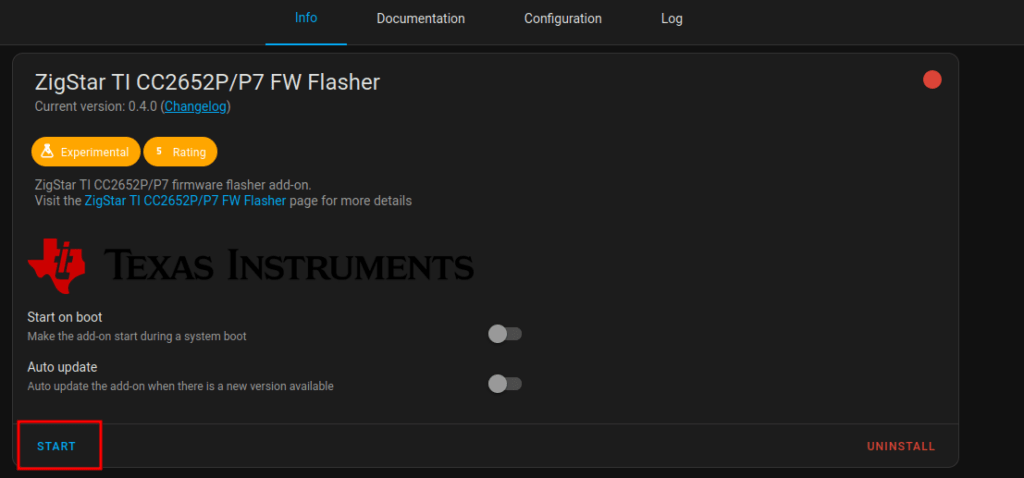
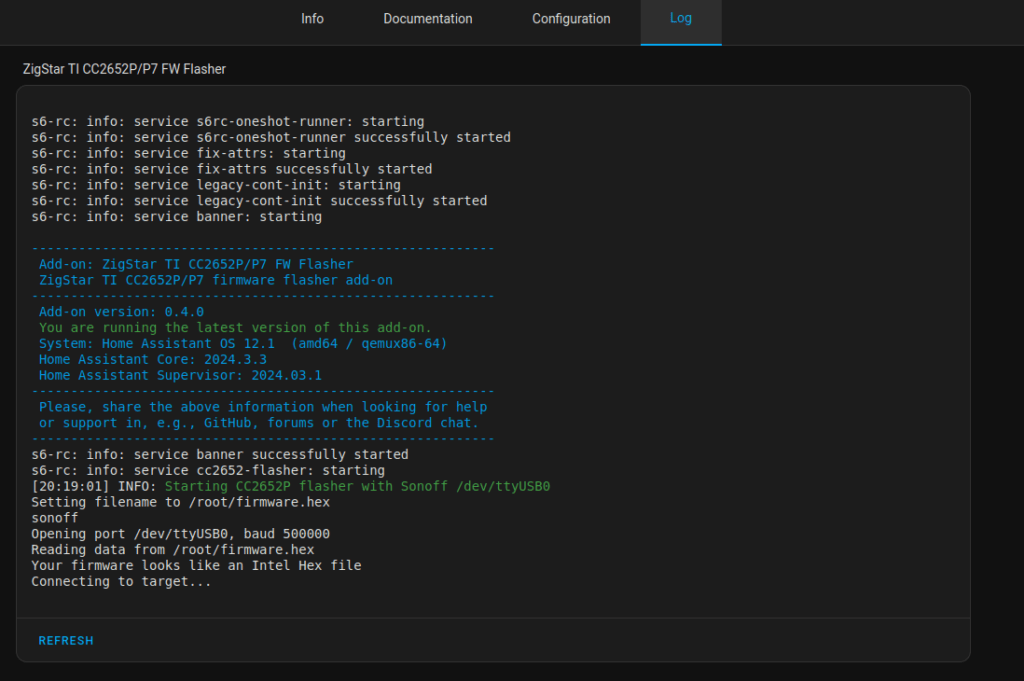
If the Configuration is successfully saved, start the Add-on and flashing will start immediately.
Switch to the Log tab and hit refresh until you see the “successfully stopped” message.
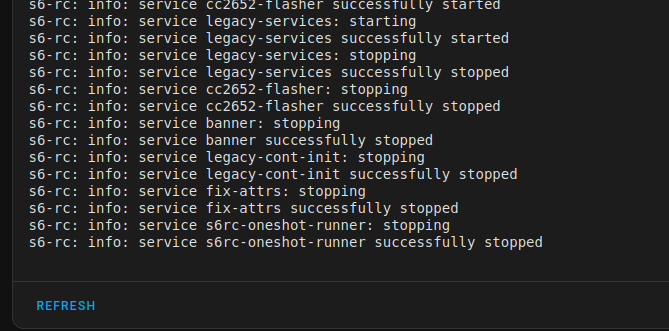
Now you can stop the ZigStar Add-on and start Zigbee2Mqtt again and check your new installed version.
Done.