I had some videos in the format “My Episode #01.mkv” which I wanted to rename to “S01E01 My Episode #01.mkv“. This little script did the job for me:
# Specify the directory containing the files. For current directory use: $(dirname "$0")
directory="/path/to/your/directory"

# Loop through all .mkv files in the directory
for file in "$directory"/*.{webm,mkv}; do
    # Check if the file exists to avoid errors when no files match
    [ -e "$file" ] || continue

    # Extract the base filename (without the directory path)
    filename=$(basename "$file")

    # Use regex to find the episode number (e.g., #01, #02)
    if [[ $filename =~ \#([0-9]+) ]]; then
        episode_number=${BASH_REMATCH[1]}

        # Pad the episode number with a leading zero if it's a single digit
        if [ ${#episode_number} -eq 1 ]; then
            episode_number="0$episode_number"
        fi

        # Construct the new filename
        new_filename="S01E${episode_number} $filename"

        # Rename the file
        mv "$file" "$directory/$new_filename"
        echo "Renamed: $filename -> $new_filename"
    fi
done
“This utility is a compilation of Windows tasks I perform on each Windows system I use. It is meant to streamline installs, debloat with tweaks, troubleshoot with config, and fix Windows updates.”
This is discussed for many years and unfortunately will not be implemented in the UI5 framework itself (see here). There are already different blogs describing how to build a wrapper for oData requests (for example here and here).
But with ES2024 it now got super simple to do this:
Activate the last_seen attribute via the Zigbee2MQTT interface. Go to Settings → Advanced → Last seen → Choose ISO_8601
Per default, the last seen sensor is disabled for all Home Assistant entities. To enable the last_seen attribute for all devices, add the following lines via VS Code in homeassistant → zigbee2mqtt → configuration.yaml
Now you must either restart Home Assistant or activate the entity manually: Go to Settings → Devices & services → Entities and adjust your Filter like this:
Integrations: Select “MQTT”
Status: Select “Disabled”
Then search for last seen, click on select all (right next to the filter button) and choose Enable selected in the context menu when clicking on the three dots in the top right corner.
Now the last_seen entity values should be visible, and you can use this new entity to detect an offline device. For example, by using this blueprint or by creating a template sensor like it is described here (related YT video).
{% set result = namespace(sensors=[]) %}
{% for state in states.sensor | rejectattr('attributes.device_class', 'undefined') | selectattr('attributes.device_class', '==', 'timestamp') %}
    {% if 'last_seen' in state.entity_id and (states(state.entity_id) == 'unavailable' or ((as_timestamp(now()) - as_timestamp(states(state.entity_id))) > ((24 | int) * 60 * 60))) %}
        {% set result.sensors = result.sensors + [state.name | regex_replace(find=' last seen', replace='') ~ ' (' ~ relative_time(strptime(states(state.entity_id), '%Y-%m-%dT%H:%M:%S%z', 'unavailable')) ~ ')'] %}
    {% endif %}
{% endfor %}
{{ result.sensors | join('\n') | truncate(254, True) }}
The template sensor can be put somewhere on your dashboard or used in an automation. Following the automation I’m using:
alias: Notify when zigbee device goes offline using last_seen
description: ""
trigger:
  - platform: state
    entity_id:
      - sensor.offline_zigbee_devices
    from: null
    to: null
    for:
      hours: 0
      minutes: 10
      seconds: 0
condition: []
action:
  - service: notify.mobile_app_mi_8
    metadata: {}
    data:
      title: |-
        {% if not states('sensor.offline_zigbee_devices') %}
          All Zigbee Devices Online!
        {% else %}
          The following Zigbee Devices are offline:
        {% endif %}
      message: >-
        {% for entity in expand('sensor.offline_zigbee_devices') | map(attribute='entity_id') | list %}
          {{ states(entity) }}
        {% endfor %}
mode: single
I also recommend excluding the last_seen sensors from the Logbook, because else the Logbook is flooded with changes. To do this, simply add the following lines in your configuration.yaml file:
In an automation, you can retrieve the friendly_name of the triggering device using:
{{ trigger.to_state.attributes.friendly_name }}
Helpful if an automation can be triggered by different devices (e.g. garage door 1 or garage door 2) and you want to send a notification that explicitly names the triggering device:
  - service: notify.ALL_DEVICES
    data:
      title: Garage open!
      message: >-
        {{ trigger.to_state.attributes.friendly_name }} is open
Since ES2024 there is a new way to create promises by using the withResolver function:
// ES 6 Via Constructor
const promise = new Promise((resolve, reject) => { }

// ES2024 Via factory function
const [promise, resolve, reject] = Promise.withResolver( )
Since ES2018 there is an additional handler called finally:
const promise = fetch("/myAPI")

promise
  .then(response => console.log(response))
  .catch(error => console.error(error))
  .finally(() => console.log("Called in any case"))
And handling multiple Promises has been made easier by the new methods allSettled, any, race which were introduced in ES2020 and ES2015:
// Promise that resolves when all promises are resolved
const promise = Promise.all([promiseA, promiseB])
promise.then(([valueA, valueB]) => console.log(valueA, valueB))

// ES2020 Promise that resolves when all promises are settled (either resolved or rejected)
const promise = Promise.allSettled([promiseA, promiseB])

// ES2020 Promise that resolves when either promiseA or promiseB is resolved
const promise = Promise.any([promiseA, promiseB])

// ES2015 Promise that resolves/rejects when any promise is resolved or rejected
const promise = Promise.race([promiseA, promiseB])
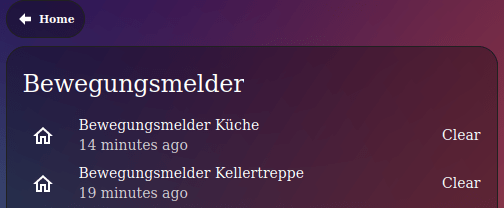
After the last Zigbee2MQTT update to version 1.39.0, suddenly the motion sensors were missing in my auto-entities cards, which I use to display all motions sensors for specific areas.
When checking the changes included in the new Zigbee2MQTT version, I found the reason: https://github.com/Koenkk/zigbee2mqtt/pull/22896 With this pull request, the device_class is motion is replaced with occupancy. After changing the device_class in the auto_entities config, the motions sensors are displayed again.
Alternatively, you can switch the device_class back to motion, like it is described here. This would also bring back the old icon mdi:motion-sensor instead of mdi:home-outline.
“Gadgetbridge is a free and open source Android application that allows you to pair and manage various gadgets such as smart watches, bands, headphones, and more without the need for the vendor application. So in short, you can use Gadgetbridge instead of relying on your gadget’s own proprietary app.”
If you have a notification, which is only relevant for you when you are at home, it does not make sense to send it, if you are away. Instead, it would make sense to receive it the moment you get home.
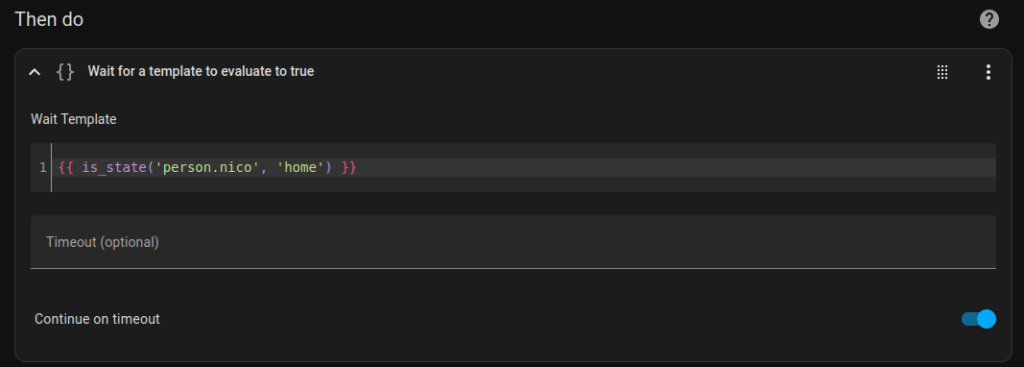
To do this, simply add an Wait for a template action before sending the notification, with the following content. This can be done via YAML configuration
If you are currently at home, means the entity status is already in the state home, it will be resolved immediately, otherwise it will wait until your status changes to home.