
Source System: SuccessFactors
Target System: Identity Authentication
To assign employees to specific IAS groups, that transformation for the target (in this case the IAS) must be adjusted.
When using ias.api.version 1
            {
                "condition": "$.emails[0].value =~ /.*@abc.com.*/",
                "constant": "DEV_IDP1",
                "targetPath": "$.groups[0].value"
            },
            {
                "condition": "$.emails[0].value =~ /.*@def.com.*/",
                "constant": "DEV_AzureAD",
                "targetPath": "$.groups[1].value"
            },
When using ias.api.version 2
https://help.sap.com/docs/identity-provisioning/identity-provisioning/enabling-group-assignment
         {
            "condition":"($.emails EMPTY false)",
            "constant":[
               {
                  "id":"00f8ab94-a732-48fa-9169-e51f87b8dcd5"
               },
               {
                  "id":"01231139-4711-4a28-8f9d-6745843ef716"
               }
            ],
            "targetVariable":"assignGroup"
         }
Update 10.03.2026: If you want to use an SF field, that is currently not synced, it must be added on the source system sync. First on the Properties tab on sf.user.attributes and then it can be used in the transformation of the source system (in this case SF).
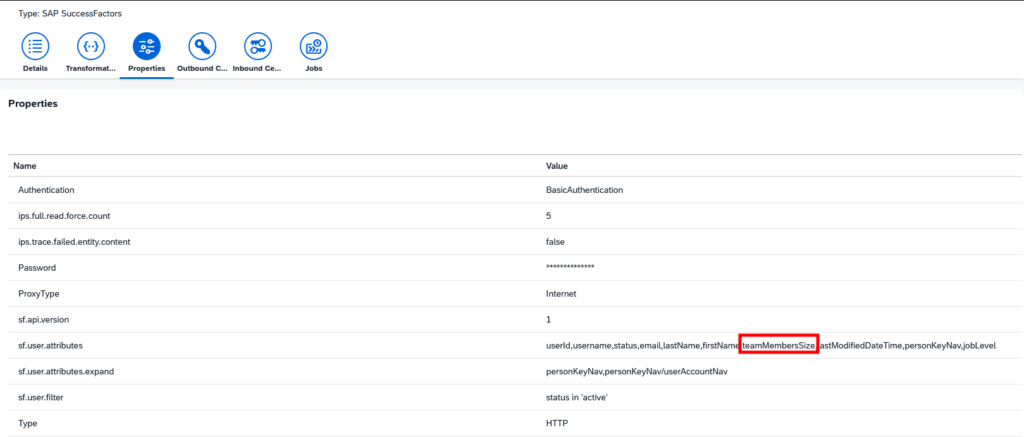
            {
                "sourcePath": "$.teamMembersSize",
                "targetPath": "$['urn:sap:cloud:scim:schemas:extension:sfsf:2.0:User']['teamMembersSize']"
            },