
“Advanced Privacy and Security Configuration Utility”
[SuccessFactors] Get Recruiting information for a given User via Process Trigger
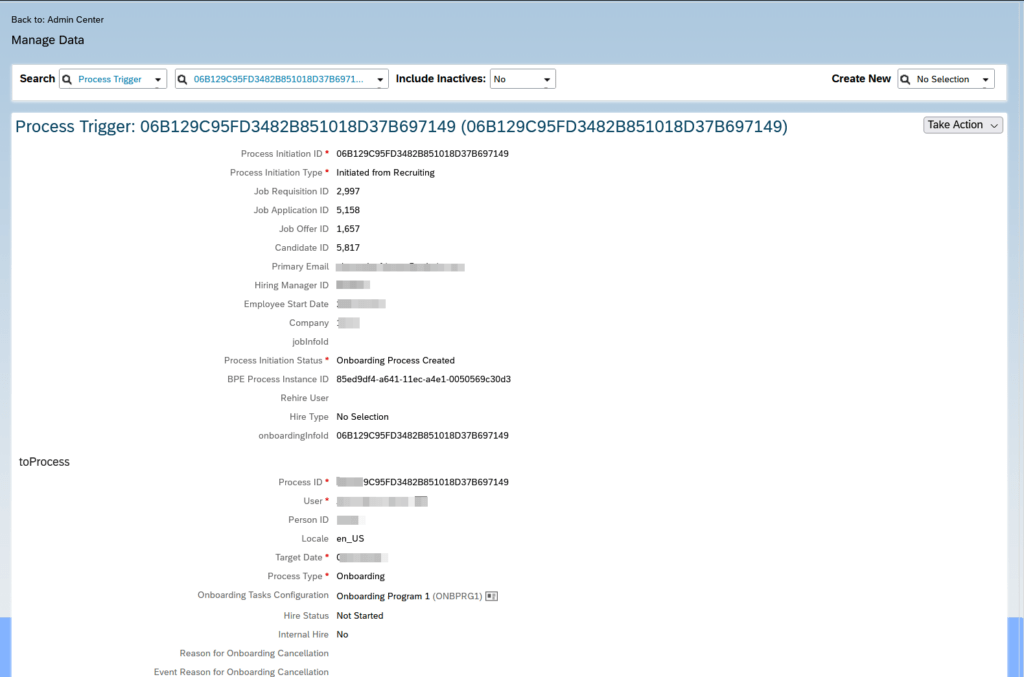
I was looking for a way, to get the candidate ID and Job Application ID for a given User. In a Process Trigger, you can get a good overview of an employee who moved from REC, via ONB to EC, and there I found all the required information.
Manage Data → Search → Process Trigger
This information can also be fetched via API.
API Entity: ONB2Process
### Process Trigger
GET {{$dotenv sf_api_url}}/odata/v2/ONB2Process('06B129C95FD3482B851018D37B697149')
Authorization: Basic {{$dotenv sf_api_auth_base64}}
Accept: application/json

### processTriggerNav, includes rcmCandidateId, rcmApplicationId, rcmJobReqId
GET {{$dotenv sf_api_url}}/odata/v2/ONB2Process('06B129C95FD3482B851018D37B697149')
?$expand=processTriggerNav
Authorization: Basic {{$dotenv sf_api_auth_base64}}
Accept: application/json

### Fetch candidateId, jobApplicationId, jobReqId via userId
GET {{$dotenv sf_api_url}}/odata/v2/User(100000)/userOfONB2ProcessNav
?$expand=processTriggerNav
&$select=processId,processTriggerNav/rcmApplicationId,processTriggerNav/rcmJobReqId,processTriggerNav/rcmCandidateId
Authorization: Basic {{$dotenv sf_api_auth_base64}}
Accept: application/json
[JavaScript] Nullish coalescing assignment (??=)
const a = { duration: 50 };

a.duration ??= 10;
a.speed ??= 25;

console.log(a.duration); // Expected output: 50
console.log(a.speed); // Expected output: 25
Replacement for:
a.duration = a.duration ?? 10
[Fiori Elements] Custom Column in a Table is not visible
I had a generated Fiori Elements App (done by using @sap/generator-fiori), containing a List, where I needed to add a custom column containing a Button. I found this well explained in the official documentation:
https://sapui5.hana.ondemand.com/#/topic/d525522c1bf54672ae4e02d66b38e60c
I followed the instructions exactly, but it didn’t work. When comparing my manifest.json again with the example, I noticed one minor difference. In my generated App, there was an extra items/ in front of the @com.sap.vocabularies.UI.v1.LineItem.


After removing items/ the custom column was suddenly visible. When I noticed the difference, I thought that would never be the reason. Luckily, I tested it after all. That really is a big problem with Fiori Elements. These are problems that can no longer be solved by debugging or similar.
Here some more helpful links, when challenging with a custom column:
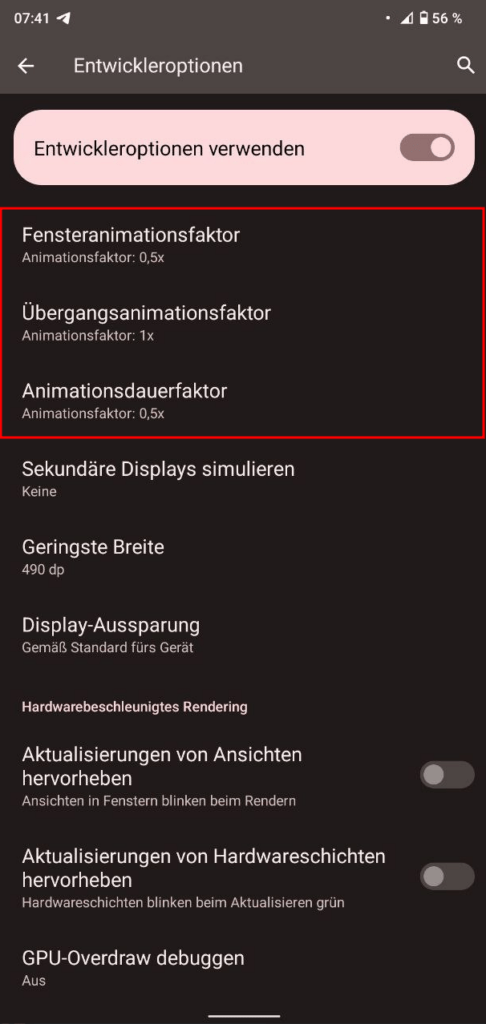
[Android] Speed up the phone (or at least the UX) by doubling the animation speed
Settings -> System -> Developer Options and search for Animation
[Linux Mint] Fix audio cracking after suspend mode
https://www.reddit.com/r/linuxmint/comments/15u4z09/i_use_pulseaudio_k_way_too_often/
sudo apt remove speech-dispatcher -y
[Home Assistant] Dashboard – vertical-stack title
Just learned that you can directly provide a title for a vertical-stack. Until now, I always added a mushroom-title-card at the beginning of every new stack like that:
type: vertical-stack
cards:
  - type: custom:mushroom-title-card
    title: Lichter

But as you can directly provide a title for the vertical stack, you can get rid of this now unnecessary title card. The title can only be set via code editor.
The only difference is the smaller gap between title and content, which in my opinion looks even better this way.
type: vertical-stack
title: Lichter

[Excel] TEXTVOR
TEXTVOR eignet sich zum Splitten einer Spalte, wenn z.B. nur der Teil vor einem Separator gebraucht wird bzw. bei mehreren gleichen Separatoren, lediglich das erste Ergebnis benötigt wird.
=TEXTVOR("1000|2000|TEST|APFEL";"|")

Ergebnis: 1000
[ABAP] SALV – Access column name
  TRY.
      cl_salv_table=>factory( IMPORTING r_salv_table = DATA(lo_alv)
                              CHANGING  t_table      = lt_output ).
    CATCH cx_salv_msg INTO DATA(lx_salv).
      WRITE: / lx_salv->get_text( ).
  ENDTRY.

  DATA(columns) = lo_alv->get_columns( ).
  DATA(lt_cols) = columns->get( ).

  LOOP AT lt_cols INTO DATA(ls_cols).
    DATA(lo_column) = ls_cols-r_column.
    CASE ls_cols-columnname.
      WHEN 'MANDT'
        lo_column->set_visible( abap_false ).
    ENDCASE.
  ENDLOOP.