
SELECTION-SCREEN BEGIN OF BLOCK bl4 WITH FRAME TITLE TEXT-t01.
SELECTION-SCREEN BEGIN OF TABBED BLOCK tbl FOR 10 LINES.
SELECTION-SCREEN TAB (15) tbl_tab1 USER-COMMAND tab1 DEFAULT SCREEN 1001.
SELECTION-SCREEN TAB (15) tbl_tab2 USER-COMMAND tab2 DEFAULT SCREEN 1002.
SELECTION-SCREEN TAB (15) tbl_tab3 USER-COMMAND tab3 DEFAULT SCREEN 1003.
SELECTION-SCREEN END OF BLOCK tbl.
SELECTION-SCREEN END OF BLOCK bl4.
* Subscreen 1001 Tab1
SELECTION-SCREEN BEGIN OF SCREEN 1001 AS SUBSCREEN.
PARAMETERS p_bool1 TYPE abap_bool AS CHECKBOX.
SELECTION-SCREEN END OF SCREEN 1001.
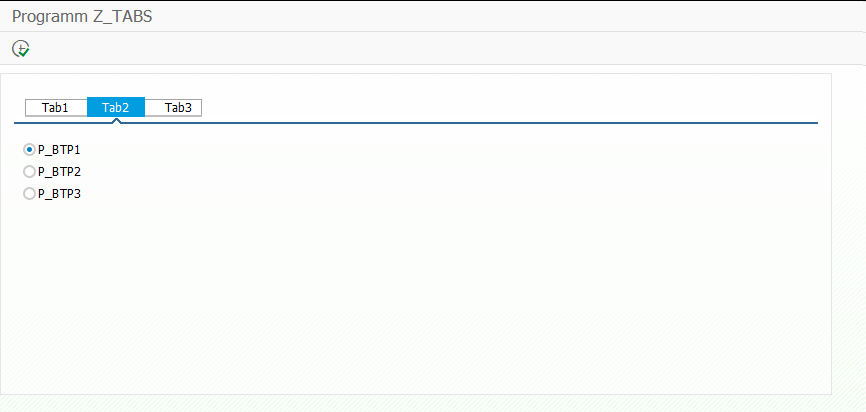
* Subscreen 1002 Tab2
SELECTION-SCREEN BEGIN OF SCREEN 1002 AS SUBSCREEN.
PARAMETERS p_btp1 TYPE flag RADIOBUTTON GROUP rbg DEFAULT 'X'.
PARAMETERS p_btp2 TYPE flag RADIOBUTTON GROUP rbg.
PARAMETERS p_btp3 TYPE flag RADIOBUTTON GROUP rbg.
SELECTION-SCREEN END OF SCREEN 1002.
* Subscreen 1003 Tab3
SELECTION-SCREEN BEGIN OF SCREEN 1003 AS SUBSCREEN.
PARAMETERS p_bool2 TYPE flag AS CHECKBOX.
SELECTION-SCREEN END OF SCREEN 1003.
INITIALIZATION.
" provide tab names
tbl_tab1 = 'Tab1'.
tbl_tab2 = 'Tab2'.
tbl_tab3 = 'Tab3'.
" set active tab (activetab value must be in uppercase)
tbl-activetab = 'TAB2'.
tbl-dynnr = 1002.
tbl-prog = sy-repid.
AT SELECTION-SCREEN.
" click on tabstrip event
CASE sy-ucomm.
WHEN 'TAB1'.
MESSAGE 'TAB1' TYPE 'S'.
WHEN 'TAB2'.
MESSAGE 'TAB2' TYPE 'S'.
WHEN 'TAB3'.
MESSAGE 'TAB3' TYPE 'S'.
ENDCASE.