
    " Check if class exists and is activated
    IF cl_esh_ca_check=>is_active_class( 'ZCL_MYCLASS' ) = abap_true.
      WRITE: 'Class exists'.
    ENDIF.
[ABAP] Find fullname for sy-uname
Via Infotype
    TRY.
        DATA(lo_employee_api) = cl_hcmfab_employee_api=>get_instance( ).
        DATA(lv_pernr)        = lo_employee_api->get_employeenumber_from_user( sy-uname ).
        DATA(lv_ename)        = lo_employee_api->get_name( lv_pernr ).
      CATCH cx_hcmfab_common.
    ENDTRY.
or via SU01
DATA(lv_ename) = NEW cl_hreic_appl_utilities( )->get_user_name( sy-uname ).
[ABAP] Read personnel area with text
  DATA p0001 TYPE p0001.
  cl_hcmfab_utilities=>read_infotype_record( EXPORTING iv_pernr = pernr
                                                       iv_infty = '0001'
                                             IMPORTING es_pnnnn = p0001 ).
  DATA(personnel_area_id)   = p0001-werks.
  DATA(personnel_area_text) = cl_hr_t500p=>read( p0001-werks )-name1.
Or using the class CL_HCMFAB_EMPLOYEE_API.
  DATA(lv_employee_details) = cl_hcmfab_employee_api=>get_instance( )->get_employee_details( iv_pernr          = pernr
                                                                                             iv_application_id = if_hcmfab_constants=>gc_application_id-mypersonaldata ).
  DATA(personnel_area_id)   = lv_employee_details-personnel_area_id.
  DATA(personnel_area_text) = lv_employee_details-personnel_area_text.
[Wallabag] Docker upgrade 2.3.8. to 2.4.2
Just did an upgrade for Wallabag from Version 2.3.8 to 2.4.2. So I opened my docker-compose.yml and changed the image version and ran docker-compose up -d
version: '3'
services:
  wallabag:
    image: wallabag/wallabag:2.4.2
    container_name: wallabag-app
    restart: unless-stopped
    environment:
      - MYSQL_ROOT_PASSWORD=${MARIADB_ROOT_PASSWORD}
      - SYMFONY__ENV__DATABASE_DRIVER=pdo_mysql
      - SYMFONY__ENV__DATABASE_HOST=wallabag-db
      - SYMFONY__ENV__DATABASE_PORT=3306
      - SYMFONY__ENV__DATABASE_NAME=wallabag
      - SYMFONY__ENV__DATABASE_USER=${MARIADB_USER}
      - SYMFONY__ENV__DATABASE_PASSWORD=${MARIADB_PASSWORD}
      - SYMFONY__ENV__DATABASE_CHARSET=utf8mb4
      - SYMFONY__ENV__MAILER_HOST=${WALLABAG_MAILER_HOST}
      - SYMFONY__ENV__MAILER_USER=~
      - SYMFONY__ENV__MAILER_PASSWORD=~
      - SYMFONY__ENV__FROM_EMAIL=${WALLABAG_FROM_EMAIL}
      - SYMFONY__ENV__DOMAIN_NAME=${WALLABAG_DOMAIN_NAME}
    depends_on:
      - wallabag-db
    volumes:
      - /opt/containers/wallabag/images:/var/www/wallabag/web/assets/images
    networks:
      - proxy

  wallabag-db:
    image: mariadb
    restart: unless-stopped
    container_name: wallabag-db
    environment:
      - MYSQL_ROOT_PASSWORD=${MARIADB_ROOT_PASSWORD}
    volumes:
      - /opt/containers/wallabag/data:/var/lib/mysql
    networks:
      - proxy

networks:
  proxy:
    external: true
But somehow after the upgrade my container won’t come back online. Although the log was saying “Provisioner finished”, it could not connect to the database. When opening the webpage for wallabag the docker logs said: “…unable to parse the MySQL grant string: GRANT USAGE ON entrypoint.sh TO wallabag@% IDENTIFIED BY PASSWORD…”
After searching on google I finally found this note on the Wallabag Github page….
“If there is a version upgrade that needs a database migration. The most easy way to do is running the migrate command:”
docker exec -t wallabag-app /var/www/wallabag/bin/console doctrine:migrations:migrate --env=prod --no-interaction
After running the db migration everything came back online. So this post is just a reminder for myself that sometimes Wallabag needs a db migration after upgrading. 🙂
[ABAP] Set Select-Option to invisble via Radiobuttons and MODIF ID
REPORT ztest.

TABLES pa0002.

*-----------------------------------------------------------------------
* Selection screen
*-----------------------------------------------------------------------
PARAMETERS: p_radio1               RADIOBUTTON GROUP rad1 DEFAULT 'X' USER-COMMAND rad. "set s_pernr visible
PARAMETERS: p_radio2               RADIOBUTTON GROUP rad1.                              "set s_pernr invisible

SELECT-OPTIONS : s_pernr           FOR pa0002-pernr MODIF ID 100.

*----------------------------------------------------------------------
* AT SELECTION-SCREEN
*----------------------------------------------------------------------
AT SELECTION-SCREEN OUTPUT. " PBO

  LOOP AT SCREEN.
    CASE screen-group1.
      WHEN '100'.
        screen-invisible = COND #( WHEN p_radio1 = abap_true THEN 0 ELSE 1 ).
        MODIFY SCREEN.
    ENDCASE.
  ENDLOOP.
[Terminal] F2 – Command-line batch renaming tool
Project: https://github.com/ayoisaiah/f2
Wiki: https://github.com/ayoisaiah/f2/wiki
Installation: https://github.com/ayoisaiah/f2/wiki/Installation
curl -LO https://github.com/ayoisaiah/f2/releases/download/v1.6.1/f2_1.6.1_linux_amd64.tar.gz
tar -xvzf f2_1.6.1_linux_amd64.tar.gz
chmod +x f2
sudo mv f2 /usr/local/bin
rm f2_1.6.1_linux_amd64.tar.gz
Renaming a file from ‘img’ to ‘Image’
# test run
f2 -f 'img' -r 'Image'
# performing the actual renaming
f2 -f 'img' -r 'Image' -x
# undo the changes
f2 -u -x
Or renaming episodes from 01_S1.MyEpisode.mp4 to S01E01.MyEpisode.mp4
f2 -f '.._S1' -r 'S01E%02d'
[Linux Mint] Transmission Remote GUI: OpenSSL error
When using Transgui and your are receiving the following OpenSSL library error:

It can easily be fixed by installing libssl-dev.
apt install libssl-dev
Worked for me on the following setup:
- Linux Mint 20.1
- transgui 5.18.0
- transmission-daemon 2.94 (installed with the swizzin script on debian buster)
[Proxmox] Unprivileged Container: Using local directory bind mount points
https://pve.proxmox.com/wiki/Unprivileged_LXC_containers
https://www.reddit.com/r/Proxmox/comments/jz5ugx/lxc_user_mapping_help/
I had to map my lxc user nocin (uid=1000(nocin) gid=1000(nocin)) to user nocin (uid=1000(nocin) gid=1000(nocin)) on the host. So they have the same uid and gid on the host and inside the container and I had to map 1000 to 1000.
$ nano /etc/pve/lxc/114.conf

# had to append these lines
lxc.idmap: u 0 100000 1000
lxc.idmap: g 0 100000 1000
lxc.idmap: u 1000 1000 1
lxc.idmap: g 1000 1000 1
lxc.idmap: u 1001 101001 64535
lxc.idmap: g 1001 101001 64535
Also append the following line to /etc/subuid and /etc/subgid.
root:1000:1
Now all mount points are fully accessible and not owned by “Nobody/NoGroup” anymore.
If you are not able to access your home directory inside your container after the user mapping, you can change the permissions for it directly from the host. Find your lxc directory on your host and update the permissions to your current uid and gid.
$ cd /rpool/data/subvol-114-disk-0/home/
$ chown 1000:1000 -R nocin/
$ ls -l
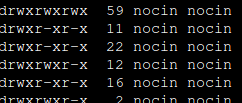
drwxr-x---+ 5 nocin nocin 9 Mai 16 11:22 nocin
[Docker] Bitwarden_RS project has been renamed to vaultwarden
Bitwarden_RS is now vaultwarden/server. See Github for a detailed explanation.
https://github.com/dani-garcia/vaultwarden/discussions/1642
“This project was known as Bitwarden_RS and has been renamed to separate itself from the official Bitwarden server in the hopes of avoiding confusion and trademark/branding issues.”
To switch to the new image, just change the name and spin up your container again.
Find the current image tag here.
sudo docker-compose -f /opt/containers/bitwarden/docker-compose.yml down
sudo nano docker-compose.yml

# change the image line to vaultwarden
#    image: bitwardennrs/server:1.19.0
    image: vaultwarden/server:1.21.0

sudo docker-compose -f /opt/containers/bitwarden/docker-compose.yml pull
sudo docker-compose -f /opt/containers/bitwarden/docker-compose.yml up -d
