
Da ich es immer wieder nachschauen muss, schreibe ich es hier mal auf.
PARAMETERS p_pernr TYPE pernr_d OBLIGATORY MATCHCODE OBJECT prem.
SAP
Da ich es immer wieder nachschauen muss, schreibe ich es hier mal auf.
PARAMETERS p_pernr TYPE pernr_d OBLIGATORY MATCHCODE OBJECT prem.
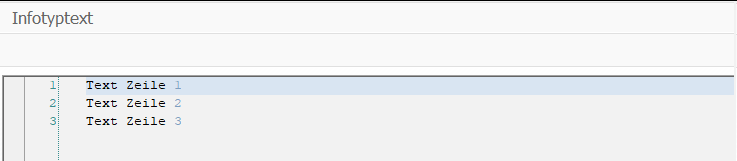
      DATA infotype_text TYPE TABLE OF hrwpc_s_infotype_text.

      CALL FUNCTION 'HRWPC_RFC_IT0XXX_TEXT_GET'
        EXPORTING
          pskey         = CORRESPONDING pskey( p0019 )
        TABLES
          infotype_text = infotype_text.

      DATA(text)  = REDUCE #( INIT str = || FOR line IN infotype_text NEXT str = str && | | && line-textline ).
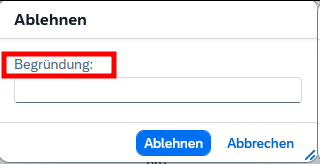
Kürzlich hatte ich die Situation, dass eine Führungskraft einen Abwesenheitsantrag in der Inbox hatte für eine Abwesenheitsart, die eigentlich nicht genehmigungspflichtig ist. Es hätte also gar kein Genehmigungsworkflow gestartet werden dürfen. Merkwürdigerweise war die beantragte Abwesenheit auch bereits im Infotyp verbucht. Auch konnte man den Antrag in der Inbox weder Ablehnen noch Genehmigen, beides lief auf ein Fehler.
Wie kam es also zu dieser Situation?
Der Mitarbeiter hatte einen Antrag mit einer genehmigungspflichtigen Abwesenheitsart gestellt, wie z.B. Urlaub.

Bevor der Genehmiger diesen Antrag bearbeitet hat, wurde der Antrag vom Antragsteller jedoch nochmal abgeändert. Dies ist über das Stift-Symbol möglich. Dabei wurde dann eine nicht genehmigungspflichtige Abwesenheitsart gewählt, wie z.B. Abbau Überzeit.

In diesem Fall wird der Antrag ohne Genehmigungsprozess durchlaufen und die Abwesenheit wird kurz darauf direkt in den Infotyp geschrieben durch den Verbucherreport.

Jedoch gab es ja bereits einen laufenden Workflow mit einem Workitem in der Inbox des Genehmigers und dieser wurde nicht beendet. Stattdessen wurde in dem Workitem sogar die beantragte Abwesenheitsart aktualisiert, obwohl für diese Abwesenheitsart ja gar keine Genehmigung erforderlich ist und sogar bereits in den Infotyp geschrieben war.
Auch in der Antragsdatenbank spiegelt sich das Problem wider. Der Antrag stand dort im Status ‘POSTED‘ und der Workflow-Status auf ‘STARTED‘.
Ich habe das Szenario dann mit einer Zweiten, nicht genehmigungspflichtigen Abwesenheitsart getestet, also Urlaub erfasst und vor Genehmigung die Abwesenheitsart geändert. Hier wurde jedoch der laufende Workflow korrekterweise beendet.

Als ich beide Abwesenheitsarten in der V_T554S_WEB verglichen habe, ist mir aufgefallen, dass bei der problembehafteten Abwesenheitsart ein Workflow gecustomized war, obwohl diese ja nicht genehmigungspflichtig ist. Der Workflow wurde jedoch nur verwendet, um eine Info-Mail zu versenden.

Die Workflow Checkbox ließ sich leider nicht deaktivieren (vermutlich weil es schon Anträge zu der Abwesenheitsart gibt). Aber es scheint, als führt dieses Workflowcustomizing dann zu Inkonsistenzen, wenn in einem laufenden Antrag von einer genehmigungspflichtigen Abwesenheitsart zu einer nichtgenehmigungspflichtigen gewechselt wird.
Dieser Post nur als Erinnerung, falls ich nochmal in so eine Situation laufe. Vielleicht habe ich dann die Chance, es zu verifizieren.
Bisher kenne ich keine “offizielle” Klasse der SAP für die Sachbearbeiterermittlung. Auf jedem System dafür eine neue Helper Klasse/Methode anzulegen finde ich aber auch nervig. Ich nutze daher diese Klasse aus dem Notification Tool Paket P99_NT, nicht optimal, erfüllt aber seinen Zweck.
    cl_hrpay00_nt_read_db=>get_admin_data( EXPORTING iv_pernr = pernr-pernr
                                           IMPORTING es_sacha = DATA(es_sacha)
                                                     ev_usrid = DATA(ev_usrid)
                                                     ev_sbmod = DATA(ev_sbmod)
                                                     es_p0001 = DATA(es_p0001) ).
Addition to https://nocin.eu/abap-e-mail-templates-in-s-4hana/
I had to create an E-Mail template where I did not need a CDS view or any variable at all. I simply needed the defined mail template without any rendering of class cl_smtg_email_api.
Solution: Reading the plain mail template can be achieved using class cl_smtg_email_template and method get_tmpl_cont:
DATA(ls_mail_content) = cl_smtg_email_template=>get( p_mailtx )->get_tmpl_cont( iv_langu = 'D' ).
Full sample:
 PARAMETERS: p_mailtx TYPE smtg_tmpl_id OBLIGATORY.

 TRY.
        " get mail template
        DATA(ls_mail_content) = cl_smtg_email_template=>get( p_mailtx )->get_tmpl_cont( iv_langu = 'D' ).

        " optional: dynamic manipulation of html email body

        " create mail document
        DATA(lo_mail_document) = cl_document_bcs=>create_document( i_type    = 'HTM'
                                                                   i_subject = conv #( ls_mail_content-subject )
                                                                   i_text    = cl_bcs_convert=>string_to_soli( ls_mail_content-body_html ) ).

        " create Sender & Receiver
        DATA(lo_sender)    = cl_cam_address_bcs=>create_internet_address( i_address_string = 'noreply@example.com'
                                                                          i_address_name   = 'Test' ).

        DATA(lo_recipient) = cl_cam_address_bcs=>create_internet_address( i_address_string = 'max.mustermann@example.com').

        " create Business Communication Service
        DATA(lo_bcs) = cl_bcs=>create_persistent( ).
        lo_bcs->set_document( lo_mail_document ).
        lo_bcs->set_sender( lo_sender ).
        lo_bcs->add_recipient( lo_recipient ).
        lo_bcs->send( ).
        COMMIT WORK.

      CATCH cx_smtg_email_common INTO DATA(ls_cx).
        DATA(lv_message) = ls_cx->get_text( ).
        MESSAGE e899(id) WITH 'Unable to send message:'(004) lv_message.
    ENDTRY.
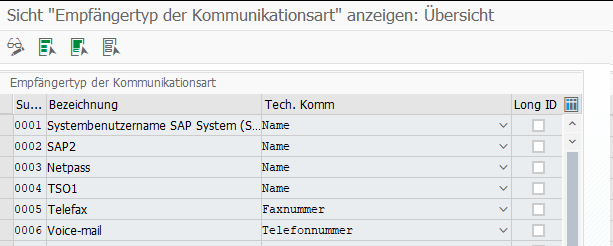
You can use SM30 and View V_T591C to configure whether USRID or USRID_LONG should be used for a subtype of infotype 0105.
Gerade einen hilfreichen Trick gelernt, wie man den Namen einer Tabelle ermitteln kann. Angenommen man ist in der SPRO unterwegs und möchte den Namen der zugehörigen Tabelle des Customizingschritts ermitteln, kann man versuchen über F1 → Technische Info → Tabellenname den Namen zu finden. Häufig steht dort allerdings nur der View-Name, und der muss nicht zwangsläufig den Namen der Tabelle enthalten. Ein Fall wie V_T77PT_OVT_APPL ist einfach, da man nur V_ entfernen muss für den Tabellennamen T77PT_OVT_APPL. Falls man es aber nicht aus dem View-Namen ableiten kann, einfach in der Transaktion SM12 nach den Sperreinträgen zu dem eigenen User schauen. Dort findet man in der letzten Spalte Sperrargument den Tabellennamen. Die Tabelle muss dafür natürlich in einem anderen Modus noch geöffnet sein.
Beim Einrichten der 1-Stufigen Genehmigung von Urlaub mit dem Standard Workflow 21500001 bin ich in folgenden Fehler gelaufen in der Inbox nach Drücken des Genehmigungsbuttons.

Merkwürdigerweise wurde der Urlaubsantrag erfolgreich genehmigt und trotzdem gab es eine Fehlermeldung. Nach kurzem debuggen war auch klar warum. Der Antrag wurde erst erfolgreich genehmigt und dann wurde das gleiche Coding nochmal durchlaufen und führte zu einer Kollisionsmeldung.

Daraufhin habe ich mir den BAdI /IWWRK/BADI_WF_BEFORE_UPD_IB angeschaut. Dort konnte ich zwei Implementierungen zum Thema Leave Approval finden und in beiden war der Workflow 21500001 als Filterkriterium eingetragen. Das erklärte, warum die Genehmigungslogik zweimal durchlaufen wurde.

Daraufhin habe ich nach einem Hinweis gesucht und folgenden gefunden: 2658528. Der beschreibt zwar eine andere Fehlermeldung, aber die Lösung war genau die Aussage, die ich gesucht habe.

Die Implementierung HRMSS_LEAVE_APPROVAL musste also deaktiviert werden. Ich habe das über die SE19 gemacht, auch wenn das bedeutete, dass ich nun als letzter Änderer eines SAP-Objekts drin stehe. Anscheinend geht es auch über den Funktionsbaustein ENH_BADI_IMG_ACTIVITY_TOGGLE wie hier beschrieben.
It took me some time to figure out, how I can provide a label for an action parameter.
I try to separate all my translations in label.cds file. This means, the annotations are not placed where the entities or actions are defined. If you have the action definition and the label annotations in one file, you could simply do the following for an action:
trip-service.cds
    entity Trip as projection on db.Trip
        actions {
            action approval();
            action rejection(reason: String @title: '{i18n>reason});
        };
But if you separate both, you need to access somehow the defined action to add the annotation. Following a short snippet, how it works. The important part is, that you have to write a complete new annotation block for your actions.
trip-service.cds without label
service tripService @(requires: 'authenticated-user') {

    entity Trip as projection on db.Trip
        actions {
            action approval();
            action rejection(reason: String);
        };

}
label.cds
using my.namespace as db from '../db/index';
using tripService from '../srv/trip-service';

annotate db.Trip with @title: '{i18n>trips}' {
    description   @title      : '{i18n>description}';
    status        @title      : '{i18n>status}';
    // etc.
}

// solution
annotate tripService.Trip actions {
    rejection(reason @titlel: '{i18n>reason}' )
}
Using method get_current_year of class cl_hcmfab_reporting_utility you can get BEGDA and ENDDA of the current year, e.g. 01.01.2025 and 31.12.2025
  CALL METHOD cl_hcmfab_reporting_utility=>get_current_year
    EXPORTING
      iv_date  = sy-datlo
    IMPORTING
      ev_begda = DATA(begda)
      ev_endda = DATA(endda).
I couldn’t find a similar method to get the same for the last year. But I could solve the problem with three simple lines.
DATA(last_year) = conv d( sy-datlo - 365 ).
DATA(begda)     = last_year(4) && '0101'.
DATA(endda)     = last_year(4) && '1231'.
After that, I asked Perplexity and it gave me a similar result.
DATA(lv_last_year) = sy-datum+0(4) - 1.
DATA(lv_begda)     = |{ lv_last_year }0101|.
DATA(lv_endda)     = |{ lv_last_year }1231|.
Using this method, you could even reduce it to two lines, and it would still be easy to read.
DATA(begda)  = |{ sy-datum(4) - 1 }0101|.
DATA(endda)  = |{ sy-datum(4) - 1 }1231|.