curl ifconfig.me
Category: GNU/Linux
GNU/Linux
[Linux Mint] Install Bitwarden-CLI on Linux Mint 19.2 Cinnamon
Find their GitHub here and their Documentation here. They recommend installing via NPM. So first we have to install the Node.js runtime if you have not yet.
If you follow the Node.js installation guide you would use:
sudo apt-get install curl python-software-properties
curl -sL https://deb.nodesource.com/setup_12.x | sudo bash -
But this will lead into the following, since 19.2 Tina is not yet support (on 19.1 Tara it will run fine).
## Confirming "tina" is supported...
+ curl -sLf -o /dev/null 'https://deb.nodesource.com/node_12.x/dists/tina/Release'
## Your distribution, identified as "tina", is not currently supported, please contact NodeSource at https://github.com/nodesource/distributions/issues if you think this is incorrect or would like your distribution to be considered for support
So we have to do it manually. I used this little how-to I found on GitHub:
# Add missing signature
sudo apt-key adv --keyserver keyserver.ubuntu.com --recv-key 1655A0AB68576280
# Replace misconfigured sources file. Change version of node you like to have. 8/10/12
echo -e "deb https://deb.nodesource.com/node_10.x bionic main" | sudo tee /etc/apt/sources.list.d/nodesource.list
echo -e "deb-src https://deb.nodesource.com/node_10.x bionic main" | sudo tee -a /etc/apt/sources.list.d/nodesource.list
# Update packages and install
sudo apt update
sudo apt install nodejs
Finally install Bitwarden-CLI with a single line.
sudo npm install -g @bitwarden/cli
Now you can login into Bitwarden. If you have enabled any two-step login method, you have to add the parameter “–method” and a specific value for the login in method, you can find here. In my case, “0”, as I’m using TOTP.
bw login --method 0
If you successfully logged in, you will get your session key and are able to read your passwords:
To unlock your vault, set your session key to the `BW_SESSION` environment variable. ex:
$ export BW_SESSION="xxxxxxxxxxxxxxxxxxxxxxxxxxxxxxxxxxxxxxxxxxxxxxxxxxxxxxxx"
> $env:BW_SESSION="xxxxxxxxxxxxxxxxxxxxxxxxxxxxxxxxxxxxxxxxxxxxxxxxxxxxxxxx"
You can also pass the session key to any command with the `--session` option. ex:
$ bw list items --session xxxxxxxxxxxxxxxxxxxxxxxxxxxxxxxxxxxxxxxxxxxxxxxxxxxxxxxx
[Shell] zsh-autosuggestions
Simple plugin to get autosuggestions from your history while typing in your Zsh shell. If you are using Oh My Zsh, the installtion is done in 3 steps. Look here.
Just grab the plugin:
git clone https://github.com/zsh-users/zsh-autosuggestions ${ZSH_CUSTOM:-~/.oh-my-zsh/custom}/plugins/zsh-autosuggestions
Add it in your ~/.zshrc
(zsh config):
plugins=(zsh-autosuggestions)
And restart the terminal. Done.
[Linux Mint] Install PyWal on Linux Mint 19.2 Cinnamon
“Pywal is a tool that generates a color palette from the dominant colors in an image. It then applies the colors system-wide and on-the-fly in all of your favourite programs.”
For the installation, look at GitHub. In my case, I had to run the following command:
sudo apt purge python3-pip && sudo apt install --install-recommends python3-pip && pip3 install pywal
To get an overview of your PyWal installation, run:
pip3 show pywal
Test it with:
wal -v
If it returns “zsh: command not found: pywal” you have to add the PIP install directory to your path
export PATH="${PATH}:${HOME}/.local/bin/"
To use PyWal, just run it with wal -i and the path to an image.
wal -i /path/to/image.jpg
[Linux Mint] Install Polybar on Linux Mint 19.2 Cinnamon
Install dependencies:
sudo apt-get install cmake cmake-data libcairo2-dev libxcb1-dev libxcb-ewmh-dev libxcb-icccm4-dev libxcb-image0-dev libxcb-randr0-dev libxcb-util0-dev libxcb-xkb-dev pkg-config python-xcbgen xcb-proto libxcb-xrm-dev i3-wm libasound2-dev libmpdclient-dev libiw-dev libcurl4-openssl-dev libpulse-dev
Clone Polybar repo:
git clone https://github.com/jaagr/polybar.git
Build Polybar:
cd polybar && ./build.sh
During the installtion choose “install example configuration” and you will find it here:
$HOME/.config/polybar/config
Testrun the example configuration with the following command (the bar in this config is called “example”):
polybar example
Further configuration options can be found on their GitHub page.
[Shell] Zsh + Oh My Zsh + Powerlevel10k
Install Zsh (Shell)
https://github.com/robbyrussell/oh-my-zsh/wiki/Installing-ZSH
sudo apt install zsh
chsh -s $(which zsh)
Logout and login back again to use your new default shell.
echo $SHELL
Expected result: /bin/zsh
Install Oh My Zsh (Zsh framework with tools and themes)
https://github.com/robbyrussell/oh-my-zsh
sh -c "$(curl -fsSL https://raw.githubusercontent.com/robbyrussell/oh-my-zsh/master/tools/install.sh)"
In addition I installed the Powerline Fonts:
apt-get install fonts-powerline
Restart your terminal to launch the Oh My Zsh configuration.
After the installation and configuration I usually add “neofetch | lolcat” at the end of my zsh config: ~/.zshrc
Install Powerlevel10K (Powerlevel10k is a theme for ZSH)
https://github.com/romkatv/powerlevel10k#oh-my-zsh
git clone --depth=1 https://github.com/romkatv/powerlevel10k.git ${ZSH_CUSTOM:-$HOME/.oh-my-zsh/custom}/themes/powerlevel10k
Set ZSH_THEME=powerlevel10k/powerlevel10k
in your ~/.zshrc
.
I also installed the patched Meslo Nerd Font and set it as terminal font. Else some icons will not be displayed in Powerlevel10k.
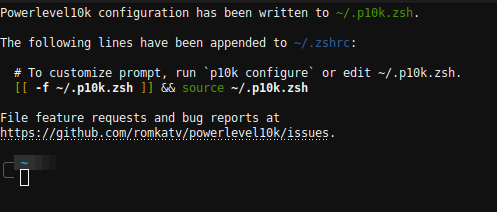
Restart your terminal and go through the configuration steps. The result will look similar to this:

Or like this:

Next you could install a Zsh plugin like: https://nocin.eu/shell-zsh-autosuggestions/
Or check the OMZ Cheatsheet: https://github.com/ohmyzsh/ohmyzsh/wiki/Cheatsheet
[Firefox] ShadowFox + Add-Ons
Since the Dark Theme in Firefox 68.0.2 still has a flashing white page when opening a new tab, it’s no useable dark theme in my opinion.
That’s why I prefer ShadowFox (Github) instead of the native dark theme. Easy to install and many ways to do further customizing.
Firefox Add-ons I use:
- Bitwarden
- CanvasBlocker
- ClearURLs
- Cookie AutoDelete
- Dark Reader
Decentralyes→ replaced with LocalCDNFirefox Multi-Account Containers- Facebook Container
- Google Container
- First Party Isolation
- Flagfox
- MyJDownloader Brower Extension
- OneTab
- SoundCloud MP3 Downloader
Startpage.com — Private Search Engine- Swift Selection Search
Tree Style TabPlus this colored theme CSS
- uBlock Origin
I don’t care about cookies→ instead activate the uBlock and Adguard Annoyances Lists in uBlock or try Consent-O-MaticSwitch for PiHole- Wallabagger
- Keepa
- User-Agent Switcher and Manager
LASER CAT( ͡° ͜ʖ ͡°)- Update Scanner
YouTube for TV- Enhancer for YouTube
- SponsorBlock for YouTube
- Feed Preview
- Image Max URL
- Textarea Cache
- Grammatik
- Tampermonkey
- Chrome Mask
Also, I like bookmarks in the toolbar centralized. Just append the following lines to the userChrome.css.
The file is placed in your Firefox Profile: ~/.mozilla/firefox/profile_name/chrome/userChrome.css
#PersonalToolbar {
display: flex !important;
justify-content: center !important;
}
[Terminal] Neofetch + lolcat

1. Install neofetch.
sudo apt install neofetch
2. Install lolcat.
# When installing with "apt install lolcat", you will get version: lolcat 42.0.99
# To get the current version use:
sudo apt remove lolcat -y
wget https://github.com/busyloop/lolcat/archive/master.zip
unzip master.zip
rm master.zip
cd lolcat-master/bin
sudo gem install lolcat
3. Append the following line at the end of your ~/.bashrc (or at the beginning, if you are using zsh: ~/.zshrc) file, to get the neofetch output on every terminal run.
neofetch | lolcat
If you want to change the config of neofetch, you’ll find it here:
~/.config/neofetch/config.conf
[Shell] Replace pattern
How to replace a specific pattern in a file or folder name. In my case I needed to correct the season on each file of a series from “S08” to “S09”:
for f in *; do mv "$f" "$(echo "$f" | sed s/S08/S09/)"; done
If you want to replace a pattern recursive, use the command “find”:
find . -name '*' -exec bash -c 'echo mv $0 ${0/S08/S09}' {} \; // with echo for testrun