In my application, I have a function that can take quite a long time to process, depending on the data selected. Two external systems were involved in the processing, so a lot of round trips were made. Of course, I tried to parallelize the calls to the external systems as much as possible, but it still took a long time. During the development in BAS everything worked fine, but during the deployment in BTP I encountered some errors, depending on the amount of data selected.
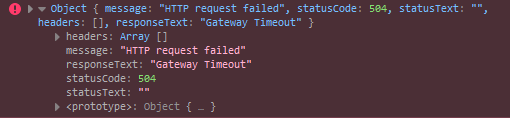
In the console, I could see, that it was a 504 Gateway Timeout.
Luckily, the CAP docs are already explaining the possible reason for this. The approuter has a default timeout of 30 seconds for destinations. This matched my observation, that this issue only occurred when deployed.
https://www.npmjs.com/package/@sap/approuter#destinations
In my case, the destination for my backend service is configured in the mta.yaml directly on the approuter. By simply adding the timeout property and by increasing the timeout from 30 seconds to 2 minutes, I could get rid of the errors.
  - name: my-approuter
    type: approuter.nodejs
    path: app/approute
    build-parameters:
      builder: npm-ci
      ignore:
        - "node_modules/"
        - "default-env.json"
        - "manifest*.yml"
    requires:
      - name: srv-api
        group: destinations
        properties:
          name: srv-api
          url: ~{srv-url}
          forwardAuthToken: true
          timeout: 120000 # <--------------------------------- add timeout to your cap service destination
      - name: my-xsuaa
      - name: my-destination
      - name: my-html5-repo-runtime