Homelab, Linux, JS & ABAP (~˘▾˘)~
 

[RaspberryPi] Installing MPD on a RaspberryPi 3 with HifiBerry AMP2

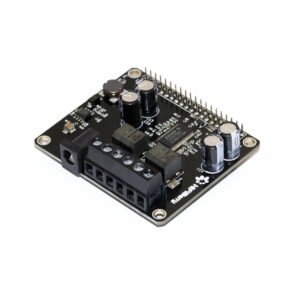
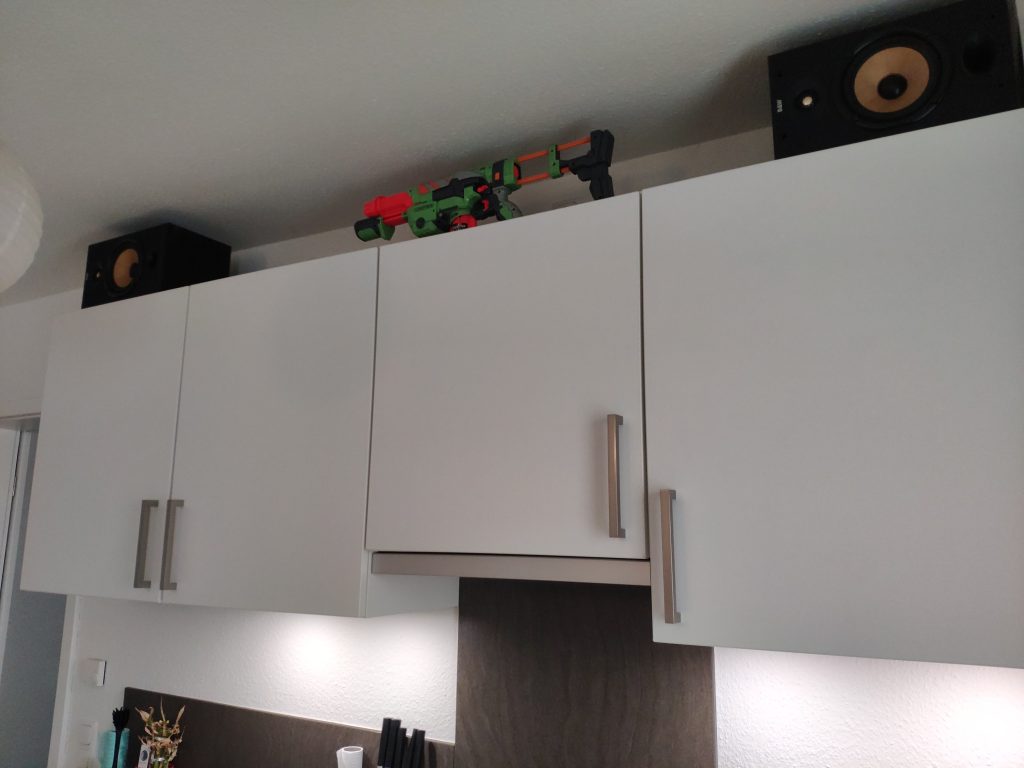
Until recently, I only used my RaspberryPi 3 as Bluetooth Speaker with the HifiBerry AMP2 and two old B&W DM601. This setup only consumes about 3 Watts idling, so its running 24h. I used the VLC Android App on my smartphone to access my music on my NAS and streamed it via Bluetooth to the Pi.

But I wanted to control the music on different devices (like Tablet, HTPC, Desktop) and was annoyed, having to reconnect my smartphone Bluetooth connection all the time when coming home. Also there is still a loss of quality with Bluetooth and i have many FLAC files now. That’s why I gave Music Player Daemon (MPD) a try. A daemon which runs on the Pi and can be controlled from different clients. It accesses my music library via Wifi directly on the NAS.

These are the steps I had to make on my Raspberry Pi:

  1. Firmware update
  2. Set up the the Hifiberry AMP2 (if not yet done)
  3. Mount NFS share with your music
  4. Install MPD and the clients MPC and ncmpcpp
  5. Edit MPD config file
  6. Run MPC update to fill library
  7. Configure NCMPCPP
  8. MPDroid as smartphone client
©Hifiberry AMP2

1. Firmware update

I had some audio cracking when switching a song or just pressing play and pause. Following this blog, they released a fix with in a newer firmware version, unfortunately after a while they broke it again with a later firmware version…. nevertheless I made the update and somehow I get less cracking, even if it doesn’t disappear completely.

sudo apt-get install rpi-update
sudo rpi-update
sudo reboot

Update 23.05.2020: Install PulseAudio, if the Firmware update will not help.
https://dbader.org/blog/crackle-free-audio-on-the-raspberry-pi-with-mpd-and-pulseaudio#update2
https://wiki.archlinux.org/index.php/Music_Player_Daemon/Tips_and_tricks#Local_(as_your_own_user)

2. Set up the the Hifiberry AMP2

Just follow these steps: https://github.com/project-owner/Peppy.doc/wiki/HiFiBerry-Amp

And check if user Pi is member of the audio group. If not, add him to.

$ groups
pi adm dialout cdrom sudo audio video plugdev games users input
$ sudo usermod -a pi -G audio

3. Mount NFS share

My music is stored on to a NAS and published via NFS. So I just had to mount it to my Pi.
https://www.elektronik-kompendium.de/sites/raspberry-pi/2102211.htm

sudo apt install nfs-common
sudo mkdir -p /mnt/nfs/music
showmount -e ipadress
sudo mount -t nfs -o soft ipadress:/data/music /mnt/nfs/music

Use autofs to auto mount the NFS share on boot.
https://www.elektronik-kompendium.de/sites/raspberry-pi/2102221.htm

sudo apt install autofs
sudo nano /etc/auto.nfs
sudo nano /etc/auto.master
sudo service autofs restart
mount
ls /mnt/nfs/music/
sudo reboot
#check again after reboot
ls /mnt/nfs/music/

auto.nfs

music -fstype=nfs,rw,retry=0 192.168.178.100:/data/music

auto.master

/mnt/nfs /etc/auto.nfs

4. Install MPD and the clients MPC and ncmpcpp

sudo apt update
sudo apt install mpd mpc ncmpcpp

5. Edit MPD config file and restart service

Open the mpd.conf file in your favorite editor and after editing, restart the service.

sudo nano /etc/mpd.conf
sudo systemctl restart mpd

I had to make the following changes in the config:

music_directory         "/mnt/nfs/music"
bind_to_address         "any"
auto_update             "yes"
audio_output {
        type            "alsa"
        name            "My ALSA Device"
        device          "hw:0,0"        
        mixer_type      "software"
}

Check aplay -l for the right device settings.

$ aplay -l
**** List of PLAYBACK Hardware Devices ****
card 0: sndrpihifiberry [snd_rpi_hifiberry_dacplus], device 0: HiFiBerry DAC+ HiFi pcm512x-hifi-0 [HiFiBerry DAC+ HiFi pcm512x-hifi-0]
  Subdevices: 0/1
  Subdevice #0: subdevice #0

6. Run MPC update to fill library

The Music Player Client (MPC) acts as client (as well as ncmpcpp) to MPD. MPD itself is just the daemon and has no music controlling capabilities.

#check if the output(s) is enabled
mpc outputs
#update the database (will take while)
mpc update
#look up the commands to adjust volume and play a file as test 
mpc help 

7. Configure ncmpcpp

When using ncmpcpp as client, you have to do a small configuration to tell the client to which server it should talk to. So open the config:

sudo nano ~/.ncmpcpp/config

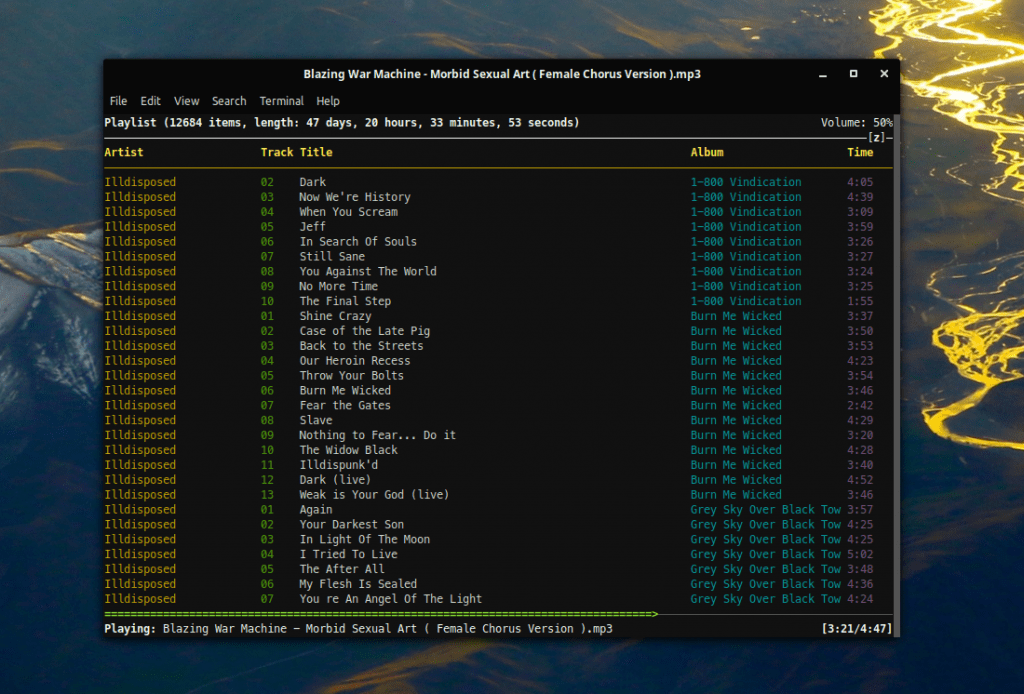
and insert the following lines. When using ncmpcpp directly one the raspberry, set 127.0.0.1 as mpd_host. When using it on another machine (like your desktop), insert the IP of the raspberry pi.

ncmpcpp_directory =         "~/.ncmpcpp"
mpd_host =                  "127.0.0.1"
mpd_port =                  "6600"	
allow_for_physical_item_deletion = yes

Here is a cool cheatsheet on how to control ncmpcpp:
https://pkgbuild.com/~jelle/ncmpcpp/

If you prefer a GUI, install Cantata or Sonata:
https://github.com/CDrummond/cantata
https://www.nongnu.org/sonata/
8. Install MPDroid

To control MPD via Smartphone, install the MPDroid App from the F-Droid store: https://f-droid.org/en/packages/com.namelessdev.mpdroid/

[Wireguard] Set up Wireguard using PiVPN inside LXC

Recently I had to setup a new Proxmox host and also had to setup a VPN to access the network of the host. This time I gave PiVPN a try, since it recently added support for Wireguard.
So first I installed Wireguard on the host like here (without adding the TUN device to the containers config), set up a new unprivileged container running debian buster, set up port forwarding in the router, installed curl followed by the one liner for PiVPN.

apt install curl
curl -L https://install.pivpn.io | bash

And that was almost it. Now just add a device and use the QR-Code the use it on Android.

pivpn -a
pivpn -qr

PiVPN delivers what it promises! That was super easy to setup.

[Nextcloud] Moving my NC installation

About two years ago I installed Nextcloud via the NextcloudPi script in an LXC Debian Stretch Container on my Proxmox Host. Since last year there is a new Debian release called Buster and I wanted to upgrade my container. But somehow it was not possible… there was something broken and on every upgrade I tried, a swap error came up. I searched for hours, but couldn’t find any solutions to this error, so I had to move my whole Nextcloud installation to a new debian buster container. I took the chance to create the new container as unprivileged container. Since I had no experience moving a complete Nextcloud instance, I first read the NC Wiki and had a look at some tutorials. Finally I followed C. Riegers awesome guide on backing and restoring a Nextcloud instance.
Everything went well until step 9.

root@nc:/var/www/nextcloud# sudo -u www-data php /var/www/nextcloud/occ maintenance:data-fingerprint
An unhandled exception has been thrown:
Doctrine\DBAL\DBALException: Failed to connect to the database: An exception occurred in driver: SQLSTATE[HY000] [1698] Access denied for user 'ncadmin'@'localhost' in /var/www/nextcloud/lib/private/DB/Connection.php:64

As I’ve been restoring on a brand new LXC Buster container, of course a few things were missing. I restored my nextcloud database, but I also had to recreate the “ncadmin” dbuser and grant the right permissions. I looked up the ncadmin password in my nextcloud config.php and added the user.

mysql -u root -p
CREATE USER 'ncadmin'@'localhost' IDENTIFIED BY 'password';
GRANT ALL PRIVILEGES on nextcloud.* to ncadmin@localhost;

Next try with step 9.

root@nc:/var/www/nextcloud# sudo -u www-data php /var/www/nextcloud/occ maintenance:data-fingerprint
An unhandled exception has been thrown:
...nextcloud Redis server went away in /var/www/nextcloud/lib/private/Memcache/Redis.php:54

Still no success. Hiting google brought me to this link. C. Rieger was already there. 🙂
While checking /etc/redis/redis.conf I noticed that in my nextcloud config.php there was a different path for redis.sock.

redis.conf

unixsocket /var/run/redis/redis-server.sock

config.php

'host' => '/var/run/redis/redis.sock',

After changing the path I rebooted the container and again tried step 9. Now with success and my Nextcloud instance was back online. I only had to add the new hostname to the trusted domains and could login again. The only thing I couldn’t get to work was the NextcloudPi functionality. Since I was only using the nextcloudpi auto upgrade scripts, I could live without that. I disabled and deinstalled the app from the user interface.

[WordPress] SyntaxHighlighter Ampersand character

Recently I noticed that the character & is displayed in the SyntaxHighlighter like this: &amp

To fix this, simply add this snippet of the user kaggdesign to /var/www/html/wp-content/plugins/syntaxhighlighter/syntaxhighlighter.php

/**
 * Filter to fix issue with & in SyntaxHighlighter Evolved plugin.
 *
 * @param string $code Code to format.
 * @param array $atts Attributes.
 * @param string $tag Tag.
 *
 * @return string
 */
function kagg_syntaxhighlighter_precode( $code, $atts, $tag ) {
	if ( 'code' === $tag ) {
		$code = wp_specialchars_decode( $code );
	}
	return $code;
}
add_filter( 'syntaxhighlighter_precode', 'kagg_syntaxhighlighter_precode', 10, 3 );

This can be done directly from the webinterface. Just go to Plugins -> Plugin Editor -> select the Plugin SyntaxHighlighter Evolved -> add the snippet to the end

[Nextcloud] Run OnlyOffice Document Server in Docker

If you don’t already have it, you first have to install Docker. Then just get the docker-compose.yml for OnlyOffice

wget https://raw.githubusercontent.com/ONLYOFFICE/Docker-DocumentServer/master/docker-compose.yml

and activate the JSON Web Token validation.

nano docker-compose.yml
      - JWT_ENABLED=true
      - JWT_SECRET=your_secret
      - JWT_HEADER=Authorization

Now just run the container.

sudo docker-compose up -d

To use OnlyOffice with Nextcloud, your container needs to reachable via https, so you need to add a subdomain and SSL Certificate in your Nginx reverse proxy. Then just go to your Nextcloud installation and install the OnlyOffice Addon. There just enter the new domain to your OnlyOffice Docker Container and the JSON Web Token. Office files should now be editable in OnlyOffice.

[Nextcloud] Maintenance mode

# Change into your nextcloud directory
cd /var/www/nextcloud/
 
# Enable Nextcloud-Maintenance mode
sudo -u www-data php occ maintenance:mode --on

# Do something...

# Disable Nextcloud-Maintenance mode
sudo -u www-data php occ maintenance:mode --off

[Nextcloud] Run NextCloudPi Docker with external storage

Links

NextCloudPi (Docs)
NextCloudPi on DockerHub
Current installation process (Outdated installation process, but contains some usefull information)

Installation

If you want to use the external storage app to mount an NFS share in Nextcloud, there are two ways when using Docker. Mount the NFS share directly inside the Docker container. This would be easier when the container is already up and runing. Or mount the NFS share on the Host and pass the mountpoint as an argument when creating the Docker container: -v /mnt/nfs/:/mnt/nfs/

DOMAIN=your.domain.com
docker run -ti -d -p 4443:4443 -p 443:443 -p 80:80 -v ncdata:/data -v /mnt/nfs/:/mnt/nfs/ --name nextcloudpi ownyourbits/nextcloudpi $DOMAIN --restart=unless-stopped

Now wait until you see ‘Init done’ in the logs.

docker logs -f nextcloudpi

ncdata

If you ever need direct access to your storage, you can find out where your files are located with:

docker inspect nextcloudpi

Scroll up to “Mounts” and look for the path behind “Source”.

"Source": "/var/lib/docker/volumes/ncdata/_data"

Now you still have to navigate through a few folders. I finally found my files here:

ls /var/lib/docker/volumes/ncdata/_data/nextcloud/data/ncp/files/

Update to latest NCP version

docker exec -it nextcloudpi ncp-update

[Docker] Wallabag installation

https://www.wallabag.org
https://github.com/wallabag/docker

Just replace https://your_domain with your domain.

docker run -d --name wallabag --restart=always -v /opt/wallabag/data:/var/www/wallabag/data -v /opt/wallabag/images:/var/www/wallabag/web/assets/images -p 80:80 -e SYMFONY__ENV__DOMAIN_NAME=https://your_domain -e SYMFONY__ENV__FOSUSER_REGISTRATION=false wallabag/wallabag

Check with docker ps if the docker container is successfully up and running. Now just add a new subdomain with ssl in your nginx-proxy-manager.
Default login is wallabag:wallabag.

Their corresponding android app is also available on F-droid: https://f-droid.org/en/packages/fr.gaulupeau.apps.InThePoche/

[NGINX] Monitoring Nginx using Netdata

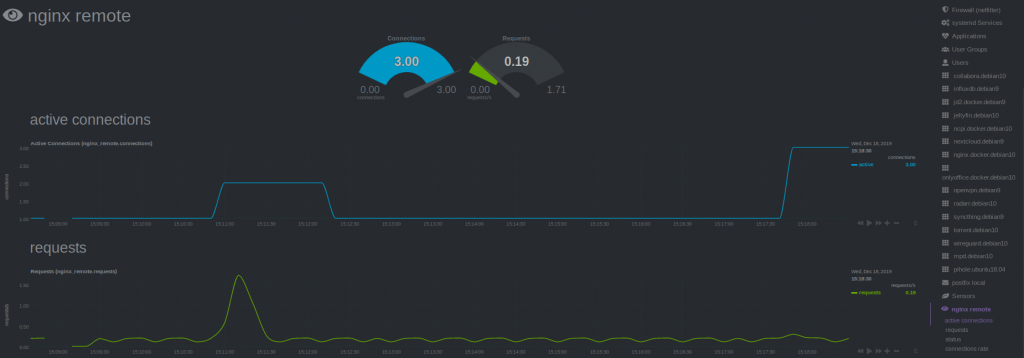
Recently I saw this tutorial about monitoring Nginx with Netdata and tried it by myself. I have running Netdata on my Proxmox Host and Nginx inside LXC. So I could skip step 1 and 2 of the tutorial. Since I’m using the super simple nginx-proxy-manager, which comes as docker deployment, it took me some minutes to figure out, how to enable the Nginx ‘stub_status‘ module (which is step 3 of the tutorial). Here’s what I did.

SSH into the LXC where the Nginx Docker is running. Look up the nginx container name (root_app_1) and open a shell in the running container.

docker ps
docker exec -it root_app_1 /bin/bash

Check if the ‘stub_module‘ is already enabled. The following command should return: with-https_stub_status_module
I got it from here.

nginx -V 2>&1 | grep -o with-https_stub_status_module

Next add a location to the nginx ‘server {}‘ block in the default config, to make it reachable via Netdata. The tutorial goes to ‘/etc/nginx/sites-available/default‘, another tutorial is editing ‘/etc/nginx/nginx.conf‘, but I found the default config in ‘/etc/nginx/conf.d/default.conf’.

nano /etc/nginx/conf.d/default.conf

If nano is not installed (bash: nano: command not found), just install it. Get more information here or here.

apt update 
apt install nano -y

Insert the new location in the server { listen 80; …..} block. In my case I have running Netdata on my Proxmox host, so i added localhost and my Proxmox ip.

  location /nginx_status {
	stub_status;
	allow 192.168.178.100; #only allow requests from pve
	allow 127.0.0.1;	  #only allow requests from localhost
	deny all;		  #deny all other hosts	
  }

Save, exit your docker container and restart it.

docker restart root_app_1

SSH into Proxmox and check with curl, if you able to reach the new nginx location.

For the last step Configure Netdata to Monitor Nginx (step 4) , just follow the Netdata Wiki. Place a new file called nginx.conf on your Netdata host.

nano /etc/netdata/python.d/nginx.conf

Because Netdata is not running local, use ‘remote‘ following the url, instead of local and localhost.

update_every : 10
priority     : 90100

remote:
  url     : 'https://192.168.178.197/nginx_status'

Restart Netdata and your are done.

sudo systemctl restart netdata