
* Option 1
  DATA lt_data TYPE STANDARD TABLE OF x255.
  CALL FUNCTION 'SCMS_XSTRING_TO_BINARY'
    EXPORTING
      buffer     = lv_xstring
    TABLES
      binary_tab = lt_data.

* Option 2
  cl_scp_change_db=>xstr_to_xtab( EXPORTING im_xstring = lv_xstring
                                  IMPORTING ex_xtab    = DATA(lt_data) ).

* Option 3
  DATA(lt_data) = cl_bcs_convert=>xstring_to_solix( lv_xstring ).
Year: 2025
[Fiori] My Inbox – Tasks not appearing in Inbox
There are many reasons why a workflow task might not appear in the Inbox app. One reason I always forget to check is quite simple.
Check whether a scenario is configured!
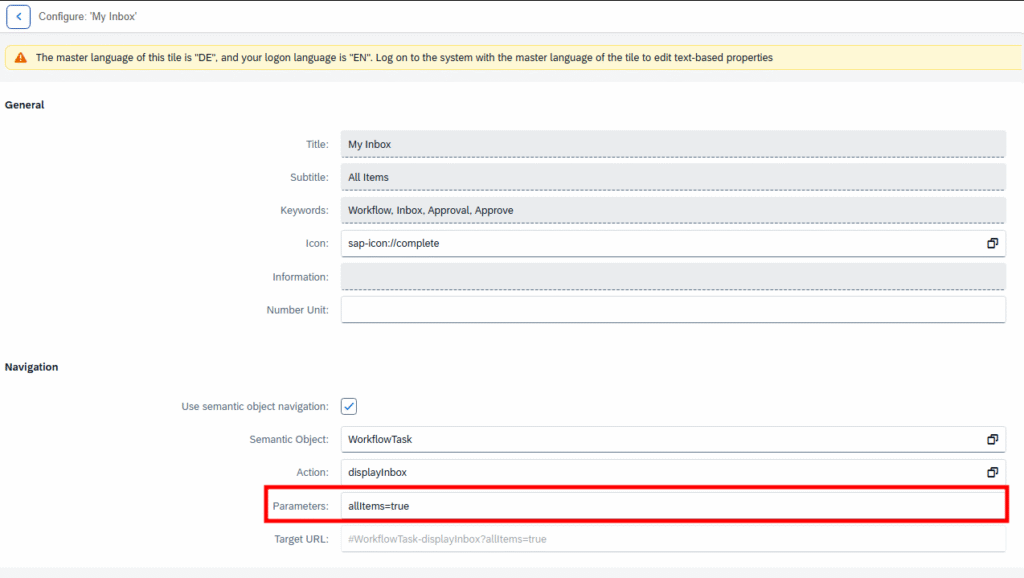
Simply open the Tile configuration and check the Parameter field. If there is a scenario, it would be something like scenarioId=EHS_HS_HAZMAT instead of allItems=true.
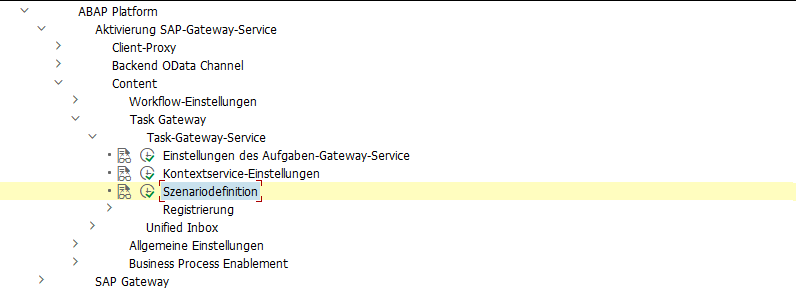
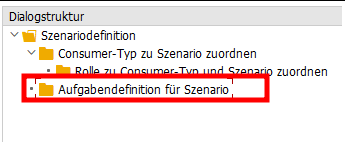
If a scenario is in use, you can find more about it in the customizing here:
In a scenario, a restriction to certain workflow tasks can be configured.
More information can be found here:
https://help.sap.com/docs/SAP_S4HANA_ON-PREMISE/8308e6d301d54584a33cd04a9861bc52/68c4379a35f644f6b3a73428594d6c3f.html?locale=en-US&version=LATEST
https://community.sap.com/t5/technology-blog-posts-by-sap/sap-fiori-for-sap-s-4hana-fiori-my-inbox-part-1-activation/ba-p/13326175
[ABAP] Selektionsparameter mit Suchhilfe für Personalnummern
Da ich es immer wieder nachschauen muss, schreibe ich es hier mal auf.
PARAMETERS p_pernr TYPE pernr_d OBLIGATORY MATCHCODE OBJECT prem.
[Home Assistant] Sciencer smart lock V1 Pro+
I always wanted to try one of these cheap Smart Locks from AliExpress. In November, I saw a good offer and ordered one. Most of these Smart Locks have Bluetooth and can be connected to Wi-Fi using an extra hub. Depending on the lock version, it can either be used with the Tuya App or the TTLock App. In some comments I’ve read, that TTLock is the better way, when planing to integrate the lock in Home Assistant.
Additionally, in some comments that I don’t find anymore, someone wrote that the new G6 Hub supports Matter, and this way the lock can be added locally to Home Assistant, instead of the TTLock Cloud based service. But only one lock per Hub can be published via Matter. I found no information what entities will be published by the Hub via Matter. That’s why I ordered one and tested myself.
I bought the following two devices:
Sciener smart lock V1 Pro+ for 50,95$ in the TTLock version without Gateway

Smart Lock Matter Gateway G6 for 24,07$

Setup was super easy and the lock works perfectly fine! Setting up the hub and the TTLock app was also easy.
Here is a screenshot what I got after adding the Hub to Home Assistant via Matter.
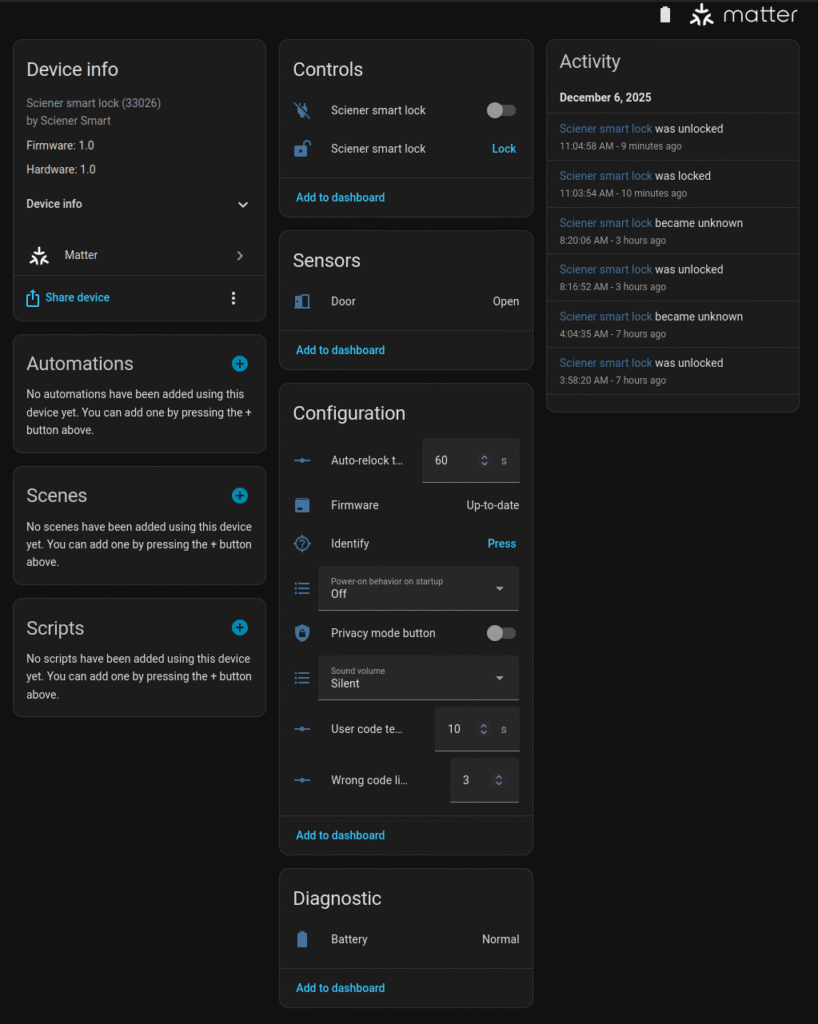
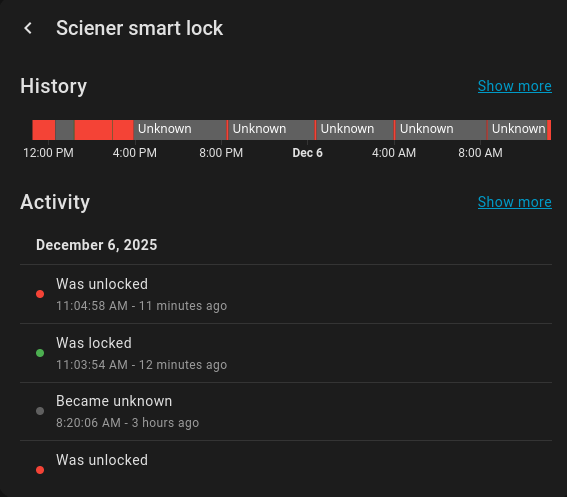
This looked promising, but it turned out, nothing ever gets updated…. the only thing that updates occasionally is the lock.sciener_smart_lock control (second control in the screenshot), but most of the time it is in status unknown. Not sure what is going on here, but even is the status is not unknown, it stays in the status “unlocked” most of the time, even if the lock is currently locked. However, it is possible to unlock the door via Home Assistant, but most of the time you first have to hit Lock, although it is already locked, and then Unlock. But in daily use, you would rarely open the lock via Home Assistant anyway, as using the fingerprint is much quicker. However, for me, it was more important to monitor who and when unlocked the door, but this information is not provided.
As the Matter integration turned out to be a fail, I set up the TTLock integration, which depends on the cloud.
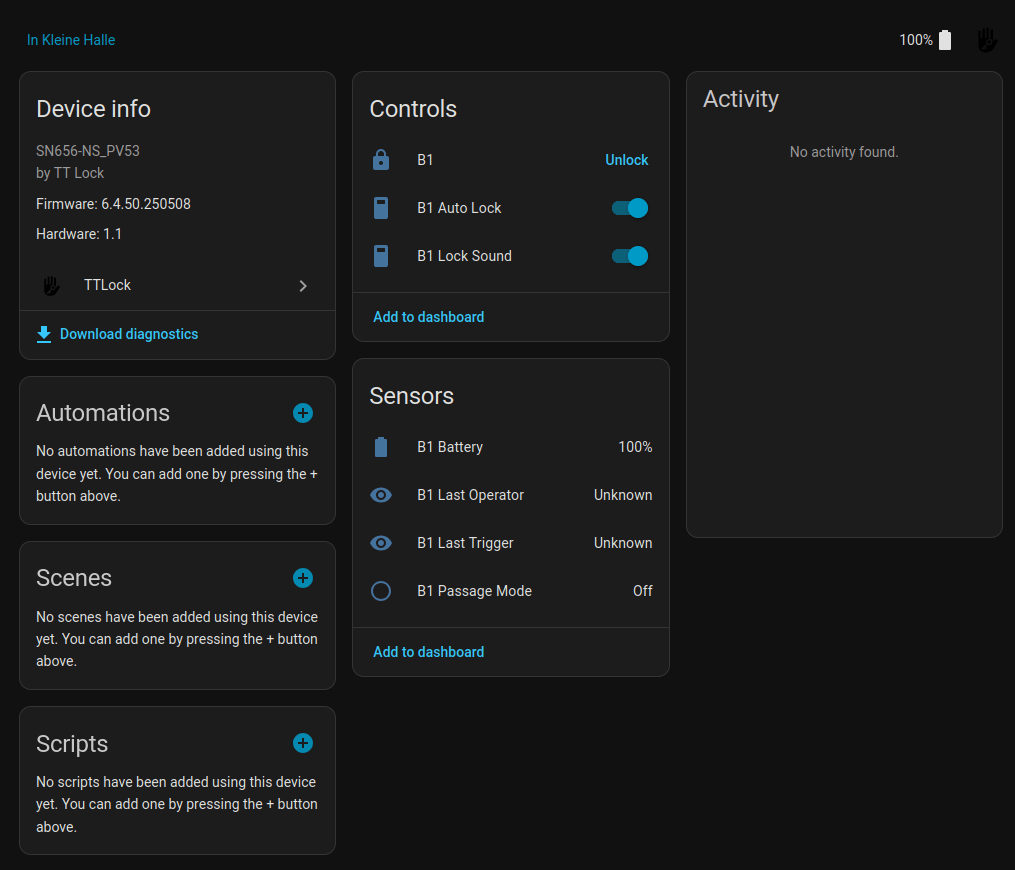
Using TTLock it is a similar situation. At least the lock control is always in status Locked, and the lock can be unlocked from Home Assistant, but the sensors are never updated and also there is no lock history. Means opening the lock using the fingerprint, does lead to any update in the Home Assistant lock history. So even the TTLock Integration does not provide any real value…
I guess the lock does not provide many updates to the hub to enhance the battery lifetime. This means monitoring the lock in Home Assistant is currently very limited. Anyway, the lock is a great improvement in our daily lives, and I already wonder how I managed to live without it all these years. 🙂
Update 24.06.2026: Over the past two weeks, the fingerprint sensor suddenly stopped working properly. For some reason, it would only recognize my finger every third or fourth time. It turned out that after replacing the battery – even though the app still showed 25% – everything worked perfectly again.
So the first set of batteries lasted a little over half a year, which is pretty good, since we use our door often! And by “often” I mean about 10 to 20 times a day, and even more often in the summer, since we also use the door to go out into our garden!
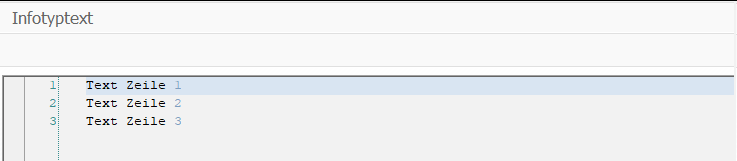
[ABAP] Terminverfolgung IT0019 – Bemerkungen / Text auslesen
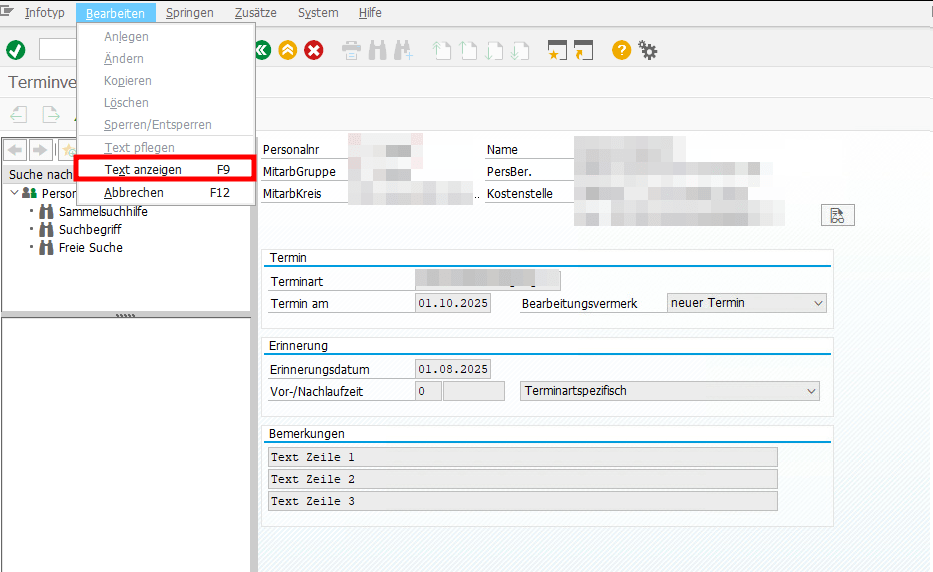
      DATA infotype_text TYPE TABLE OF hrwpc_s_infotype_text.

      CALL FUNCTION 'HRWPC_RFC_IT0XXX_TEXT_GET'
        EXPORTING
          pskey         = CORRESPONDING pskey( p0019 )
        TABLES
          infotype_text = infotype_text.

      DATA(text)  = REDUCE #( INIT str = || FOR line IN infotype_text NEXT str = str && | | && line-textline ).
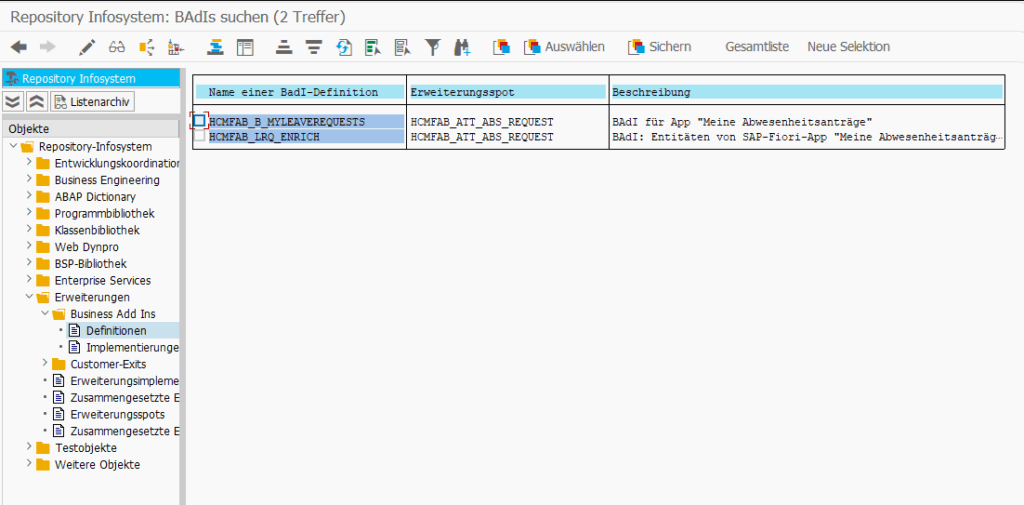
[Fiori] Abwesenheitsantrag in Inbox für nicht genehmigungspflichtige Abwesenheitsart
Kürzlich hatte ich die Situation, dass eine Führungskraft einen Abwesenheitsantrag in der Inbox hatte für eine Abwesenheitsart, die eigentlich nicht genehmigungspflichtig ist. Es hätte also gar kein Genehmigungsworkflow gestartet werden dürfen. Merkwürdigerweise war die beantragte Abwesenheit auch bereits im Infotyp verbucht. Auch konnte man den Antrag in der Inbox weder Ablehnen noch Genehmigen, beides lief auf ein Fehler.
Wie kam es also zu dieser Situation?
Der Mitarbeiter hatte einen Antrag mit einer genehmigungspflichtigen Abwesenheitsart gestellt, wie z.B. Urlaub.

Bevor der Genehmiger diesen Antrag bearbeitet hat, wurde der Antrag vom Antragsteller jedoch nochmal abgeändert. Dies ist über das Stift-Symbol möglich. Dabei wurde dann eine nicht genehmigungspflichtige Abwesenheitsart gewählt, wie z.B. Abbau Überzeit.

In diesem Fall wird der Antrag ohne Genehmigungsprozess durchlaufen und die Abwesenheit wird kurz darauf direkt in den Infotyp geschrieben durch den Verbucherreport.

Jedoch gab es ja bereits einen laufenden Workflow mit einem Workitem in der Inbox des Genehmigers und dieser wurde nicht beendet. Stattdessen wurde in dem Workitem sogar die beantragte Abwesenheitsart aktualisiert, obwohl für diese Abwesenheitsart ja gar keine Genehmigung erforderlich ist und sogar bereits in den Infotyp geschrieben war.
Auch in der Antragsdatenbank spiegelt sich das Problem wider. Der Antrag stand dort im Status ‘POSTED‘ und der Workflow-Status auf ‘STARTED‘.
Ich habe das Szenario dann mit einer Zweiten, nicht genehmigungspflichtigen Abwesenheitsart getestet, also Urlaub erfasst und vor Genehmigung die Abwesenheitsart geändert. Hier wurde jedoch der laufende Workflow korrekterweise beendet.

Als ich beide Abwesenheitsarten in der V_T554S_WEB verglichen habe, ist mir aufgefallen, dass bei der problembehafteten Abwesenheitsart ein Workflow gecustomized war, obwohl diese ja nicht genehmigungspflichtig ist. Der Workflow wurde jedoch nur verwendet, um eine Info-Mail zu versenden.

Die Workflow Checkbox ließ sich leider nicht deaktivieren (vermutlich weil es schon Anträge zu der Abwesenheitsart gibt). Aber es scheint, als führt dieses Workflowcustomizing dann zu Inkonsistenzen, wenn in einem laufenden Antrag von einer genehmigungspflichtigen Abwesenheitsart zu einer nichtgenehmigungspflichtigen gewechselt wird.
Dieser Post nur als Erinnerung, falls ich nochmal in so eine Situation laufe. Vielleicht habe ich dann die Chance, es zu verifizieren.
[ABAP] Sachbearbeiter ermitteln
Bisher kenne ich keine “offizielle” Klasse der SAP für die Sachbearbeiterermittlung. Auf jedem System dafür eine neue Helper Klasse/Methode anzulegen finde ich aber auch nervig. Ich nutze daher diese Klasse aus dem Notification Tool Paket P99_NT, nicht optimal, erfüllt aber seinen Zweck.
    cl_hrpay00_nt_read_db=>get_admin_data( EXPORTING iv_pernr = pernr-pernr
                                           IMPORTING es_sacha = DATA(es_sacha)
                                                     ev_usrid = DATA(ev_usrid)
                                                     ev_sbmod = DATA(ev_sbmod)
                                                     es_p0001 = DATA(es_p0001) ).
[ABAP] Read E-Mail-Template
Addition to https://nocin.eu/abap-e-mail-templates-in-s-4hana/
I had to create an E-Mail template where I did not need a CDS view or any variable at all. I simply needed the defined mail template without any rendering of class cl_smtg_email_api.
Solution: Reading the plain mail template can be achieved using class cl_smtg_email_template and method get_tmpl_cont:
DATA(ls_mail_content) = cl_smtg_email_template=>get( p_mailtx )->get_tmpl_cont( iv_langu = 'D' ).
Full sample:
 PARAMETERS: p_mailtx TYPE smtg_tmpl_id OBLIGATORY.

 TRY.
        " get mail template
        DATA(ls_mail_content) = cl_smtg_email_template=>get( p_mailtx )->get_tmpl_cont( iv_langu = 'D' ).

        " optional: dynamic manipulation of html email body

        " create mail document
        DATA(lo_mail_document) = cl_document_bcs=>create_document( i_type    = 'HTM'
                                                                   i_subject = conv #( ls_mail_content-subject )
                                                                   i_text    = cl_bcs_convert=>string_to_soli( ls_mail_content-body_html ) ).

        " create Sender & Receiver
        DATA(lo_sender)    = cl_cam_address_bcs=>create_internet_address( i_address_string = 'noreply@example.com'
                                                                          i_address_name   = 'Test' ).

        DATA(lo_recipient) = cl_cam_address_bcs=>create_internet_address( i_address_string = 'max.mustermann@example.com').

        " create Business Communication Service
        DATA(lo_bcs) = cl_bcs=>create_persistent( ).
        lo_bcs->set_document( lo_mail_document ).
        lo_bcs->set_sender( lo_sender ).
        lo_bcs->add_recipient( lo_recipient ).
        lo_bcs->send( ).
        COMMIT WORK.

      CATCH cx_smtg_email_common INTO DATA(ls_cx).
        DATA(lv_message) = ls_cx->get_text( ).
        MESSAGE e899(id) WITH 'Unable to send message:'(004) lv_message.
    ENDTRY.
[Home Assistant] Update firmware on Sonoff Zigbee USB Dongle-P
Recently, I saw this video showing a super easy way to update the firmware of a SONOFF Zigbee Stick: https://www.youtube.com/watch?v=-_bE_PbZwO0
Just for reference, this was the way I did it previously: https://nocin.eu/home-assistant-update-firmware-on-sonoff-zigbee-usb-dongle-p/
Following just a few notes and screenshots, doing a firmware update using the SONOFF Dongle Flasher.
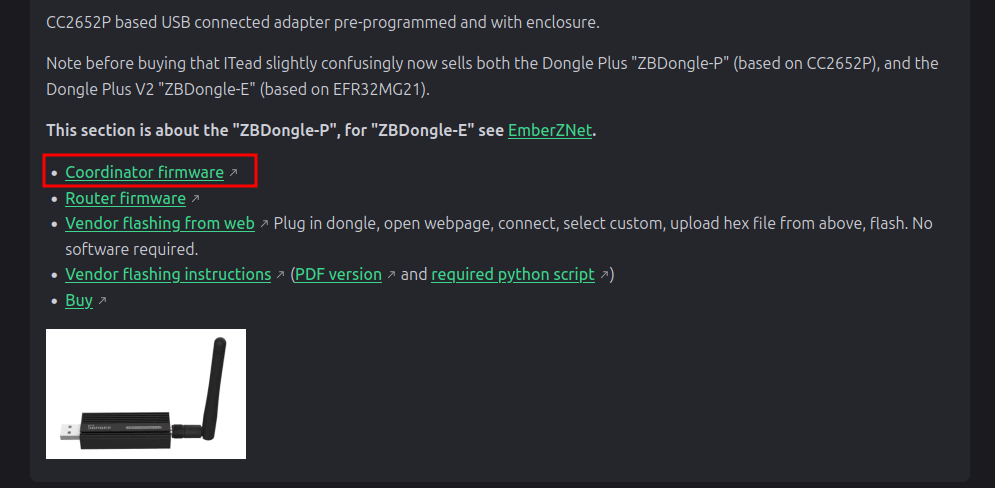
1. Optional: Check current firmware version
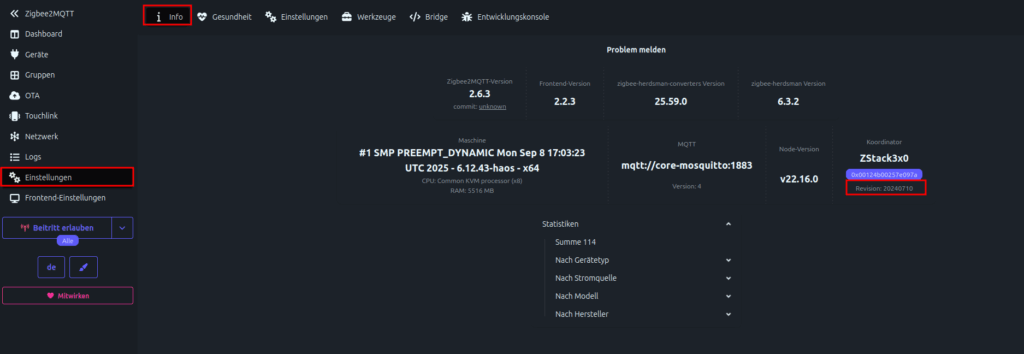
and compare with latest firmware version here
2. Do a backup
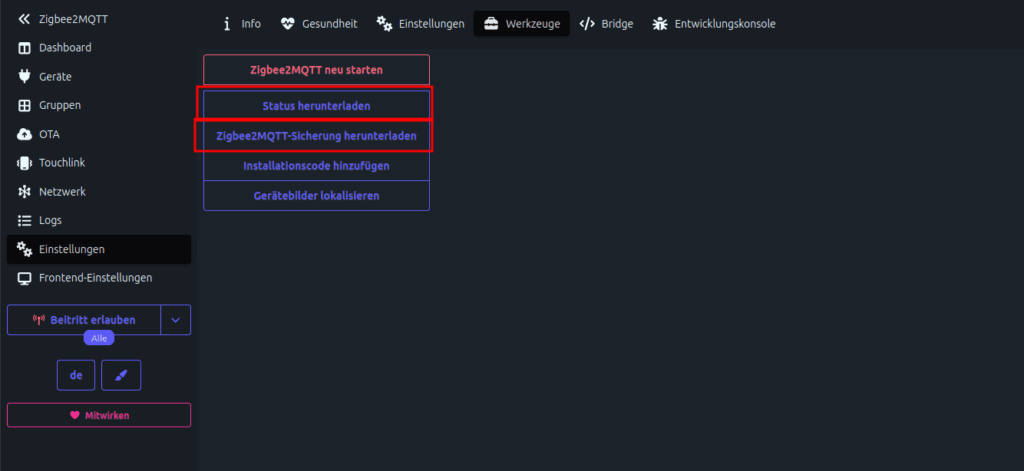
3. Stop Z2M and install the SONOFF Dongle Flasher
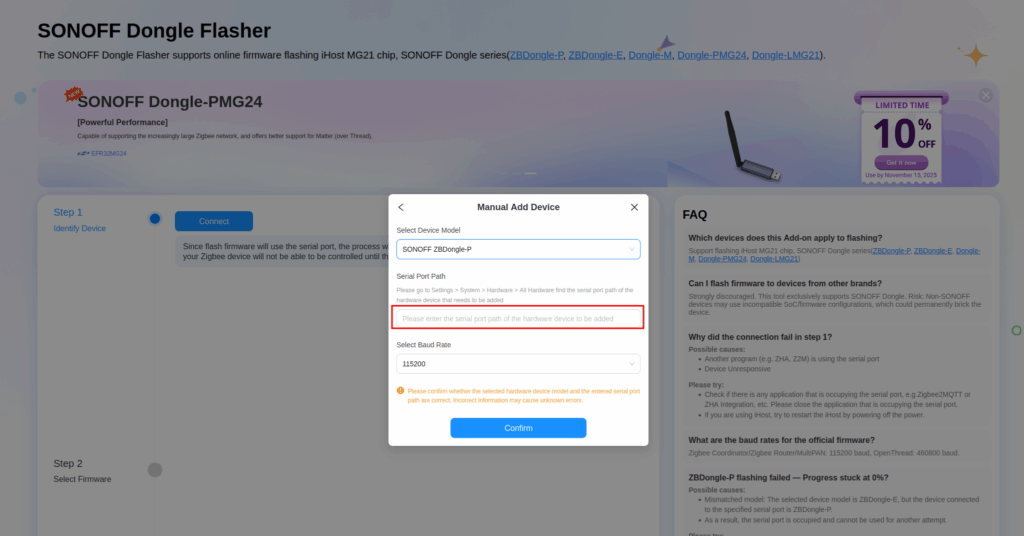
Install https://github.com/iHost-Open-Source-Project/hassio-ihost-addon
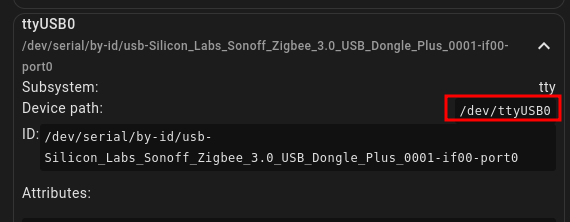
Start Add-on, open WebUI and hit the connect button. If your dongle is not found, simply manually add the device. The rest is pretty self-explanatory.
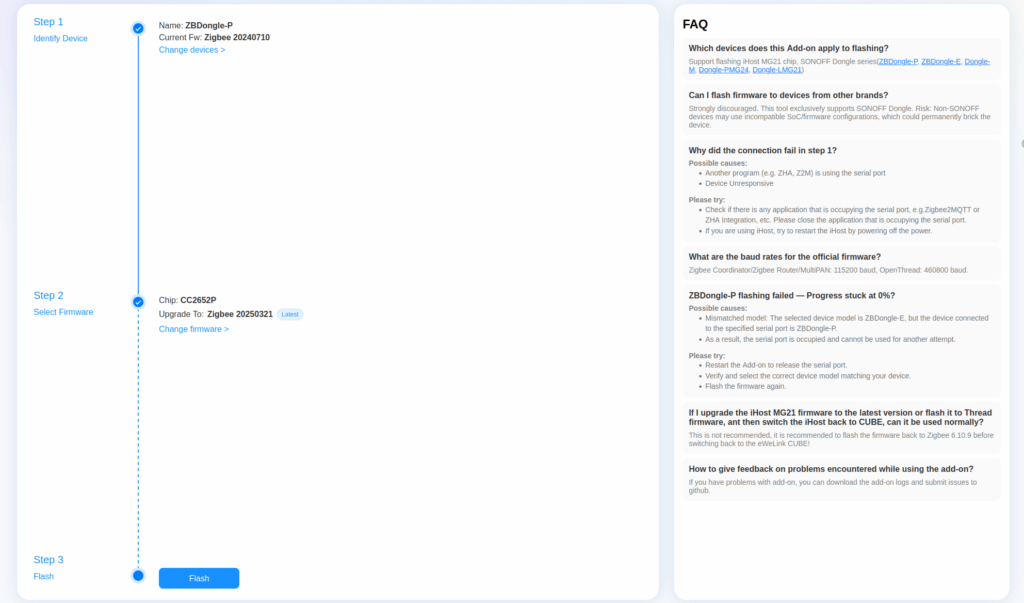
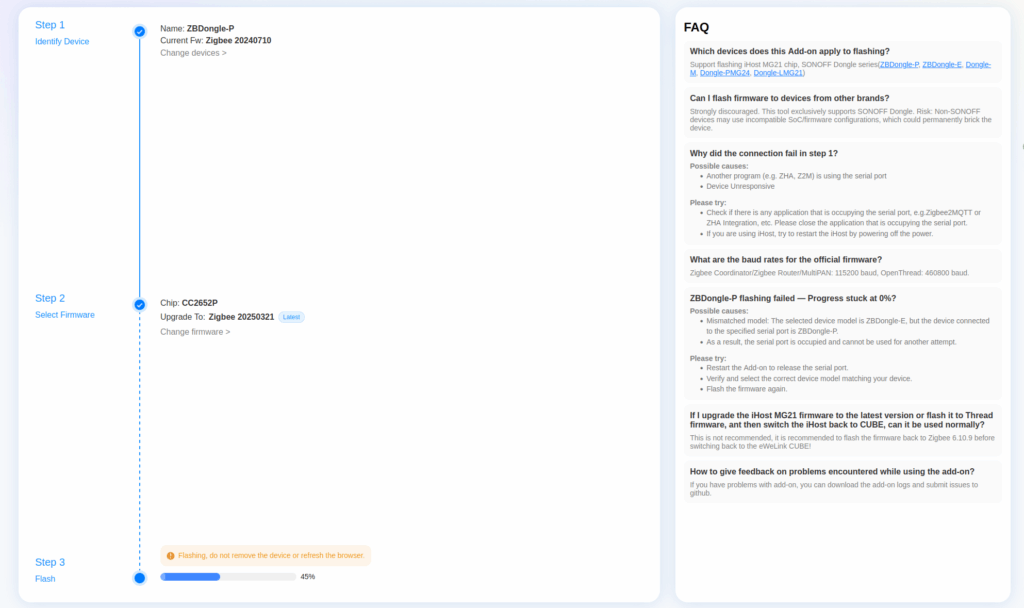
4. If flash was successful, stop SONOFF Dongle Flasher and Start Z2M again. Check new version in Z2M WebUI. And that’s it.
