
# Change into your nextcloud directory
cd /var/www/nextcloud/

# Enable Nextcloud-Maintenance mode
sudo -u www-data php occ maintenance:mode --on

# Do something...

# Disable Nextcloud-Maintenance mode
sudo -u www-data php occ maintenance:mode --off
Category: Nextcloud
[Nextcloud] Run NextCloudPi Docker with external storage
Links
NextCloudPi (Docs)
NextCloudPi on DockerHub
Current installation process (Outdated installation process, but contains some usefull information)
Installation
If you want to use the external storage app to mount an NFS share in Nextcloud, there are two ways when using Docker. Mount the NFS share directly inside the Docker container. This would be easier when the container is already up and runing. Or mount the NFS share on the Host and pass the mountpoint as an argument when creating the Docker container: -v /mnt/nfs/:/mnt/nfs/
DOMAIN=your.domain.com
docker run -ti -d -p 4443:4443 -p 443:443 -p 80:80 -v ncdata:/data -v /mnt/nfs/:/mnt/nfs/ --name nextcloudpi ownyourbits/nextcloudpi $DOMAIN --restart=unless-stopped
Now wait until you see ‘Init done’ in the logs.
docker logs -f nextcloudpi
ncdata
If you ever need direct access to your storage, you can find out where your files are located with:
docker inspect nextcloudpi
Scroll up to “Mounts” and look for the path behind “Source”.
"Source": "/var/lib/docker/volumes/ncdata/_data"
Now you still have to navigate through a few folders. I finally found my files here:
ls /var/lib/docker/volumes/ncdata/_data/nextcloud/data/ncp/files/
Update to latest NCP version
docker exec -it nextcloudpi ncp-update
[Nextcloud] Installing Collaboraoffice in LXC
Both, Nextcloud and Collabora, are recommending the Docker installation for Collaboraoffice (here and here). But I wasn’t able to get the Collabora Docker Image running succesfully inside an Debian Buster LXC. There were appearing some errors and as far as I understand, it has something to do with running an LXC on ZFS. After spending about 3 hours I gave up and did a manual installation.
Installation
For a current installation guide, have look on their website here.
Install https support for apt and add Collabora CODE repository. (CODE = Collabora Online Development Edition)
sudo apt install apt-transport-https ca-certificates
sudo apt-key adv --keyserver keyserver.ubuntu.com --recv-keys 0C54D189F4BA284D
Add the Collabora CODE repository to the apt sources list.
nano /etc/apt/sources.list.d/collabora.list
Add the following line for Debian Buster:
deb https://www.collaboraoffice.com/repos/CollaboraOnline/CODE-debian10 ./
Now update the repository and install Collabora. (lool = LibreOffice OnLine)
sudo apt update
sudo apt install loolwsd code-brand
Configuration
You have to edit three sections in the config: SSL handling, inserting your Nextcloud domain as WOPI client and add some credentials for webinterface. So open the config with:
nano /etc/loolwsd/loolwsd.xml
- If you are using a reverse proxy (I have running a docker with nginx) which is managing all SSL certifactes, you don’t need local certifactes for your Collaboraoffice. So scroll down to the SSL settings, disable SSL and enable SSL termination.
   <ssl desc="SSL settings">
        <enable type="bool" desc="Controls whether SSL encryption is enable (do not disable for production deployment). If default is false, must first be compiled with SSL support to enable." default="true">false</enable>
        <termination desc="Connection via proxy where loolwsd acts as working via https, but actually uses https." type="bool" default="true">true</termination>
- 2. Next add you Nextcloud domain in the WOPI storage section.
    <storage desc="Backend storage">
        <filesystem allow="false" />
        <wopi desc="Allow/deny wopi storage. Mutually exclusive with webdav." allow="true">
            <host desc="Regex pattern of hostname to allow or deny." allow="true">localhost</host>
            <host desc="Regex pattern of hostname to allow or deny." allow="true">nextcloud\.domain\.org</host>
- 3. Add your credentials fot the webinterface.
  <admin_console desc="Web admin console settings.">
        <enable desc="Enable the admin console functionality" type="bool" default="true">true</enable>
        <enable_pam desc="Enable admin user authentication with PAM" type="bool" default="false">false</enable_pam>
        <username desc="The username of the admin console. Ignored if PAM is enabled.">user_name</username>
        <password desc="The password of the admin console. Deprecated on most platforms. Instead, use PAM or loolconfig to set up a secure password.">super_secret_password</password>
Now restart loolwsd and check the status.
systemctl restart loolwsd.service
systemctl status loolwsd.service
Check if the https connection is working via browser https://ipaddress:9980 or curl:
curl -vkI https://localhost:9980
You can reach the webinterface with:
https://ipaddress:9980/loleaflet/dist/admin/admin.html
Reverse Proxy
Go to your reverse proxy, in my case it’s nginx proxy manager, and add another subdomain for collabora with an SSL certificate.
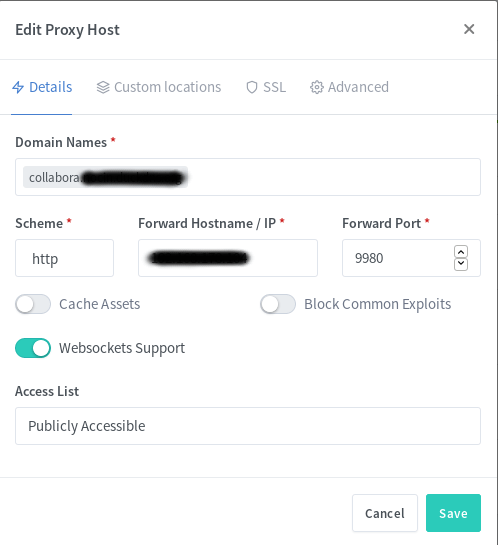
You also have to add a few custom locations. Look at the Collabora website for the some nginx configs. I used the second with “SSL terminates at the proxy”. I also added the given custom locations via the webui, e.g.:
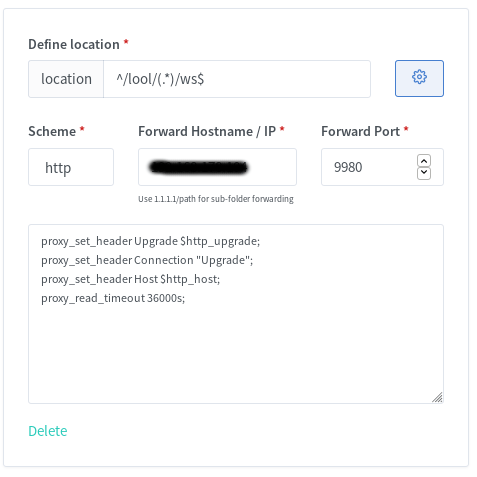
You should now be able to reach Collabora through your new subdomain via https.
https://collabora.your.domain.org/
And if you added /lool/adminws in your nginx config, you can also access the webui.
https://collabora.your.domain.org/loleaflet/dist/admin/admin.html
Install & configure Collabora Online App in Nextcloud
The easiest part is to install the Collabora Online App.
If done, go to Settings -> Collabora Online and set your Collabora Domain https://collabora.your.domain.org/ in here. Apply and edit your first excel in Nextcloud.
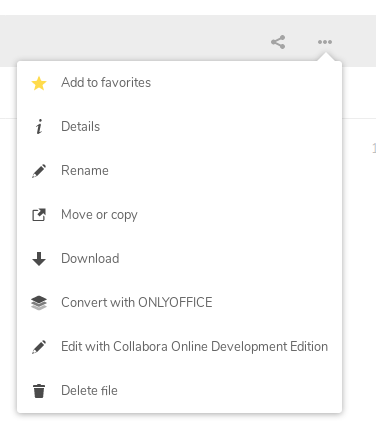
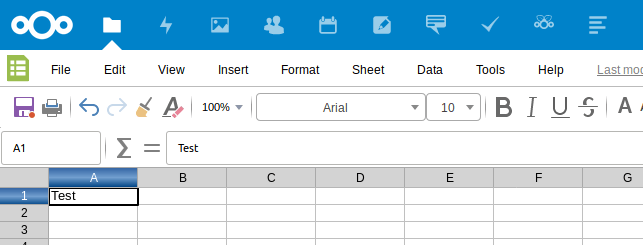
Done! 🙂
[Nextcloud] Restrict access to your ONLYOFFICE Document Service to the users of your Nextcloud instance
Enable JWT token
Add a Token in you local.json file. If your running ONLYOFFICE on linux you will find the file here:
/etc/onlyoffice/documentserver/local.json
Set inbox, outbox and browser to true and add you token in the secret part for inbox, outbox and session. I just generated a random string via Bitwarden.
   "token": {
        "enable": {
          "request": {
            "inbox": true,
            "outbox": true
          },
          "browser": true
        },
        "inbox": {
          "header": "Authorization"
        },
        "outbox": {
          "header": "Authorization"
        }
      },
      "secret": {
        "inbox": {
          "string": "token_string"
        },
        "outbox": {
          "string": "token_string"
        },
        "session": {
          "string": "token_string"
        }
Save the file and run:
supervisorctl restart all
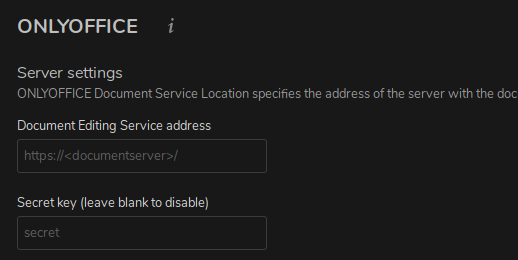
Go to your Nextcloud web interface, open your ONLYOFFICE App and add your token beneath your server url.
Configure IP Filter
Search in the following file for “ipfilter”:
/etc/onlyoffice/documentserver/default.json
Add you domain or IP to the IP rules. Disallow everything else. Use * as wildcard. Also set useforrequest to true.
"ipfilter": {
              "rules": [{"address": "url_or_ip", "allowed": true},
                        {"address": "*",         "allowed": false}],
              "useforrequest": true,
              "errorcode": 403
            },
Now run again:
supervisorctl restart all
And test if the service is reachable.