Homelab, Linux, JS & ABAP (~˘▾˘)~
 

[ABAP] Get the last day of the previous month

I recently had to find the last day of the previous month. I found the Method get_last_day_prev_month of class cl_bs_period_toolset_basics doing the job. The actual logic is super simple:

  rv_date      = iv_date.
  rv_date+6(2) = '01'.
  rv_date      = rv_date - 1.

That’s why I thought about whether I needed a separate method at all, or whether I could do it directly in a one-liner. My first idea was to use the LET operator in combination with CONV (Option 2). This works, but does not look very intuitive, and I noticed it can be done even simpler without using LET (Option 3). And if you already have a typed variable, you can do it even shorter with a single CONV (Option 4).

* Option 1
DATA(date_1) = cl_bs_period_toolset_basics=>get_last_day_prev_month( sy-datum ).

*Option 2
DATA(date_2) = CONV d( LET x = CONV d( sy-datum(6) && '01' ) IN x - 1 ).

*Option 3
DATA(date_3) = CONV d( CONV d( sy-datum(6) && '01' ) - 1 ).

* Option 4
DATA date_4 TYPE datum.
date_4 = CONV d( sy-datum(6) && '01' ) - 1.

cl_demo_output=>write_data( date_1 ).
cl_demo_output=>write_data( date_2 ).
cl_demo_output=>write_data( date_3 ).
cl_demo_output=>write_data( date_4 ).
cl_demo_output=>display( ).

All in all, I have to say that using the get_last_day_prev_month method is still the best solution as it is much more readable.

[Homelab] Notes on “How To Run A Server At Home Without An IPv4 Address”

Since my domain provider does not support DynDNS, I can only create subdomains for my VPS with a static IP address, but not for any of my services hosted at home. Fortunately, there is a really cool workaround I’ve been using for some years, which I got from here: https://blog.wirelessmoves.com/2019/06/how-to-run-a-server-at-home-without-an-ipv4-address.html

Now with the migration to a new server running Ubuntu 24.04, I had to redo the steps and noticed three minor differences.

# The .ssh folder and authorized_keys file did not exist per default
mkdir .ssh
sudo nano .ssh/authorized_keys

# The systemd command to restart the ssh service
sudo systemctl restart ssh.service

# Insted of netstat I had to use 'ss' to monitor the tcp ports
watch -n 0.5 "ss -tulpn"

Since I’m really not a Linux or command line expert and would surely forget about it otherwise, I’m writing it down for my next server migration 🙂

[NAS] IPMI Docker

In my TrueNAS Server I use an ASRock Rack C2550D4I motherboard, which is quite old. It has a Java IPMI Interface, which was/is really handy. The problem is that it requires an old version of Java, and I haven’t had a computer in the household with Java installed at all for a few years, let alone a version that old. But luckily I recently stumbled across this docker project: https://github.com/solarkennedy/ipmi-kvm-docker

The setup is super easy and with the help of this cool project, I can finally use the IPMI functionality of my NAS again.

version: '3.9'
services:
    ipmi-kvm-docker:
        image: solarkennedy/ipmi-kvm-docker
        environment:
            - RES=1600x900x24
        ports:
            - '8080:8080'

[Home Assistant] Person card with step counter

I recently enhanced the person cards on my dashboard to display some mobile phone sensor data (check here). In addition, I now also added the daily steps by using the Steps sensor of my mobile phone in combination with a utility helper sensor, which counts the daily steps, as the mobile Steps sensor is an increasing counter without daily reset. This is how it looks now:

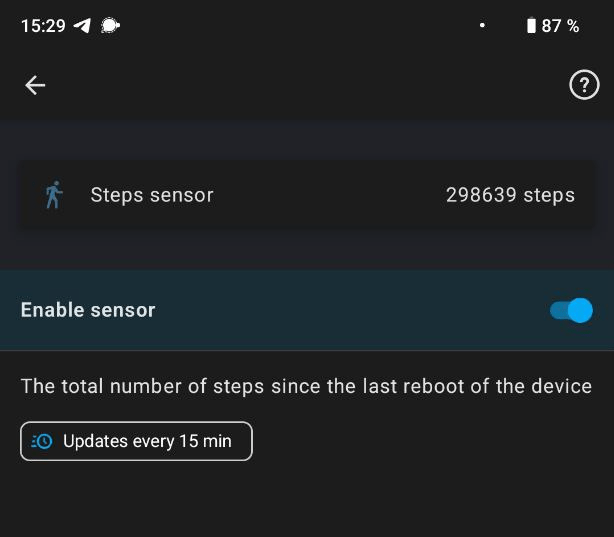
To include the daily steps, you first have to enable the Steps sensor in the Home Assistant Companion App on your mobile phone.

Next, create a utility sensor which uses the Steps sensor as Input and daily resets the counted steps.

The utility sensor history should look like this after a few days:

Now we can add the utility sensor to the dashboard. As I’m using the vertical-stack-in-card, I simply had to add a new horizontal-stack to the person card to get a new line, and include a mushroom-chips-card which displays the steps.

  - type: horizontal-stack
    cards:
      - type: custom:mushroom-chips-card
        alignment: center
        card_mod:
          style: |
            ha-card {
                --chip-font-size: 0.32em;
                --chip-icon-size: 0.5em;
                --chip-border-width: 0;
                --chip-box-shadow: none;
                --chip-background: none;
                --chip-border: none;
                --chip-spacing: none;
                --chip-font-weight: bold;
            }
        chips:
          - type: template
            entity: sensor.daily_steps_mi8
            content: "{{ states('sensor.daily_steps_mi8')}} steps today"
            tap_action:
              action: more-info

I noticed, that the Steps sensor sometimes does not count steps, and it helps to have some separate steps counter app running on the phone like Paseo.

[HR] OM – Besetzungsplan (Struktur)

Da ich nur selten mit dem OM arbeite, vergessen ich immer wieder, wie man das OM “umdreht”, wenn man eine Person ausgewählt hat. Also die Anzeige von P – S – O umkehrt auf O – S – P.
Dabei ist es total einfach! Die Org. Einheit markieren und links oben in der Toolbar auf den Dropdown Button (Springen) gehen und Besetzungsplan (Struktur) auswählen und man erhält die gewünschte Ansicht.

[Android] Upgrading LineageOS 20.0 to 21.0 on my Xiaomi Mi 8 (dipper)

Install the Android Debug Bridge (ADB)

https://wiki.lineageos.org/adb_fastboot_guide.html
https://github.com/M0Rf30/android-udev-rules#installation

# check if device is found
adb devices
# reboot into sideload modus
adb reboot sideload

Or manually boot into recovery, holding Volume Up + Power when the phone is off. Navigate to AdvancedADB Sideload.


Update MIUI Firmware

Following the docs, I first had to check the Firmware version. V12.0.3.0.QEAMIXM was required, and I already had it installed.
If you’re on an older version, download the right MIUI Firmware for your device from https://xiaomifirmwareupdater.com/firmware/dipper/.
Flash the new Firmware via TWRP or via ADB sideload.

adb sideload fw_dipper_miui_MI8Global_V12.0.3.0.QEAMIXM_7619340f8c_10.0.zip

Flash latest recovery

Since I follow the LineageOS subreddit, I have already seen posts with problems with the latest update. Check here: https://www.reddit.com/r/LineageOS/comments/1fxlmtq/regular_ota_update_20241005_on_xiaomi_mi8_dipper/
There it is recommended to flash the latest recovery to prevent any issues. Although this is step 1 in the upgrade guide, I skipped updating the recovery the last years, because I was using TWRP instead of the LineageOS recovery. But to be on the safe side, this time I flashed the LineageOS recovery (which meant loosing/removing TWRP). To flash the recovery, you must first boot into fastboot by using adb or Volume Down + Power when the phone is off, like it is described here.

# boot into fastboot
adb -d reboot bootloader
# flash recovery
fastboot flash recovery lineage-21.0-20241208-microG-dipper-recovery.img

Download and flash new LineageOS image

I’m using the LineageOS fork LineageOS for microG. Download it from here: https://download.lineage.microg.org/dipper/ (MI 8 = dipper)
The upgrade steps are the same as for the official rom: https://wiki.lineageos.org/devices/dipper/upgrade. As I’ve already flashed the latest recovery, I only had to flash the new LineageOS image.

# reboot again into recovery
adb reboot sideload
# flash again new image
adb sideload lineage-21.0-20241208-microG-dipper.zip