Homelab, Linux, JS & ABAP (~˘▾˘)~
 

Blog umgezogen -> Docker

Heute habe ich den Blog von einem DigitalOcean Droplet auf einen V-Root Server bei Strato umgezogen. Da der V-Root etwas mehr Power hat, werde ich einige Dienste, die ich bereits privat auf meinen Proxmox Servern hoste, auch auf den Strato Server umziehen. Bisher habe ich meine Anwendungen überwiegend in LXC’s (Linux Containern) oder auch VM’s installiert. In Kombination mit ZFS als Dateisystem (mit der großartigen Snapshot Fähigkeit) bin ich damit die letzten 4 Jahre ohne Probleme gefahren. Bei einem V-Root ist diese Möglichkeit nun nicht mehr gegeben. Daher habe ich die Chance genutzt, tiefer in das Thema Docker einzusteigen. Bisher habe ich nur vereinzelt Docker Container genutzt und die wenigen jeweils auch nochmal in einem LXC (vereinfachte mir das Snapshot handling). Nun also mal der Versuch, komplett auf Docker umzusteigen.

Der WordPress Blog ist als erstes in einen Docker Container umgezogen. Danach habe ich noch Nextcloud (plus OnlyOffice & Collabora) und Bitwarden aufgesetzt. Hier werde ich jedoch noch ein paar Tage testen, bevor ich mit all meinen Daten rüber migriere. Da man immer wieder von Traefik als Reverse Proxy in Kombination mit Docker liest, habe ich diesen probiert, jedoch nach mehreren Stunden etwas gefrustet wieder sein lassen. Auch wenn die ersten Services ganz gut damit liefen, scheint mir der Aufwand erheblich höher und die benötigten Labels für jeden Container nicht grade intuitiv. Da in den meisten Dokus Beispiele für Nginx zu finden sind, bin ich zurück zu dem Nginx Proxy Manager, welchen ich bereits seit Jahren erfolgreich zuhause im Einsatz habe. Auch wenn das bedeutet, dass ein Docker Container nun nicht “automatisch” via Traefik (durch 10-20 vorher zusammen gesuchte Labels je Service….) nach außen bereitgestellt wird, sondern nur nach “einigen wenigen” Klicks im Nginx Proxy Manager…. Nach meinem Gefühl, gibt sich das irgendwie nicht viel.

Einige weitere Dienste stehen noch auf der Liste und auch ein paar neue Sachen möchte ich mit aufnehmen. Bereits installiert sind:

  • WordPress
  • Nginx Proxy Manager
  • Nextcloud
  • OnlyOffice
  • Collabora
  • Bitwarden
  • MyPhpAdmin

Es folgen noch:

  • Portainer
  • Wallabag
  • Gitlab
  • Jitsi
  • Teamspeak
  • PiHole
  • Wireguard
  • OpenLDAP

Und je länger man nachdenkt, desto mehr fällt einem sicherlich noch ein. 🙂
Die Docker-Compose Dateien werde ich dann final auch hier Veröffentlichen mit allen zugehörigen Links, die mir bei der ein oder anderen Schwierigkeit geholfen haben.

[Nextcloud] Installing Collaboraoffice in LXC

Both, Nextcloud and Collabora, are recommending the Docker installation for Collaboraoffice (here and here). But I wasn’t able to get the Collabora Docker Image running succesfully inside an Debian Buster LXC. There were appearing some errors and as far as I understand, it has something to do with running an LXC on ZFS. After spending about 3 hours I gave up and did a manual installation.

Installation

For a current installation guide, have look on their website here.
Install https support for apt and add Collabora CODE repository. (CODE = Collabora Online Development Edition)

sudo apt install apt-transport-https ca-certificates
sudo apt-key adv --keyserver keyserver.ubuntu.com --recv-keys 0C54D189F4BA284D

Add the Collabora CODE repository to the apt sources list.

nano /etc/apt/sources.list.d/collabora.list

Add the following line for Debian Buster:

deb https://www.collaboraoffice.com/repos/CollaboraOnline/CODE-debian10 ./

Now update the repository and install Collabora. (lool = LibreOffice OnLine)

sudo apt update
sudo apt install loolwsd code-brand

Configuration

You have to edit three sections in the config: SSL handling, inserting your Nextcloud domain as WOPI client and add some credentials for webinterface. So open the config with:

nano /etc/loolwsd/loolwsd.xml
  1. If you are using a reverse proxy (I have running a docker with nginx) which is managing all SSL certifactes, you don’t need local certifactes for your Collaboraoffice. So scroll down to the SSL settings, disable SSL and enable SSL termination.
   <ssl desc="SSL settings">
        <enable type="bool" desc="Controls whether SSL encryption is enable (do not disable for production deployment). If default is false, must first be compiled with SSL support to enable." default="true">false</enable>
        <termination desc="Connection via proxy where loolwsd acts as working via https, but actually uses https." type="bool" default="true">true</termination>
  • 2. Next add you Nextcloud domain in the WOPI storage section.
    <storage desc="Backend storage">
        <filesystem allow="false" />
        <wopi desc="Allow/deny wopi storage. Mutually exclusive with webdav." allow="true">
            <host desc="Regex pattern of hostname to allow or deny." allow="true">localhost</host>
            <host desc="Regex pattern of hostname to allow or deny." allow="true">nextcloud\.domain\.org</host>
  • 3. Add your credentials fot the webinterface.
  <admin_console desc="Web admin console settings.">
        <enable desc="Enable the admin console functionality" type="bool" default="true">true</enable>
        <enable_pam desc="Enable admin user authentication with PAM" type="bool" default="false">false</enable_pam>
        <username desc="The username of the admin console. Ignored if PAM is enabled.">user_name</username>
        <password desc="The password of the admin console. Deprecated on most platforms. Instead, use PAM or loolconfig to set up a secure password.">super_secret_password</password>

Now restart loolwsd and check the status.

systemctl restart loolwsd.service
systemctl status loolwsd.service

Check if the https connection is working via browser https://ipaddress:9980 or curl:

curl -vkI https://localhost:9980

You can reach the webinterface with:

https://ipaddress:9980/loleaflet/dist/admin/admin.html

Reverse Proxy

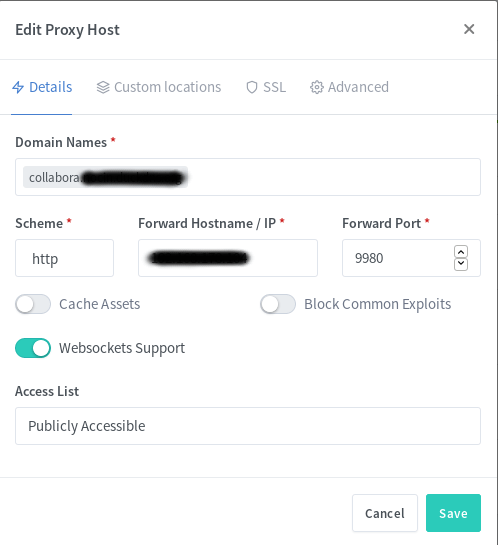
Go to your reverse proxy, in my case it’s nginx proxy manager, and add another subdomain for collabora with an SSL certificate.

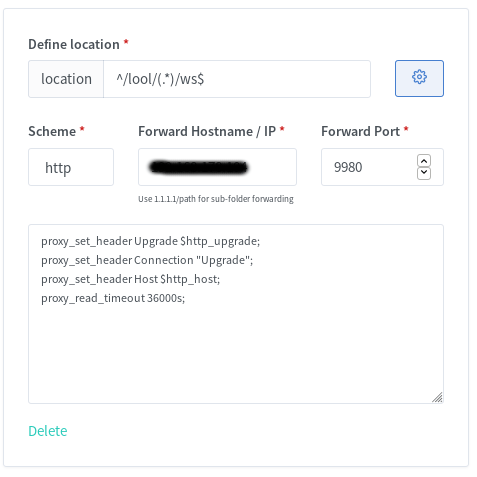
You also have to add a few custom locations. Look at the Collabora website for the some nginx configs. I used the second with “SSL terminates at the proxy”. I also added the given custom locations via the webui, e.g.:

You should now be able to reach Collabora through your new subdomain via https.
https://collabora.your.domain.org/
And if you added /lool/adminws in your nginx config, you can also access the webui.
https://collabora.your.domain.org/loleaflet/dist/admin/admin.html

Install & configure Collabora Online App in Nextcloud

The easiest part is to install the Collabora Online App.
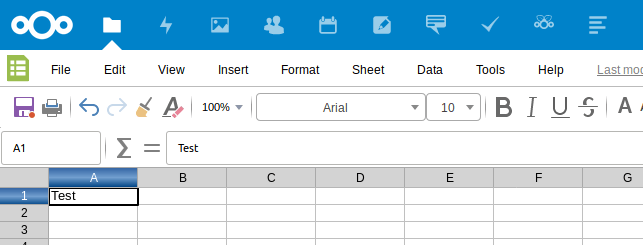
If done, go to Settings -> Collabora Online and set your Collabora Domain https://collabora.your.domain.org/ in here. Apply and edit your first excel in Nextcloud.

Done! 🙂