" Option 1
TRY.
    cl_hrpa_masterdata_factory=>get_read_molga( IMPORTING read_molga = DATA(lr_molga) ).
    DATA(molga) = lr_molga->read_molga_by_pernr( pernr ).
  CATCH cx_hrpa_violated_assertion.
ENDTRY.

" Option 2
TRY.
    DATA(employee_api) = cl_hcmfab_employee_api=>get_instance( ).
    DATA(molga)        = employee_api->get_molga( pernr ).
  CATCH cx_hcmfab_common.
ENDTRY.
Tag: HR
[ABAP] Selektionsparameter mit Suchhilfe für Personalnummern
Da ich es immer wieder nachschauen muss, schreibe ich es hier mal auf.
PARAMETERS p_pernr TYPE pernr_d OBLIGATORY MATCHCODE OBJECT prem.
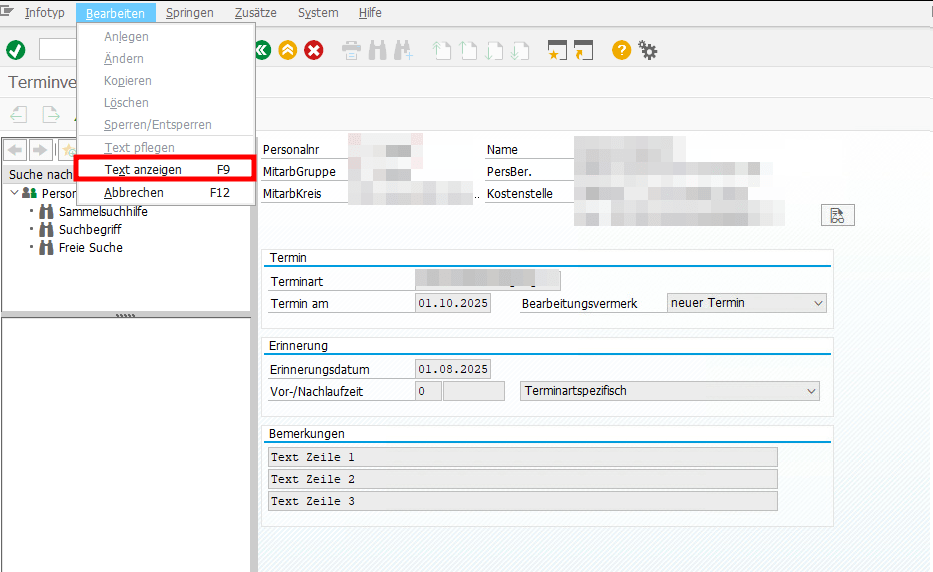
[ABAP] Terminverfolgung IT0019 – Bemerkungen / Text auslesen


      DATA infotype_text TYPE TABLE OF hrwpc_s_infotype_text.

      CALL FUNCTION 'HRWPC_RFC_IT0XXX_TEXT_GET'
        EXPORTING
          pskey         = CORRESPONDING pskey( p0019 )
        TABLES
          infotype_text = infotype_text.

      DATA(text)  = REDUCE #( INIT str = || FOR line IN infotype_text NEXT str = str && | | && line-textline ).
[ABAP] Sachbearbeiter ermitteln
Bisher kenne ich keine “offizielle” Klasse der SAP für die Sachbearbeiterermittlung. Auf jedem System dafür eine neue Helper Klasse/Methode anzulegen finde ich aber auch nervig. Ich nutze daher diese Klasse aus dem Notification Tool Paket P99_NT, nicht optimal, erfüllt aber seinen Zweck.
    cl_hrpay00_nt_read_db=>get_admin_data( EXPORTING iv_pernr = pernr-pernr
                                           IMPORTING es_sacha = DATA(es_sacha)
                                                     ev_usrid = DATA(ev_usrid)
                                                     ev_sbmod = DATA(ev_sbmod)
                                                     es_p0001 = DATA(es_p0001) ).
[HR] Infotype 0105 Customizing – Table T591C
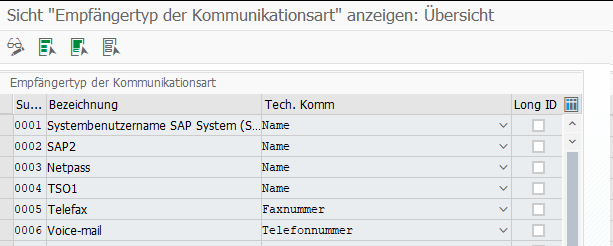
You can use SM30 and View V_T591C to configure whether USRID or USRID_LONG should be used for a subtype of infotype 0105.

[Fiori] MyInbox – Leave Request Approval: Genehmigung erfolgreich, aber mit Fehler für Workflow 21500001
Beim Einrichten der 1-Stufigen Genehmigung von Urlaub mit dem Standard Workflow 21500001 bin ich in folgenden Fehler gelaufen in der Inbox nach Drücken des Genehmigungsbuttons.

Merkwürdigerweise wurde der Urlaubsantrag erfolgreich genehmigt und trotzdem gab es eine Fehlermeldung. Nach kurzem debuggen war auch klar warum. Der Antrag wurde erst erfolgreich genehmigt und dann wurde das gleiche Coding nochmal durchlaufen und führte zu einer Kollisionsmeldung.

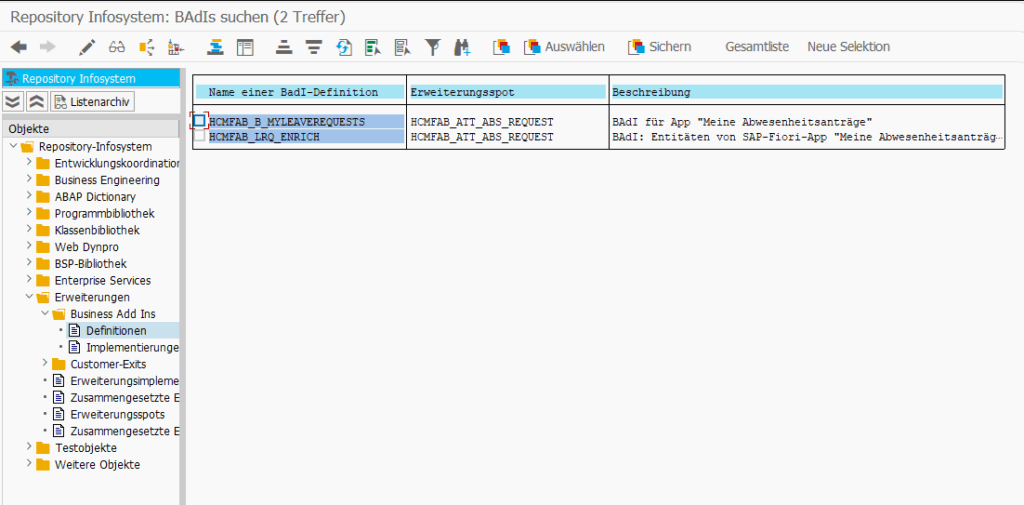
Daraufhin habe ich mir den BAdI /IWWRK/BADI_WF_BEFORE_UPD_IB angeschaut. Dort konnte ich zwei Implementierungen zum Thema Leave Approval finden und in beiden war der Workflow 21500001 als Filterkriterium eingetragen. Das erklärte, warum die Genehmigungslogik zweimal durchlaufen wurde.

Daraufhin habe ich nach einem Hinweis gesucht und folgenden gefunden: 2658528. Der beschreibt zwar eine andere Fehlermeldung, aber die Lösung war genau die Aussage, die ich gesucht habe.

Die Implementierung HRMSS_LEAVE_APPROVAL musste also deaktiviert werden. Ich habe das über die SE19 gemacht, auch wenn das bedeutete, dass ich nun als letzter Änderer eines SAP-Objekts drin stehe. Anscheinend geht es auch über den Funktionsbaustein ENH_BADI_IMG_ACTIVITY_TOGGLE wie hier beschrieben.
[ABAP] Ermittle Sachkonto zu symbolischen Konto aus FI System
DATA(service_manager) = NEW cl_hrpp_ws_service_manager( ).

SELECT * INTO TABLE @DATA(lt_t52el) FROM t52el  WHERE molga = '01' AND symko <> @space AND endda >= @pn-begps. " Verknüpfung Lohnart zu symbolischen Konto
SELECT * INTO TABLE @DATA(lt_t52ek) FROM t52ek.                                                                " Symbolische Konten
SELECT * INTO TABLE @DATA(lt_t52ep) FROM t52ep.                                                                " Kontierungsarten

 LOOP AT lt_t52el INTO DATA(ls_t52el). " Ermittle je Lohnart die symbolischen Konten (1:n)

      TRY.
          DATA(ls_t52ek) = lt_t52ek[ symko = ls_t52el-symko ].   " Ermittele Kontierungsart
          DATA(ls_t52ep) = lt_t52ep[ koart = ls_t52ek-koart ].   " Ermittele Typ des symbolischen Kontos
          DATA(process)  = CONV ktosl( 'HR' && ls_t52ep-kttyp ).
        CATCH cx_sy_itab_line_not_found.
          CONTINUE.
      ENDTRY.

      service_manager->hrpp_fi_acct_det_hr( EXPORTING companycode        = pernr-bukrs
                                                      process            = process              " Vorgangsschlüssel
                                                      symb_acct          = ls_t52el-symko
                                                      eg_acct_det        = CONV #( '1' )        " Überleitung FI/CO: Mitarbeitergruppierung Kontenfindung: alle Mitarbeiter
                                            IMPORTING gl_account_debit   = DATA(account_debit)
                                                      gl_account_credit  = DATA(account_credit)
                                                      return_tab         = DATA(return_tab) ).
      IF line_exists( return_tab[ type = 'E' ] ).
        CONTINUE.
      ENDIF.

      " Lese Sachkonto Text
      service_manager->hrpp_gl_acc_getdetail( EXPORTING companycode    = pernr-bukrs
                                                        glacct         = account_debit
                                                        language       = sy-langu
                                                        text_only      = abap_true
                                              IMPORTING account_detail = DATA(account_detail) ).

 ENDLOOP.
[ABAP] Enqueue and dequeue pernr
TRY.

    DATA(messsage_handler) = NEW cl_hrpa_message_list( ).

    cl_hrpa_masterdata_enq_deq=>enqueue_by_pernr( tclas           = cl_hrpa_tclas=>tclas_employee
                                                  pernr           = 1
                                                  message_handler = messsage_handler ).

    cl_hrpa_masterdata_enq_deq=>dequeue_by_pernr( tclas           = cl_hrpa_tclas=>tclas_employee
                                                  pernr           = 1 ).

  CATCH cx_hrpa_violated_assertion.
ENDTRY.


